

Blender quick tip: Extending polygon edges just like AutoCAD
As part of the work of an architectural visualization artist using Blender, we sometimes must create architectural models with the modeling tools provided by Blender. And for this type of 3d modeling, we must rely on precision modeling tools to create the correct geometry with the right scale and measurements. Some people still think that Blender lacks some of those precision modeling tools, but they always seemed surprised, when I show some of the Blender options for precision modeling.
For instance, do you know that we can use the snap tool of Blender to extend polygon edges, just like we would do on CAD tools such as AutoCAD? No? I was afraid you would say that! Let me show you how to do it!
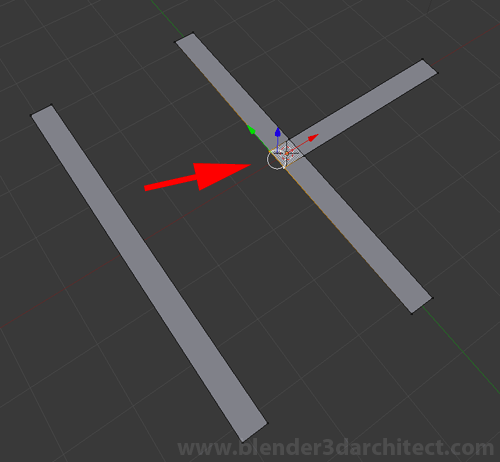
The image below shows an example of a common problem for architectural modeling. We have two edges that could be extended until that other by perpendicular edge representing a wall.

To get started, we will select only the two vertices pointed at the image below. You can also select only the edge connecting those two vertices.
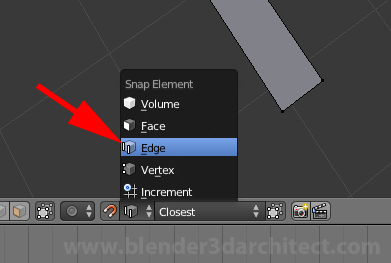
And now the important part, we must turn on the snap tool and choose edge as the snap element. Leave the snap target on Closest.
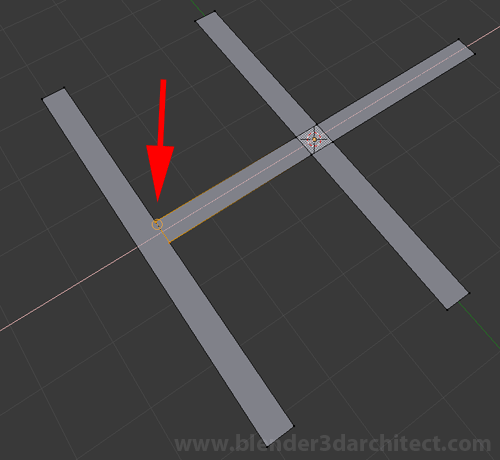
With the snap turned on, just press E to extrude those vertices, and restrain the extrude to the axis perpendicular to the edge that you want to use as limit to the extend. In my case it is the X axis, so I press the x key right after the extrude. If you place your mouse cursor near of the edge point at the image below, the result will be something really similar to the extend of AutoCAD.
But, what if we don’t have exactly two perpendicular edges? In this scenario the snap tool will also works, but the trick is to use two different objects. Because, we will have to restrain the extrude on the local axis of the edge. For that, just press the key corresponding to the axis twice, like the image below shows. To separate an object, you can use the P key on Edit mode and to join to different objects, just use the CTRL+J with the objects selected.

And that is it! I hope this quick tip helps artists trying to create 3d models for architecture with Blender.


The little snap circle is still sliding around the edge.. How to make it snap to intersection like on 2. example?
This is about to get a lot easier with the (hopefully) upcoming Google summer of code project precision modeling tools
Blender Artists Thread at:
http://blenderartists.org/forum/showthread.php?255662-GSOC-2012-Precision-Modelling-Tools