

Top floor: From Blender to Unreal Engine 4 – Part II (Profile)
The project profile series of Blender 3D Architect is a collection of articles with the aim of feature projects related to architectural visualization. We invite talented artists to share additional details about each project to demonstrate how they approach each stage of the process. And also allow each author to publicize their work among our readers.
How does it work? It is like an interview, where we sent a couple of questions about a project for the artist.
If you want to check previous project profiles, visit this link.
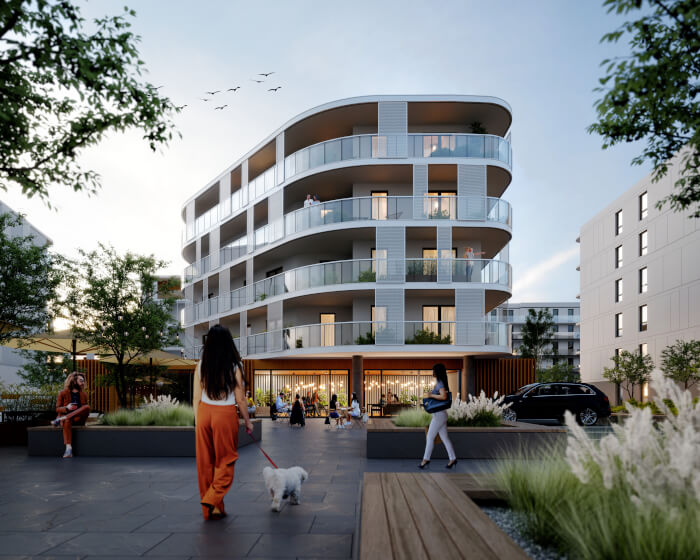
Today we have an apartment interior from digital artist Wessel Huizenga, which uses Unreal Engine 4 as the primary render engine for models created with Blender. This is part II of that project profile, which covers most aspects of the lighting process for architecture in the Unreal Engine.
(Click to enlarge)
You can also read Top floor: From Blender to Unreal Engine 4 – Part I (Profile) here.
Let me thank Wessel Huizenga for sharing the details about the project with Blender 3D Architect readers.
Can you share any details about the lighting process?
I like to work iteratively, with renders between stages. This way, I can do early quality checks and test my assets. If there are any mistakes, I can quickly fix them. I usually create high-quality renders from the start, as this gives me the most information about how things might look. The first step is importing block-out and HDRI. From that point, I can set up the light mass importance and post-processing.
Lightmap density:
After importing all assets and models, I increase my lightmap density to achieve better overall lighting. When I change my LMD (Lightmap density), it is important to make sure I get as close to red as I can without using high-resolutions, usually stopping at 2048. This way, I can keep my baking times low to render a scene with production quality within an hour using an average PC.
This makes working in iterations for quality checks efficient. One of the tricks I use to always stay under a resolution of 2048 is to cut the walls into smaller pieces using the corners as a reference. In the corners, we hardly get any artifacts that allow me to keep the resolution low.
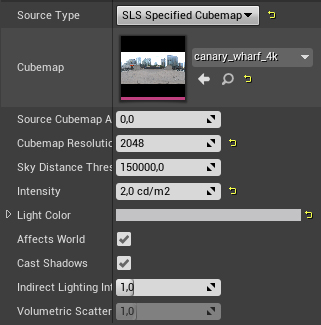
HDRI and Skylight:
For my HDRI, I use HDRI Heaven. They have a large free library that fit my scene perfectly. My only concern with the HDR map is to pick one that matches the mood I’m trying to achieve. For this project, I wanted to go to a warmish place. Having a cloudy day as my HDRI helped to get that result. Before importing, I increase the HDRI resolution by opening the file and manually changing its resolution. Note: This will also increase baking times, don’t go too crazy with the values.
I want to make sure it’s set to bake, I find that this gives me the best results:
(Click to enlarge)
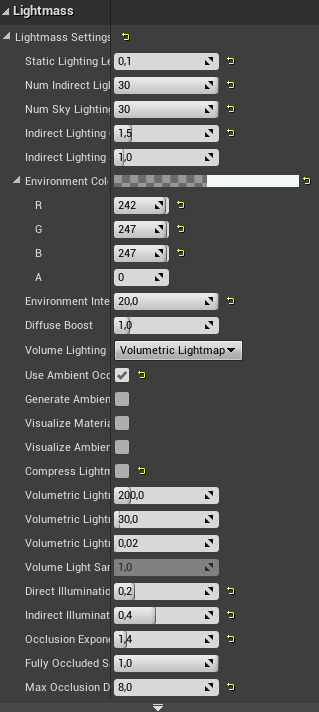
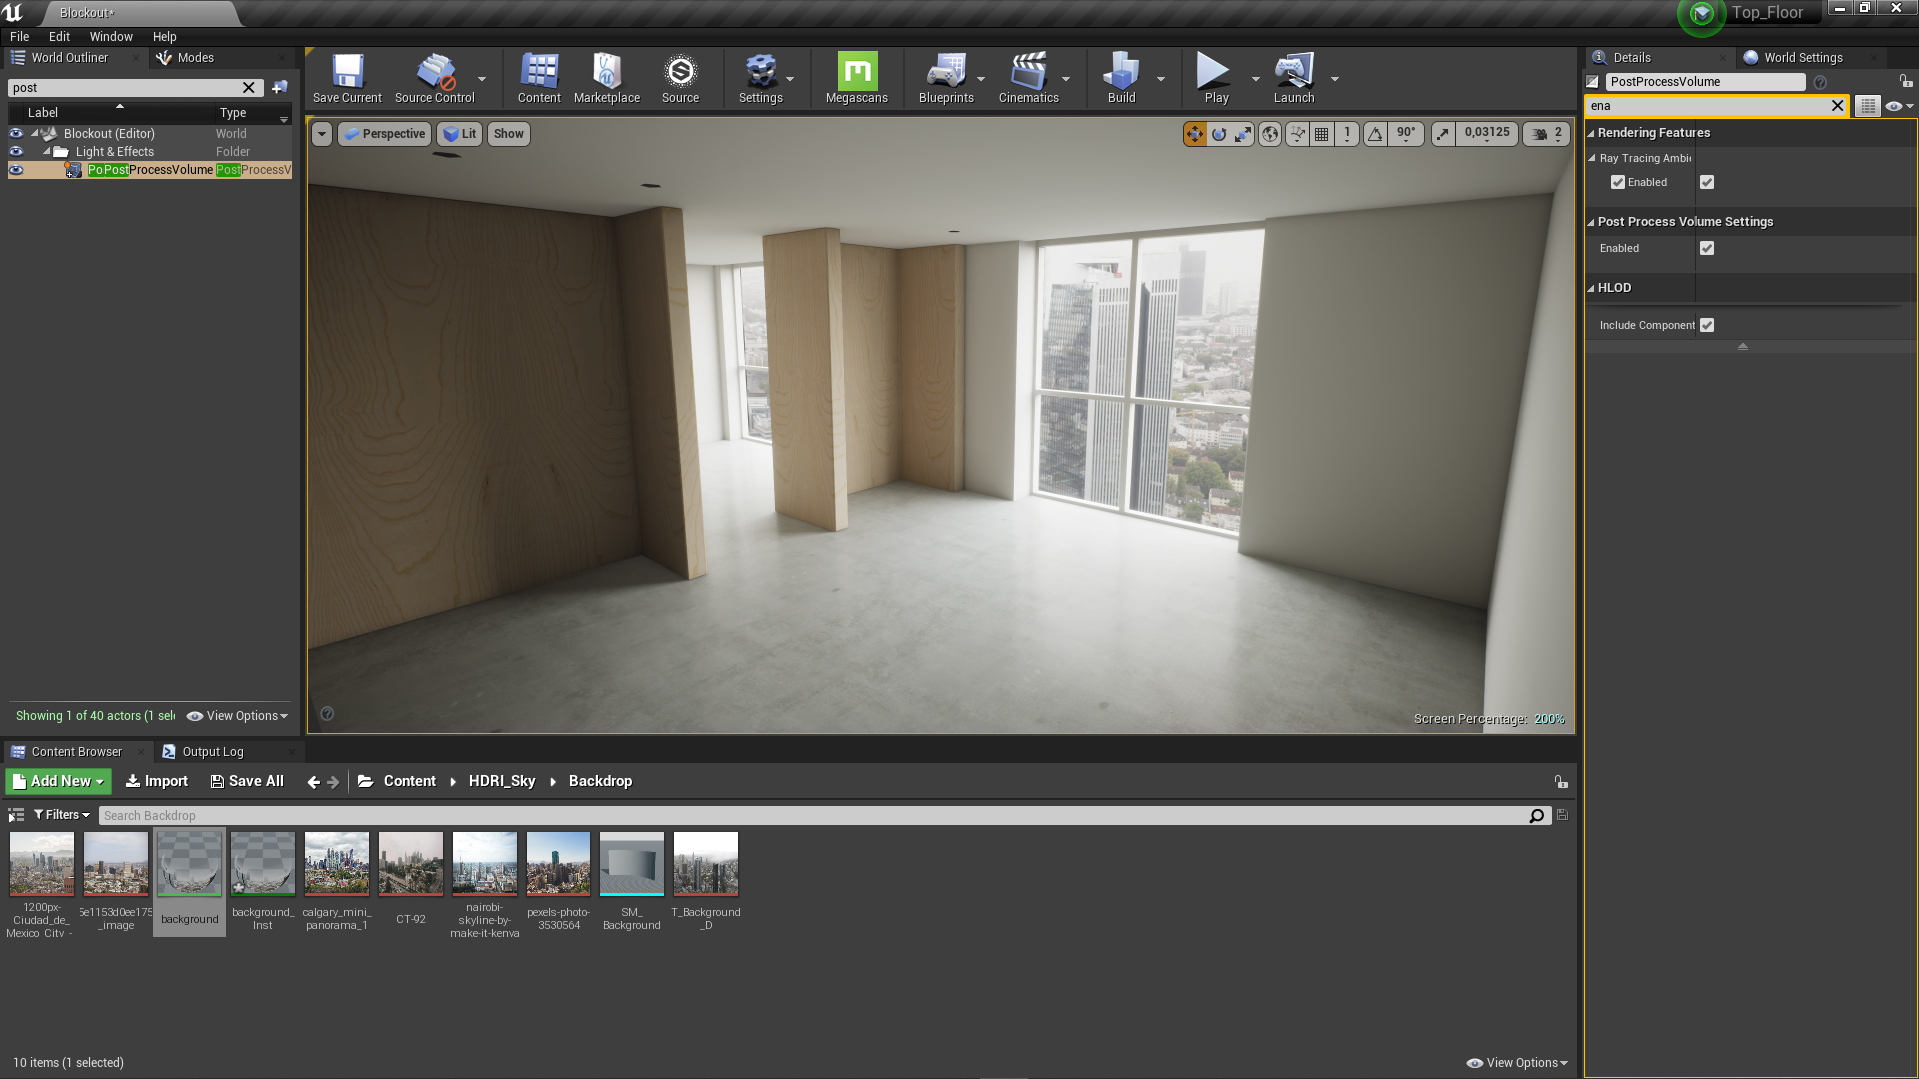
World settings:
World settings will be different for each scene. Understanding what each of the different settings controls helps a lot in the final result. I highly recommend checking out UE4 documentation before you get started.
(Click to enlarge)
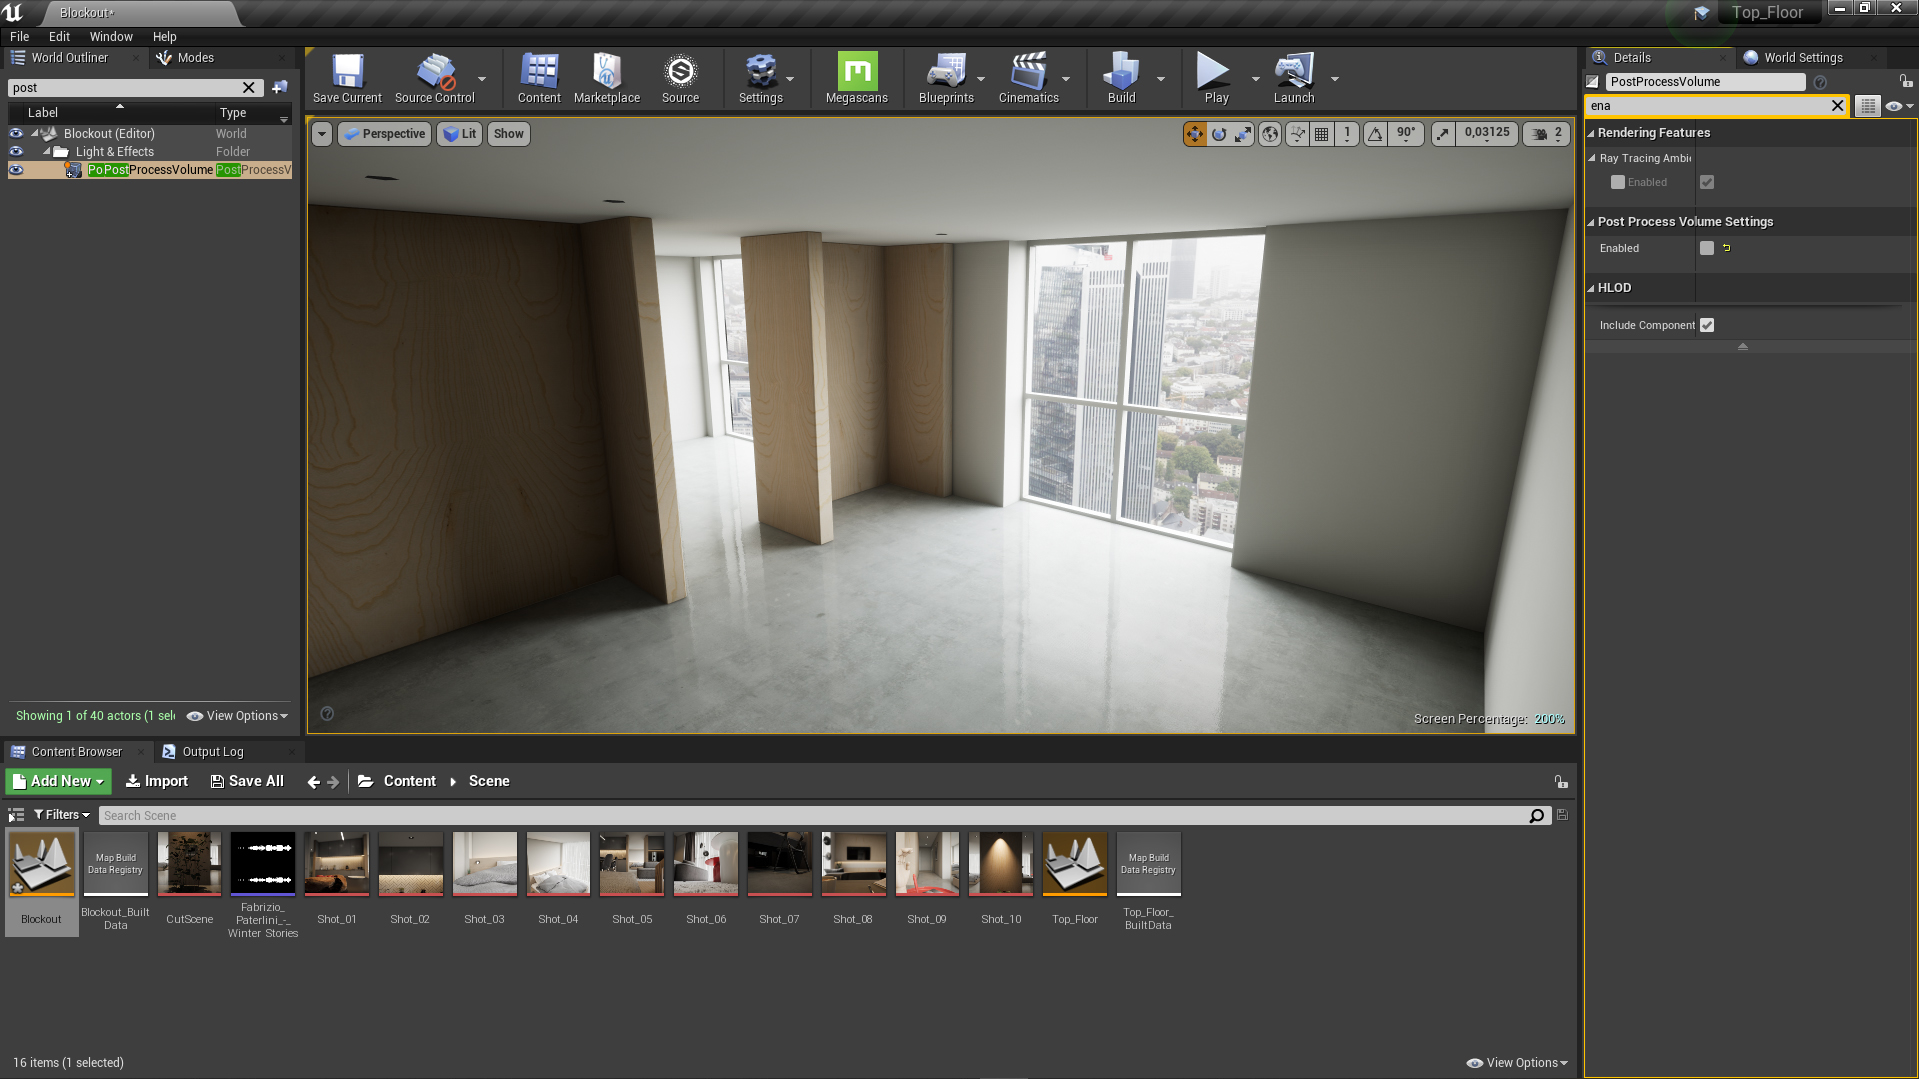
Post Processing Volume:
After I have a foundation for my lighting, I always try to enhance it by importing a PPV (Post Processing Volume). I make sure it covers the entire scene. I use PPV to enhance my lighting and illuminate darker spots. The way I approach my World settings is to leave everything RAW as you would with shooting photos.
Going too crazy with your World settings gives you less control. Meaning that when I bake my World settings, I want to let everything look flat. I use a PPV to bring the environment to life. Doing this in PPV gives you a lot of control during the build of the scene. Since the PPV is realtime, we don’t have to re-bake the scene if you need to make changes.
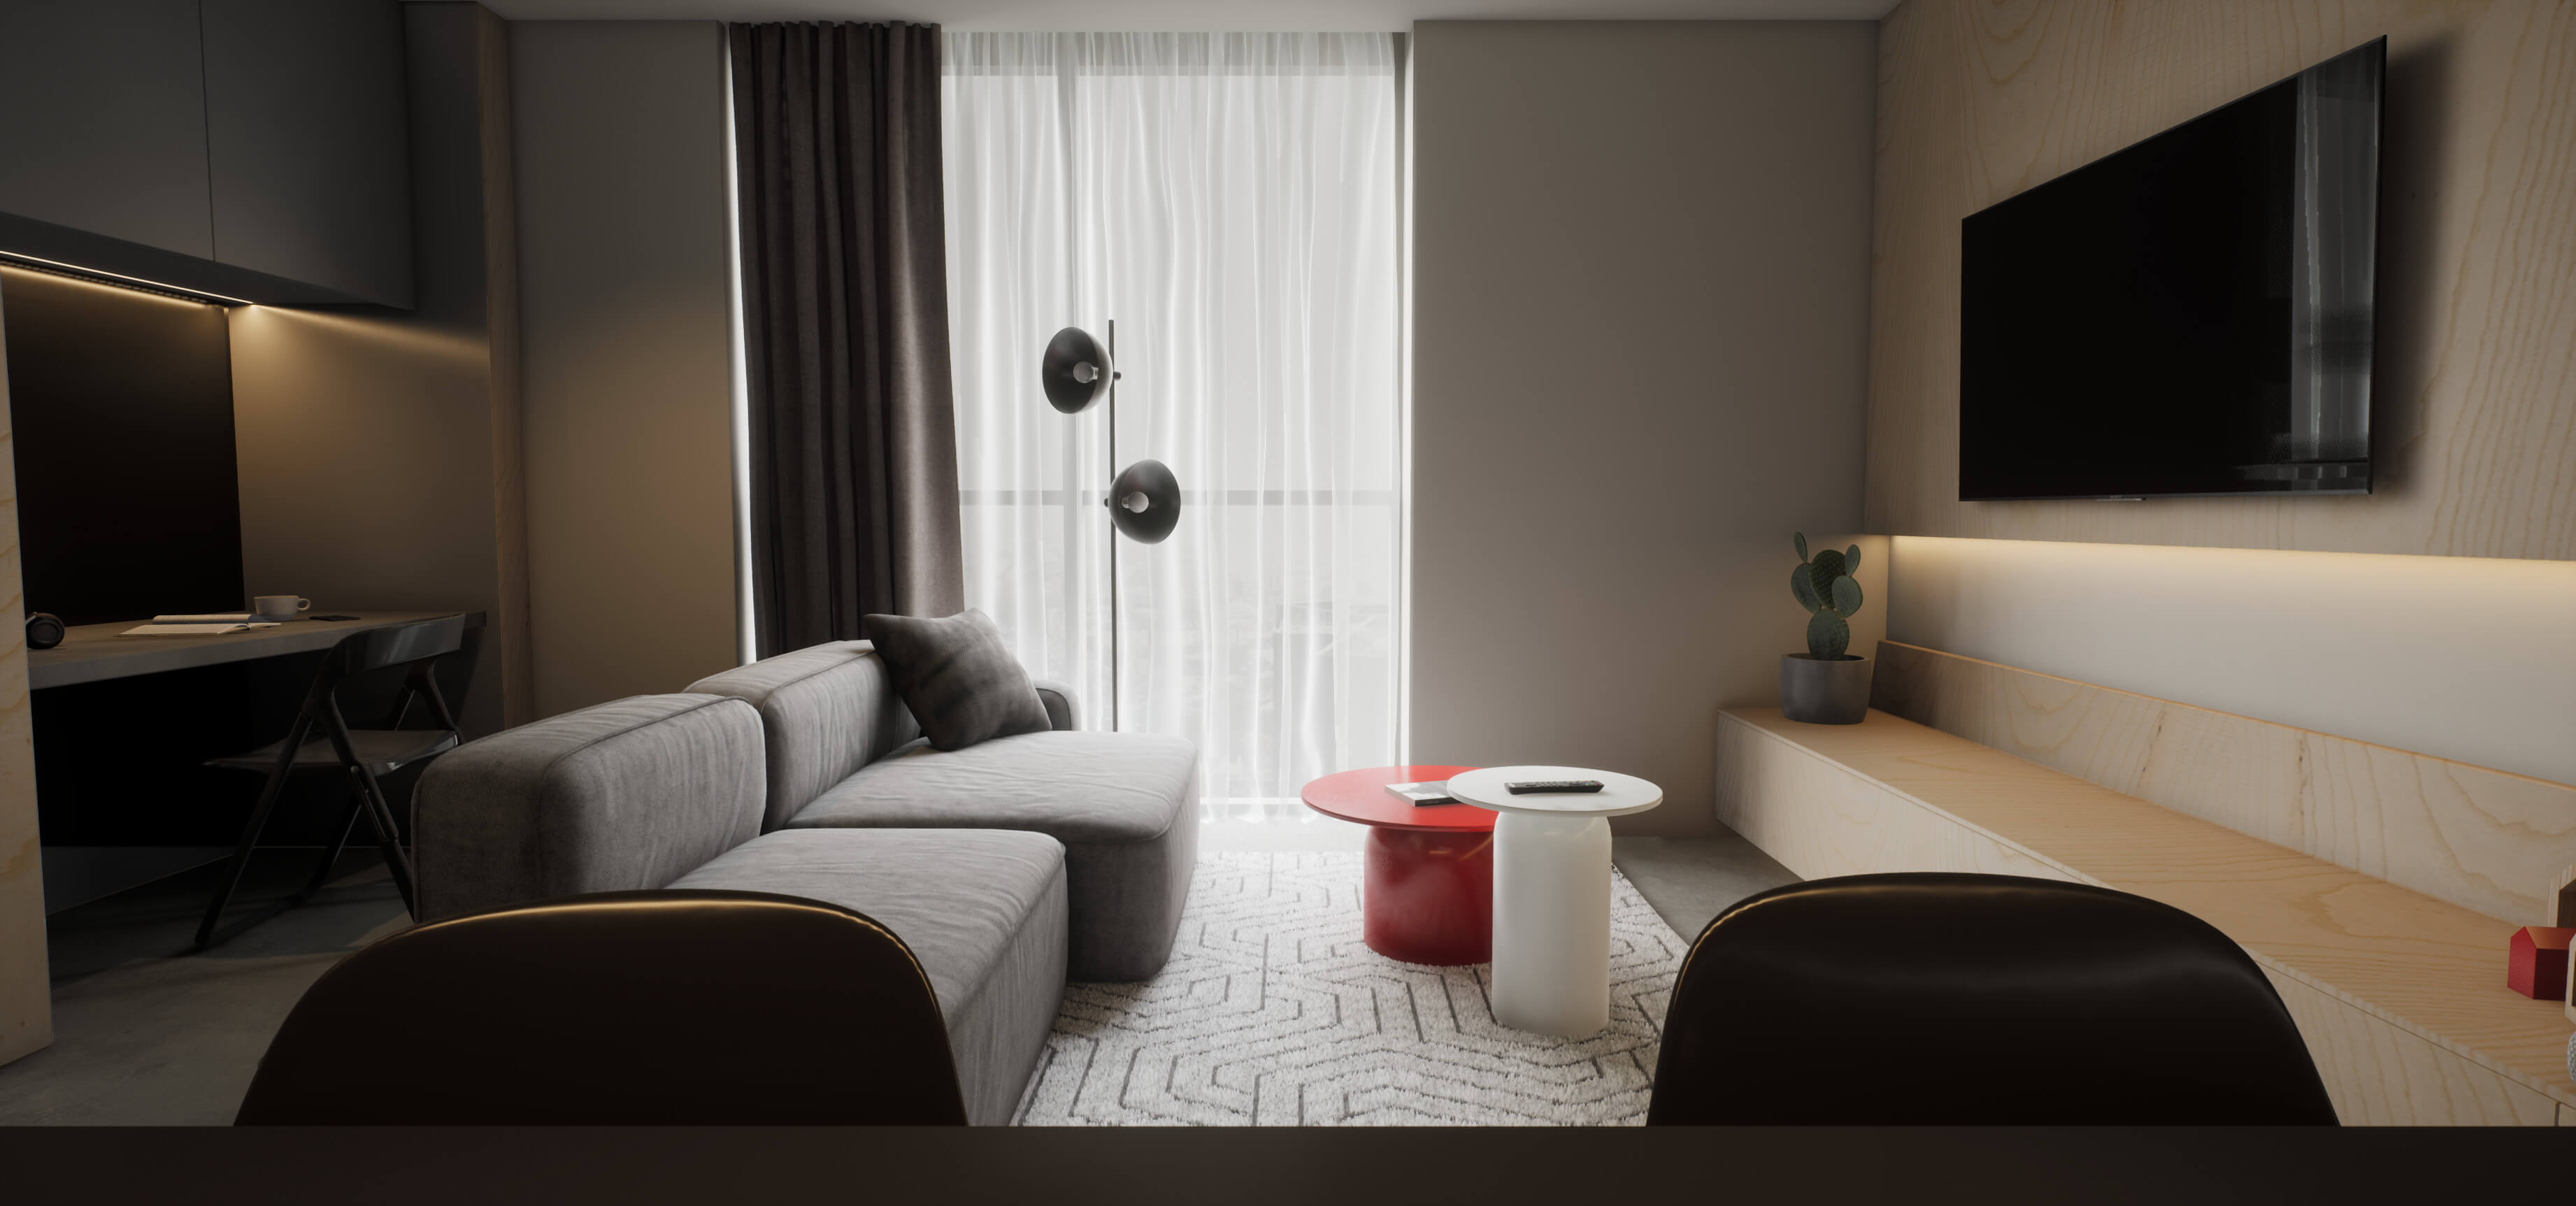
Lightmass only – (Click to enlarge)
The most important aspects of the settings are white balance, color grading, exposure, and screen-space reflections.
Understanding what each one of those options does is an important skill if you are looking for good results in realtime rendering.
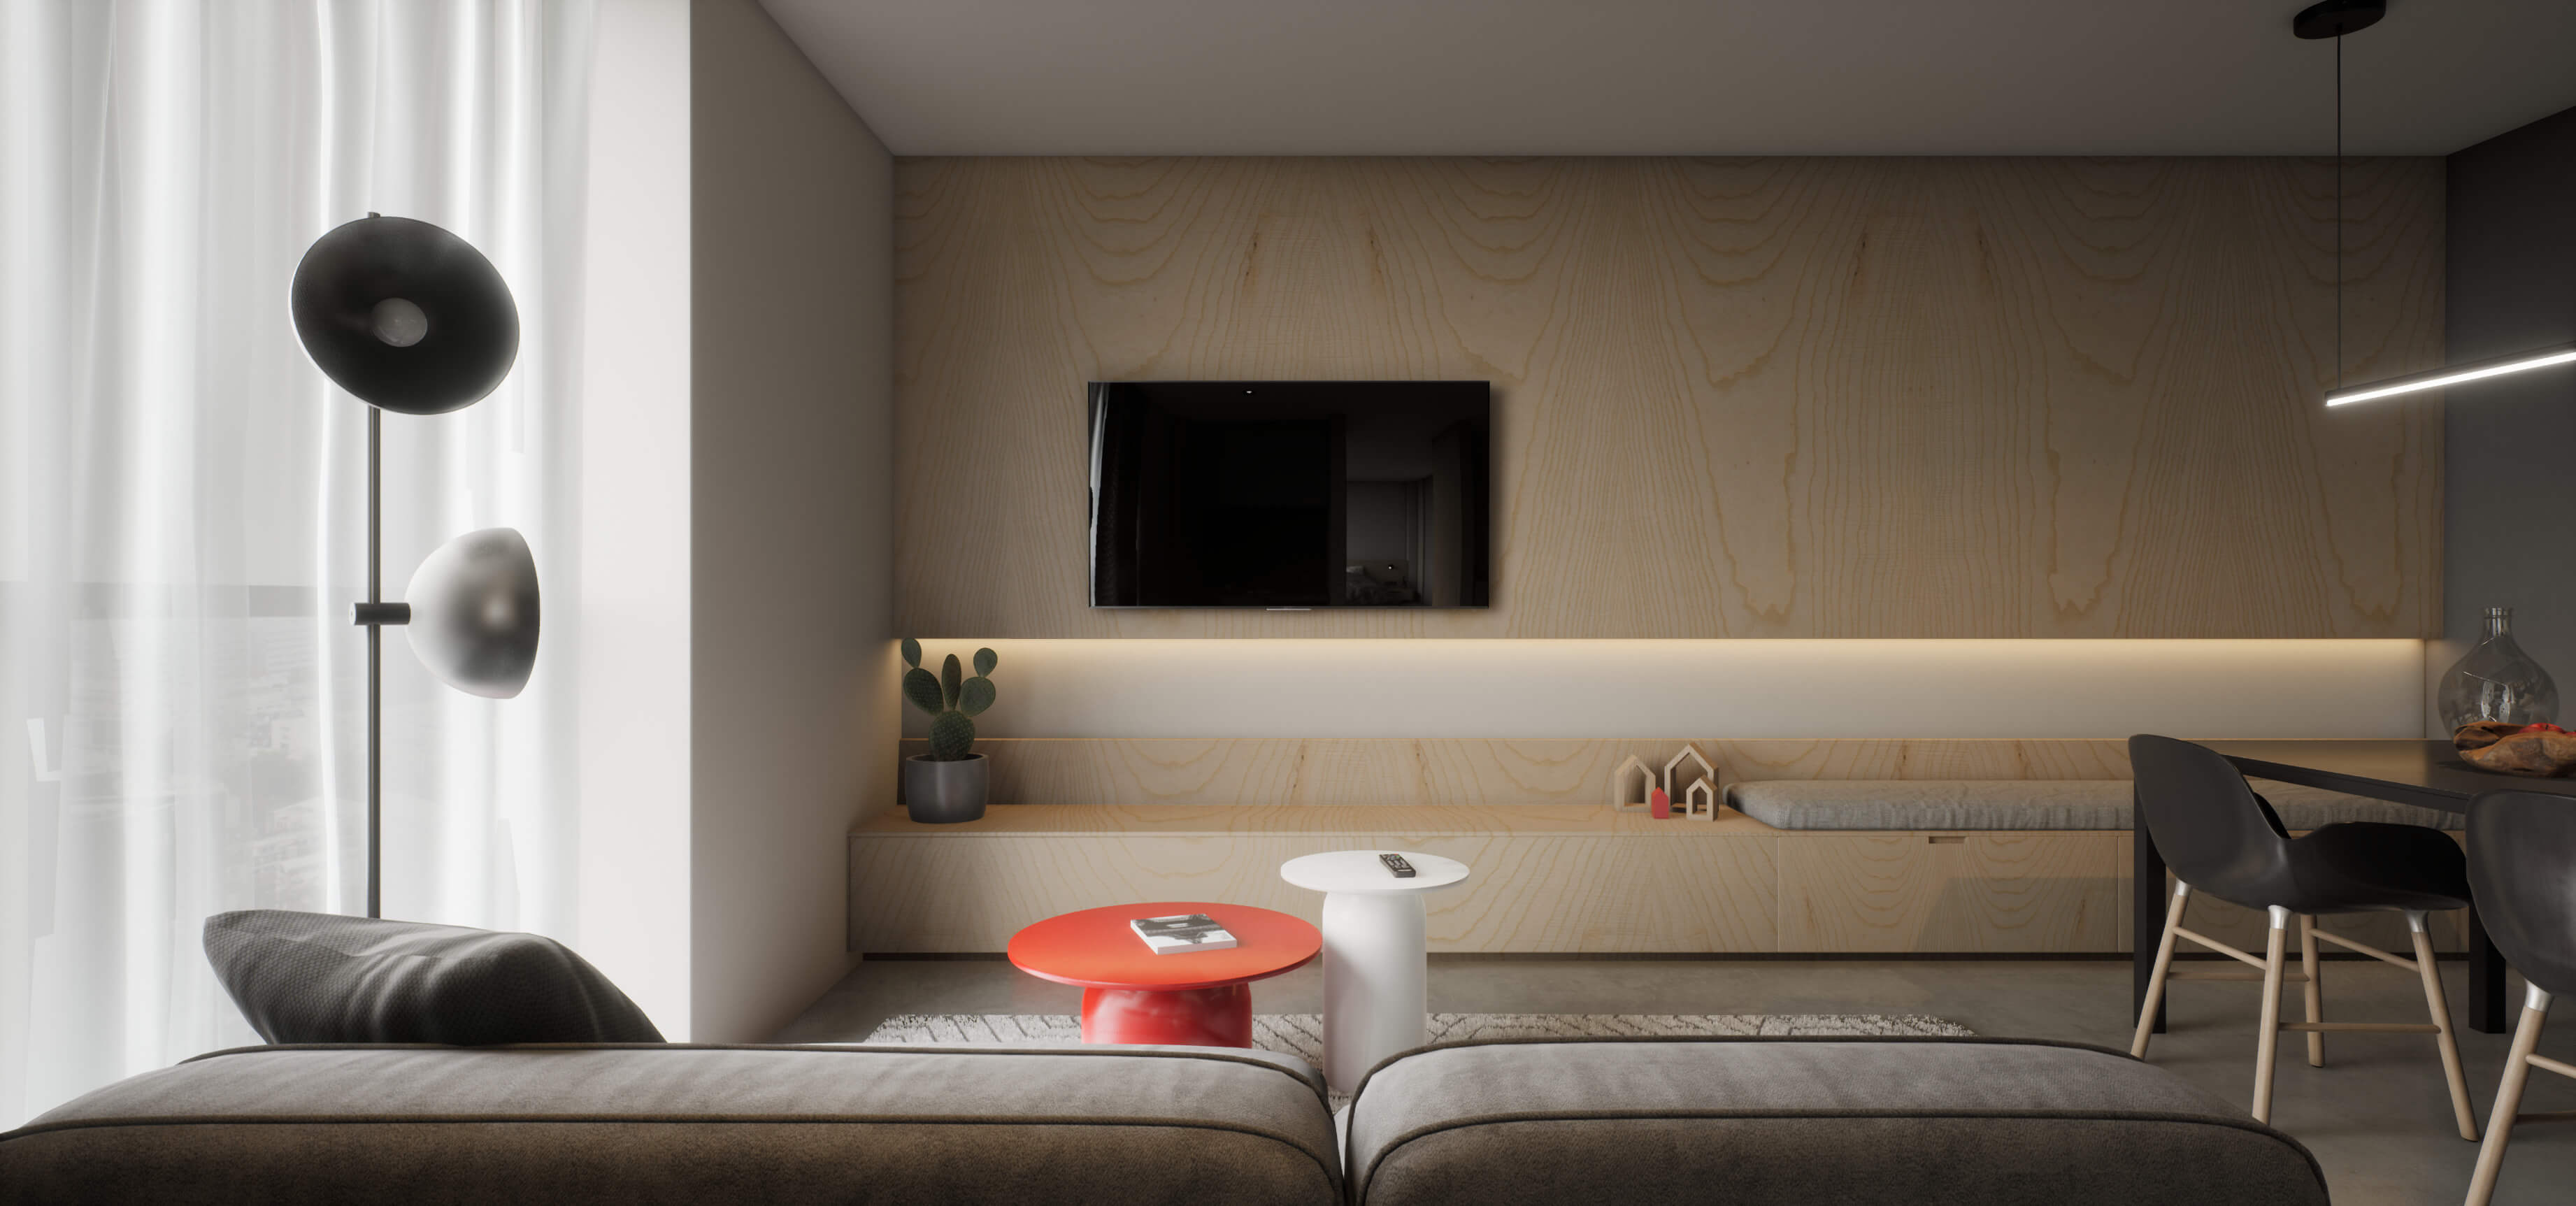
Lightmass with PPV – (Click to enlarge)
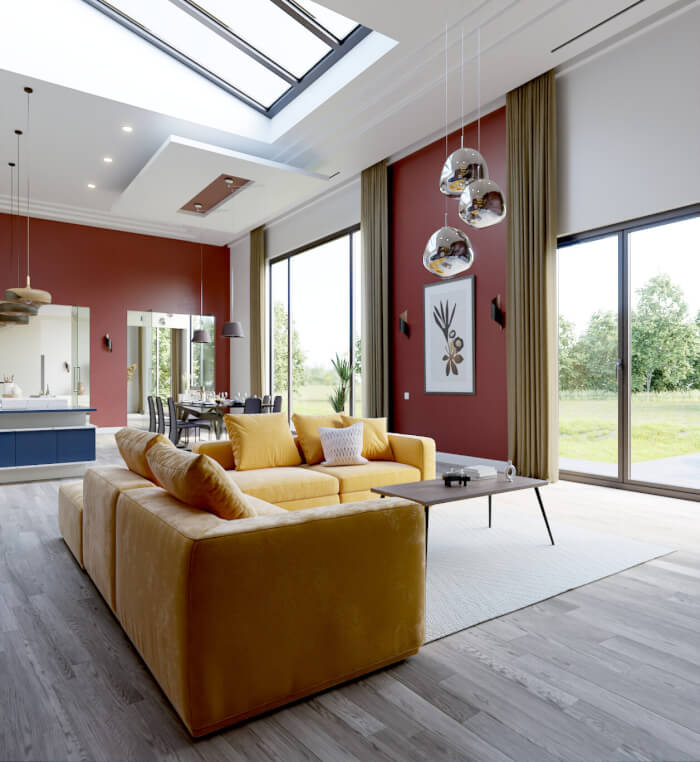
Final Render:
I try to optimize my pipeline as much as I can throughout my workflow. Being able to do most of the work within Blender, Substance, and UE4 greatly increases my project times.
Besides having a fast project development, I also aim for low render times. By having high quality renders within a short amount of time. With my current setup, it takes me less than a minute to adjust my camera, put in position, and render a shot that I can use on my portfolio.
A useful shortcut I use is copping my post-processing settings onto my camera, by adding a cinematic camera from the modes menu. I can quickly edit my camera settings in the details tab. In the settings, I can copy my post-processing values into my camera, and experiment with the ‘Current camera settings,’ which doesn’t take a lot of time.
These are the preferred settings I like to work:
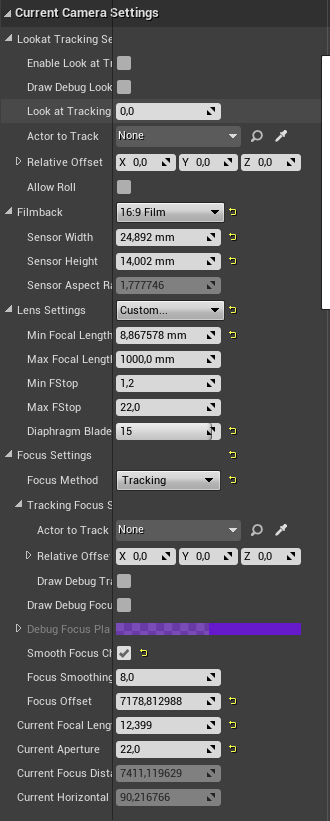
(Click to enlarge)
Did you use any Add-ons or external tools to create the project?
I used a few tools within Blender to speed up my unwrapping process. As a rule, I try to have good unwraps on my models. The tools I use to speed up my unwrapping process are Textools and UV Toolkit. Besides that, I like to work with a consistent Texel Density. Having a consistent Texel density keeps the overall quality of the materials on each object equal. Having that consistency, I can illuminate any blurry or low-resolution objects showing up in my final render.
To set a custom Texel density, I use a tool called: Texel Density.
I don’t use any external tools besides unwrapping. Blender offers a great variety in different powerful tools that will help to get the result you desire.
Did you use any interactive controls for this project?
I created an event that allows me to cycle between materials in realtime. It’s a simple graph that allows me to switch materials while I’m walking through the scene. I set up a collision box for the player to collide with; when the player is within this box, it can change the material by pressing the ‘X’ key.
This graph allows me to incorporate multiple materials that would fit in different scenarios. Having a walk-through is a professional way of displaying your final work, being able to change materials in this walk-through adds another dimension to the user’s experience.
That concludes our project profile for Top floor, which is an amazing overview of how to set up projects from Blender to render with the Unreal Engine 4.
Thanks again to Wessel Huizenga for sharing details about his work. Visit his portfolio page if you want to reach him or see more of his architectural visualization projects.
You can also reach him on LinkedIn.

Thanks Alan! This was a great interview and very helpful.
UE is really interesting especially with UE5 around the corner