The project profile series of Blender 3D Architect is a collection of articles with the aim of feature projects related to architectural visualization. We invite talented artists to share additional details about each project to demonstrate how they approach each stage of the process. And also allow each author to publicize their work among our readers.
How does it work? It is like an interview, where we sent a couple of questions about a project for the artist.
If you want to check previous project profiles, visit this link.
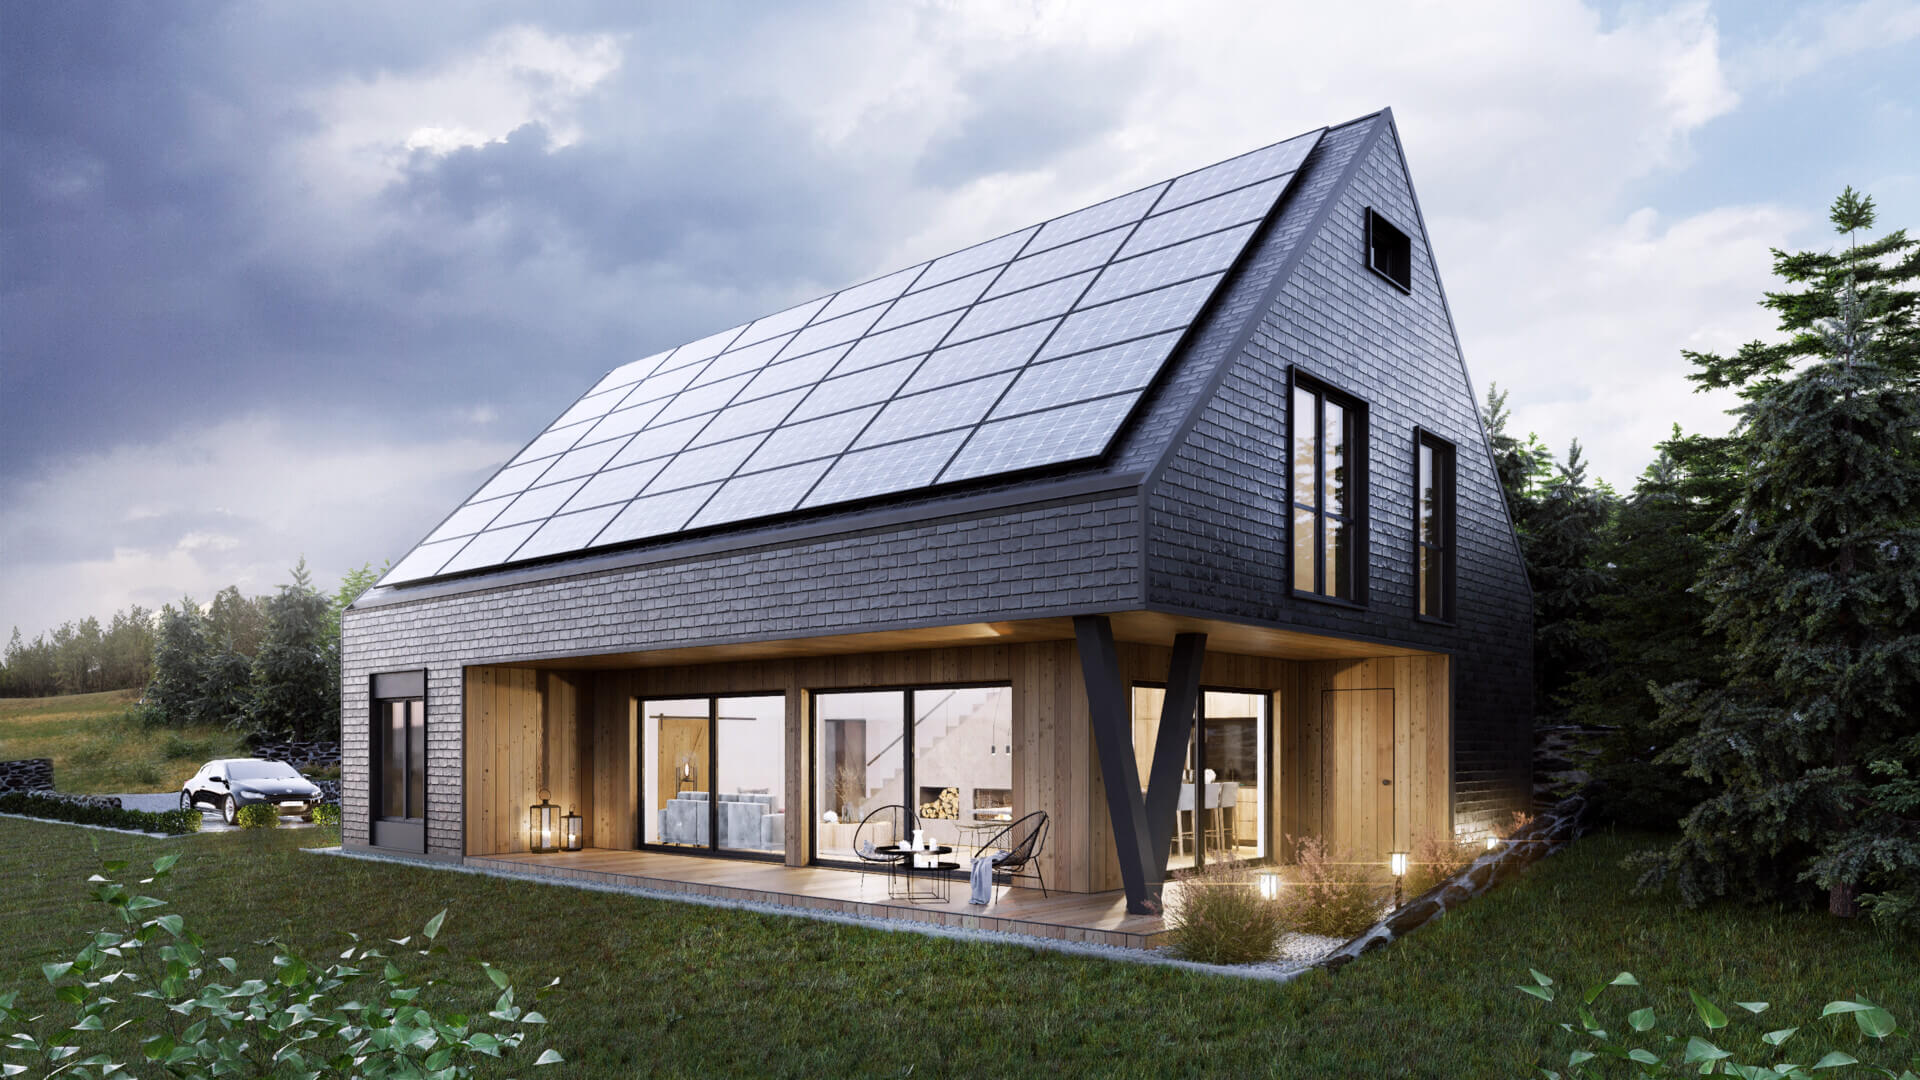
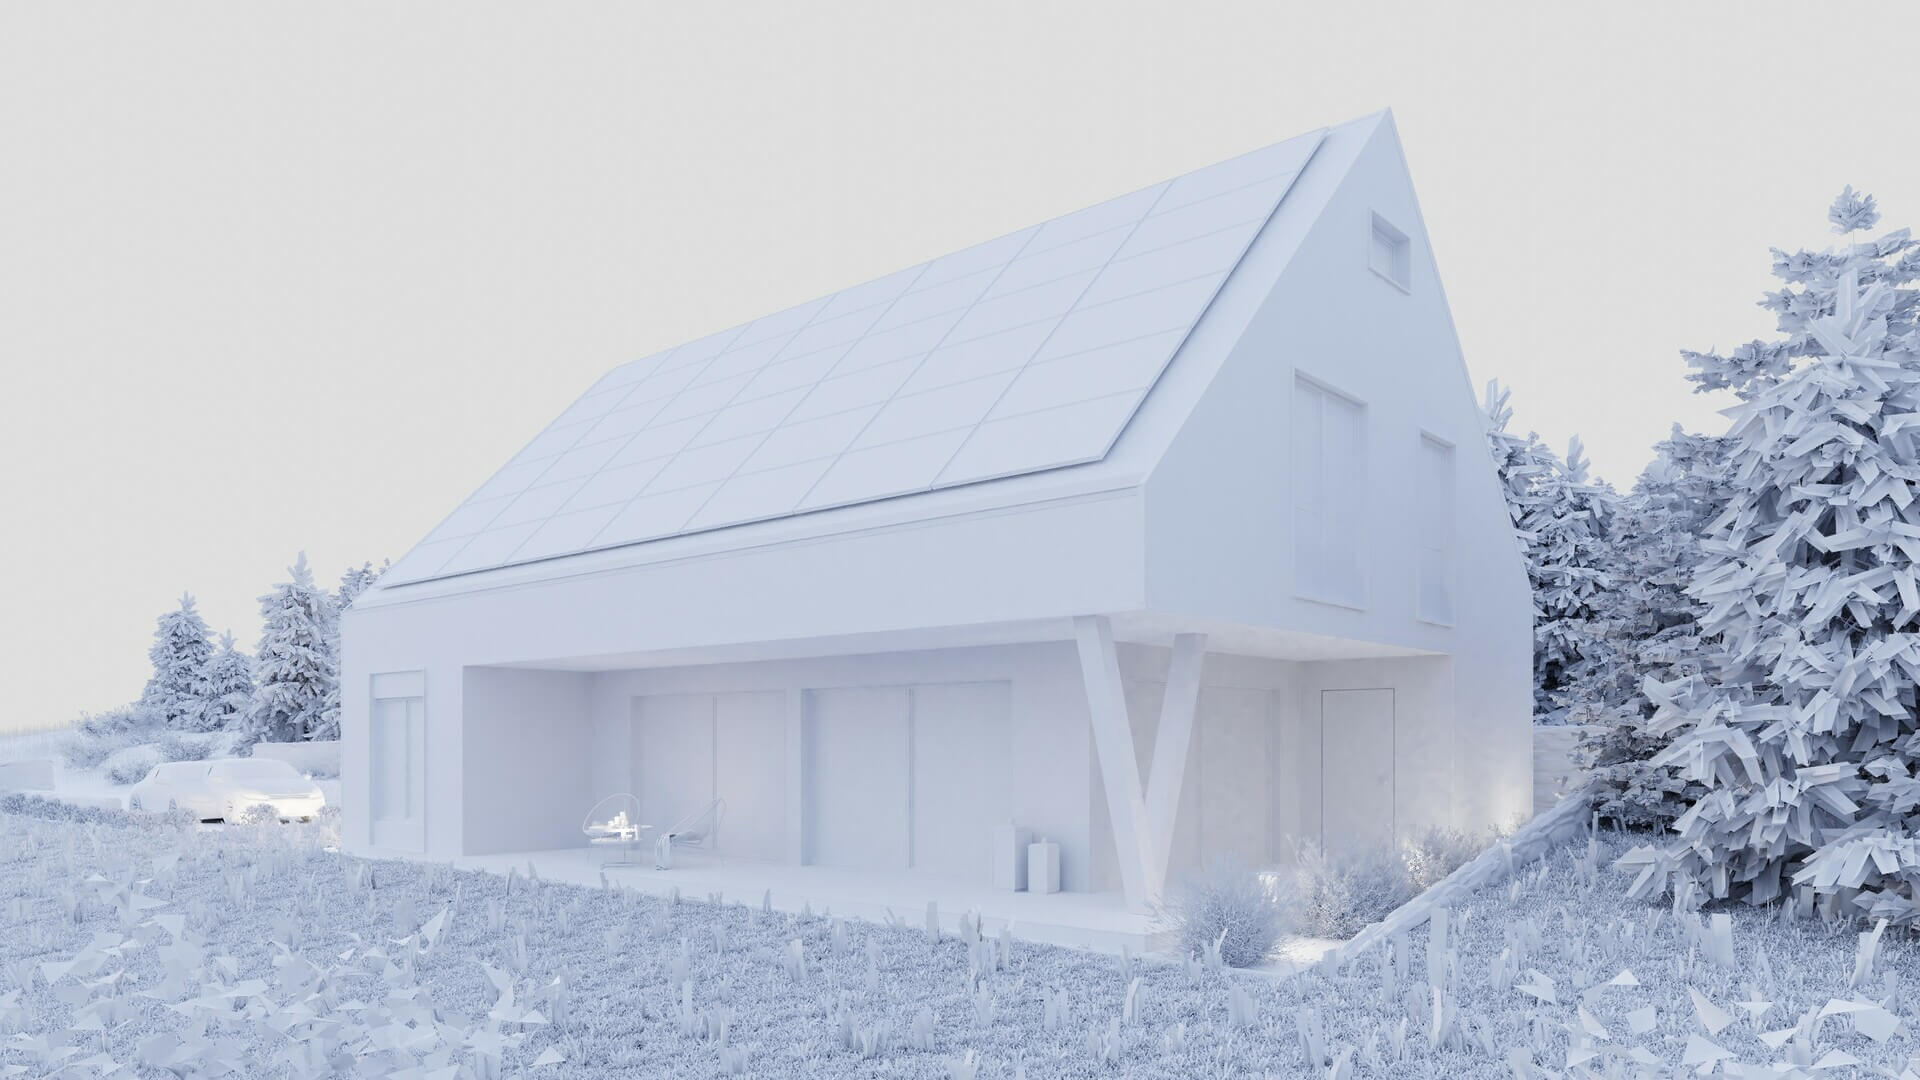
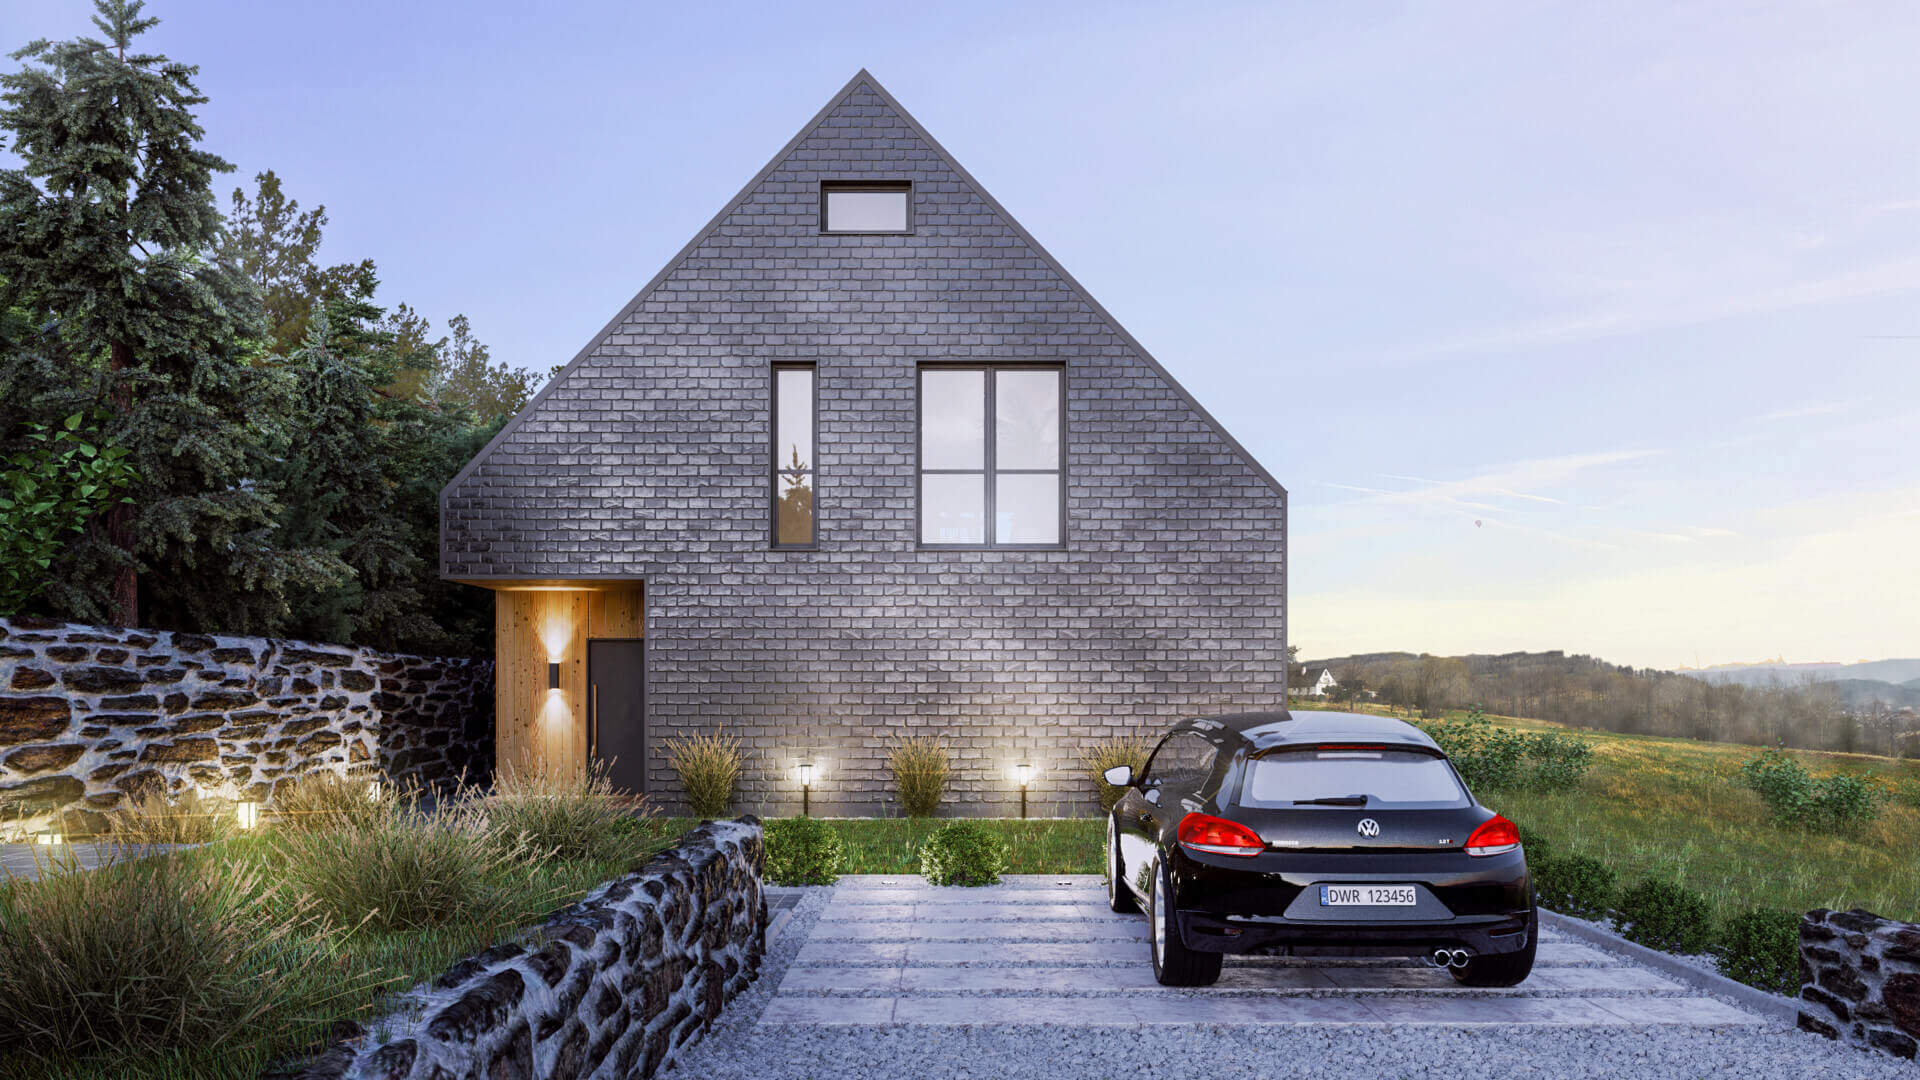
Today we have a project called Meadow house from artist Kamil Golec, which used Cycles to create all images from this house in Włodowice, Poland.
(Click to enlarge)
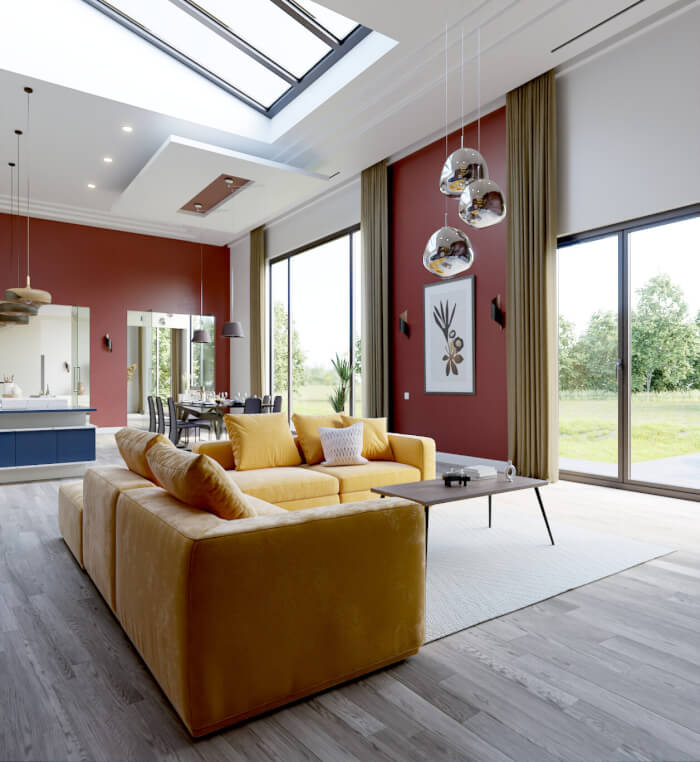
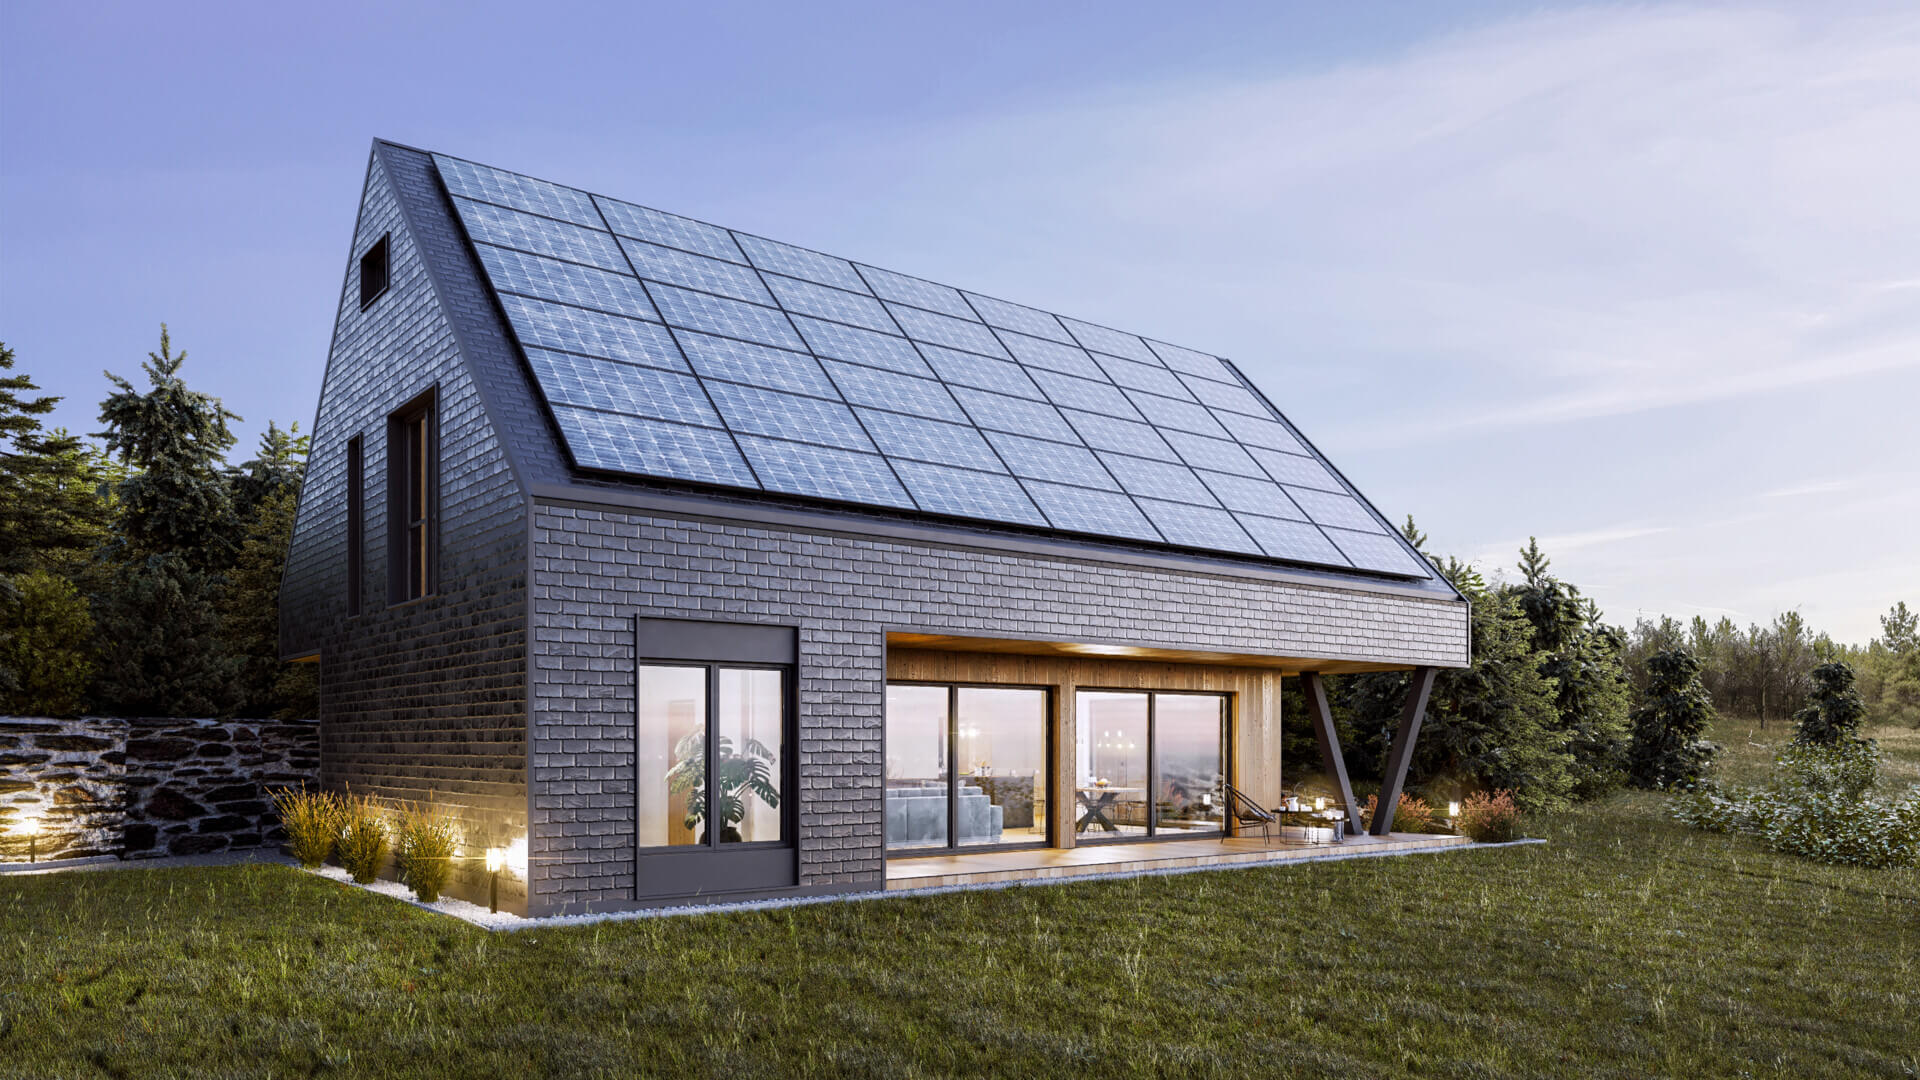
What is unique about this project? The project shows some excellent skills by the author in recreating a house with a unique site with forest and meadows. Another challenge of the render was to balance external and internal lights in the same render. Even being an exterior visualization, the artist had to enable all interior lights for rendering.
(Click to enlarge)
An overall great looking visualization using Cycles with a lighting set up that doesn’t make use of direct sunlight.
Let me thank Kamil Golec for sharing the details about the project with Blender 3D Architect readers.
Was it a commercial project? What can you tell us about the motivation for this project?
The Meadow House was a commercial project, the building is a design from a friend, and I’ve visualized it for her. It is located in Włodowice, Poland. The entire neighborhood is quite wild, meadows on the front and small forest in the back, and she asked me to try to recreate this environment in my work as much as I could. The idea of this project was to use the local materials – the elevation will be made out of slate and the retaining walls out of stones available on site.
Luckily, the owner of that house was really open-minded, which allowed me the freedom to create something a little more artistic than what I usually need to do. Most of my customers prefer “traditional” afternoon sunlight, over-saturated colors (mainly green and blue), and many human scales pasted in Photoshop.
(Click to enlarge)
_Did you use any references for modeling, like technical drawings? _
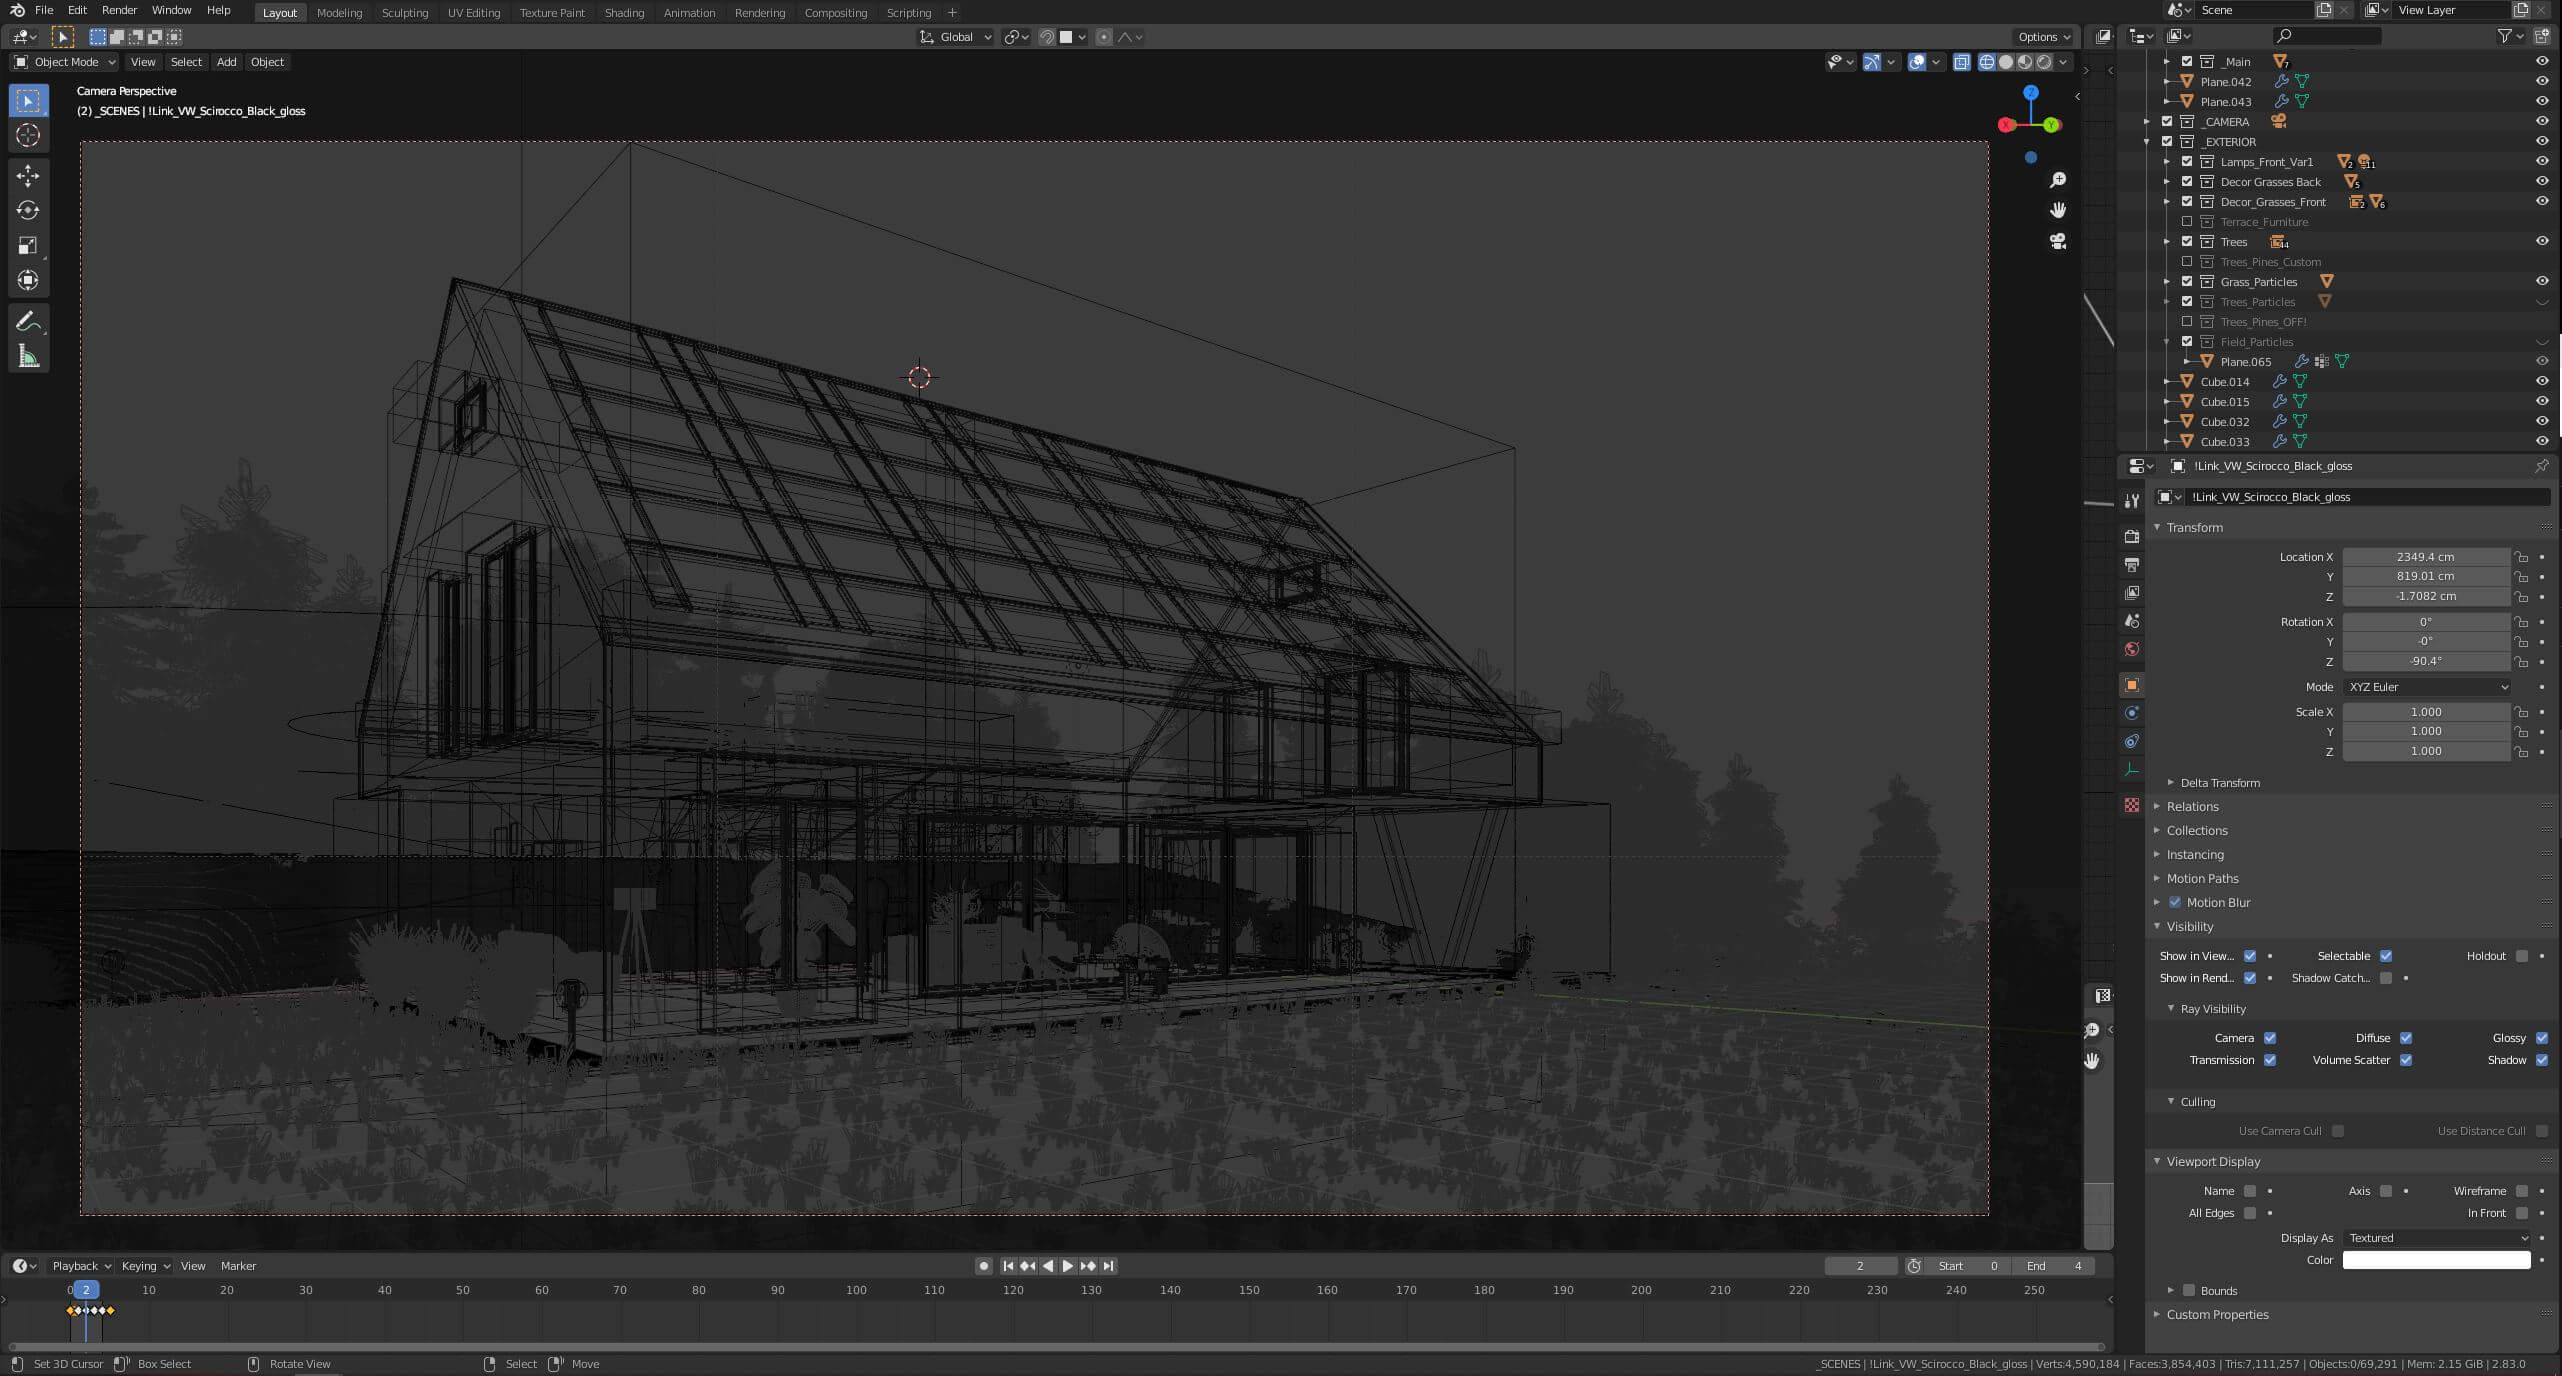
I’ve worked mostly with a SketchUp model of the building that I’ve used as a reference, but I entirely created the final model in Blender. I usually use this technique with smaller objects to preserve details and make it easier to texture, edit, make booleans, etc. The SketchUp models may even display lots of details, but they are rarely well editable. I’ve also received technical drawings for this project, but I didn’t have to use it in this visualization.
(Click to enlarge)
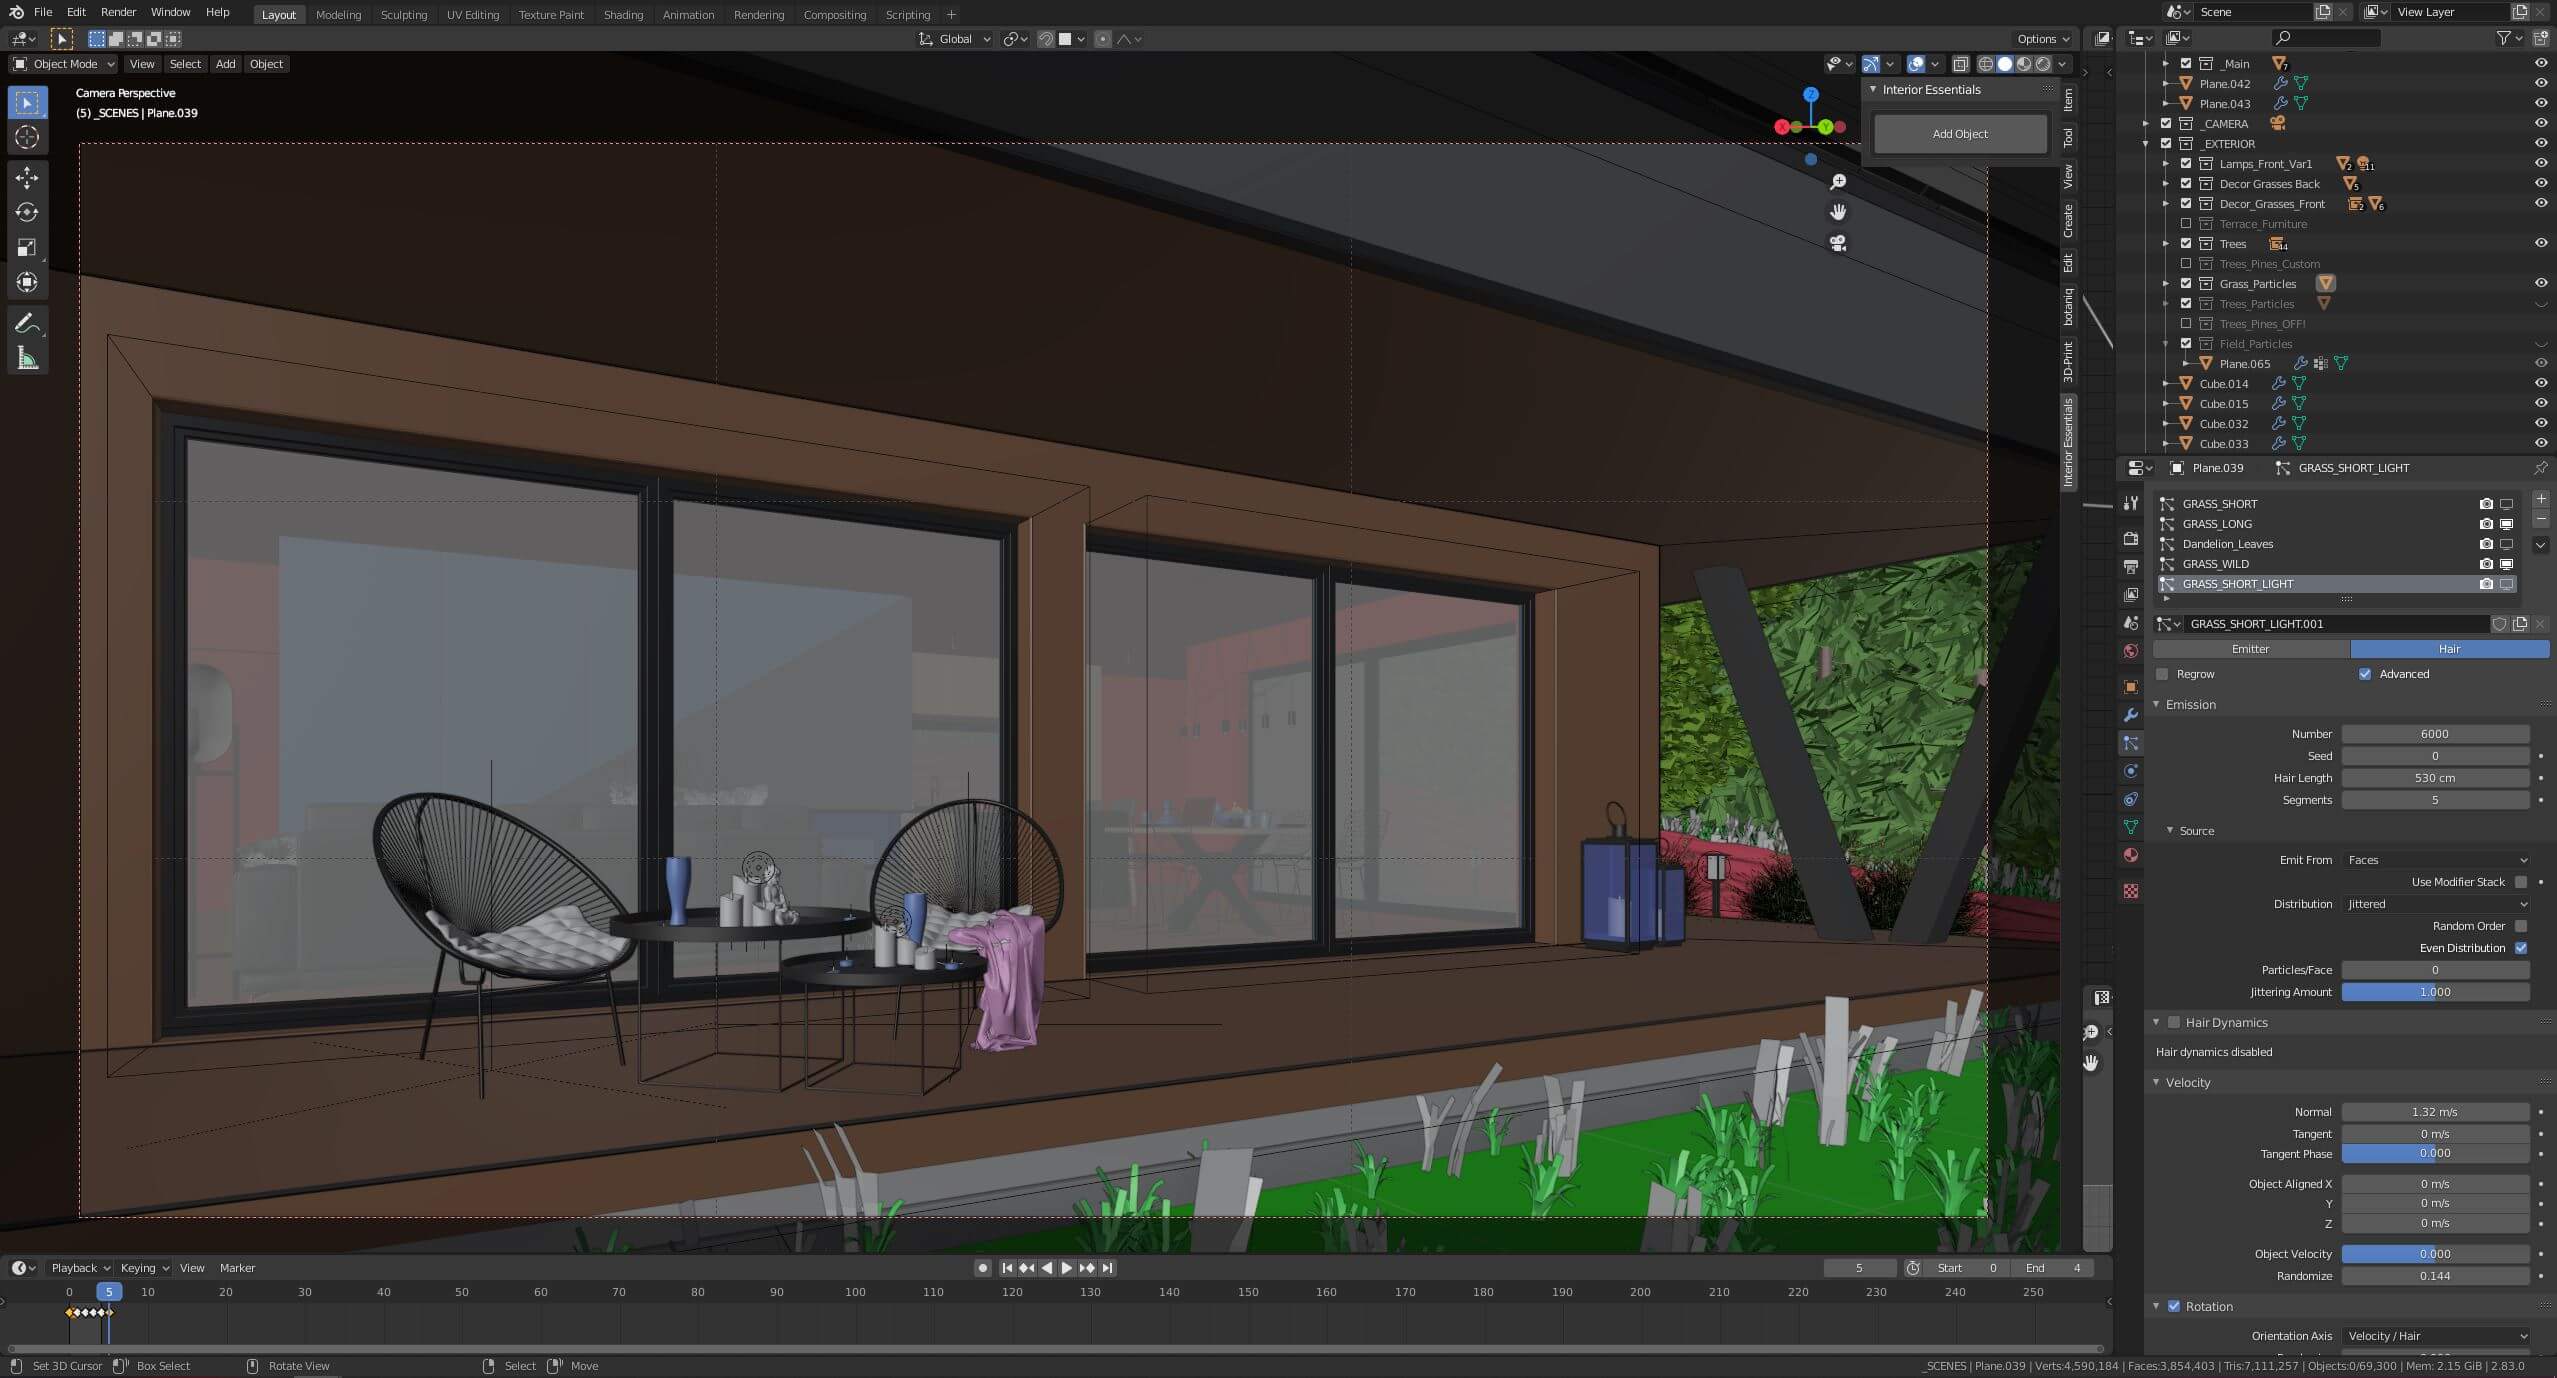
Did you model everything in the project, including furniture and props?
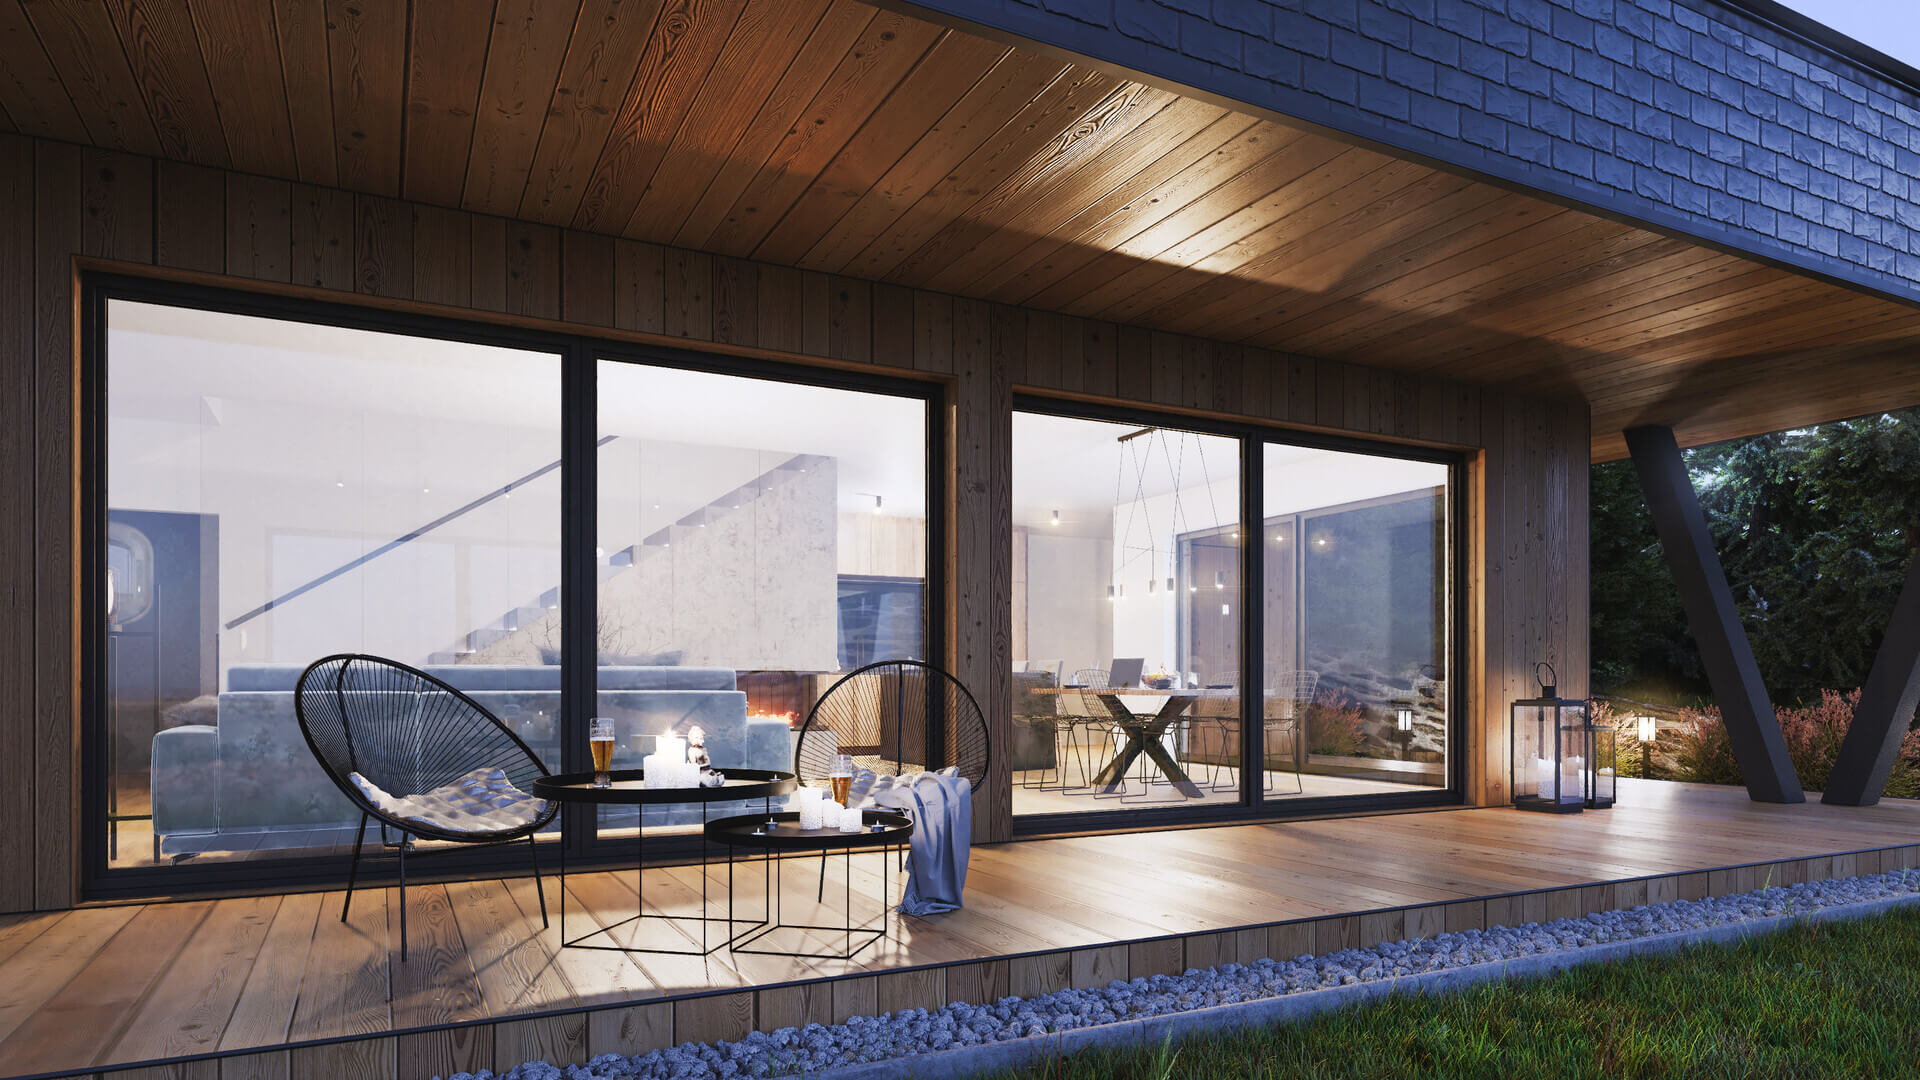
The whole building was remodeled by me. Main interior design elements (stairs, kitchen furniture, lamps) were included in the SketchUp model, I’ve remodeled some of them to add more details. The rest of the interior assets and terrace furniture is entirely my company work – we are currently creating the interior asset library for Blender, called Interior Essentials. All props like glasses, candles, some furniture are part of this library, and in my opinion, these miscellaneous objects bring a lot of life to the project. The textures are from cc0textures.com, poliigon.com, and some are my creations.
The greenery like the grass is made by me, out of the textures coming from cc0textures and my photos. Decor grasses are a trick from the Grass Essentials library. The trees are from Botaniq asset pack.
(Click to enlarge)
How long did it take from start to finish?
The entire project took me about 3–4 workdays, as I remember. It’s hard for me to tell you the exact time since it wasn’t 3 days in a row. We had to wait for reviews and corrections to keep developing the project, which placed the visualization on hold.
(Click to enlarge)
What hardware did you use to render? Can you share some render times?
My specs are a Gigabyte GTX 1080Ti with 11GB VRAM, Intel Core i7–4770K, 16GB RAM. All images were rendered in Cycles, 2880x1620px, with 256 samples & denoising. The renders took about 3 minutes to build and 10 minutes to render.
(Click to enlarge)
Can you share any details about the lighting process?
I always start by setting up the environment light and main materials. In this case, I’ve first selected the HDR (syferfontein_0d_clear_4k from hdrihaven.com – I like it very much for the evening scenes well saturated and always gives great effects) and set up the reflections on the materials. The next step was setting the interior lights, and there was some work with that, as I’ve tried various types of lights – very real, to make each blender lamp correspondent to the “real” light source, but that made the interior to bright and was difficult to control.
Then I’ve started experimenting with a reduced number of lamps, which you see in the final result. I’ve also set up exterior lamps, but that was not difficult – I’ve made a large-sized point lamp with IES texture to each pole lantern.
I’ve added some fine details like the candle lights and the tiny emission spheres in each light source (like in the kitchen table lamp). When lamps were set up, I’ve adjusted the exposure, which is my final light solution.
(Click to enlarge)
Did you use any Add-ons or external tools to create the project?
I did not use any external tools and addons as for modeling, just the asset libraries made for Blender – Botaniq, Grass Essentials, and my own Interior Essentials. What makes the workflow fast is our plugin that allows us to link the objects from the library just with a few clicks, so filling the interiors with the objects looks a little bit like playing The Sims – you don’t need to scan your hard disk or the Internet for assets. It is easy to fill the scene with photorealistic objects in a few minutes.
The post-processing was made in Photoshop, but there was not a lot of that, as I was happy with the render results – I just added the background, some lamp flares, adjusted the brightness of certain spots and changed contrast and saturation. My current goal is to minimize the usage of photoshop, but I still make some adjustments in it, as it is much easier to use and control than the Blender Compositor.
(Click to enlarge)
Do you want to share any additional information or tips about this project development?
Since I’ve bought a new monitor, I’ve realized that my visualizations are much better colored than before. So I think this might be useful because it is worth investing in a better monitor for the best results. I’m currently using Acer Nitro VG270UPBMIIPX.
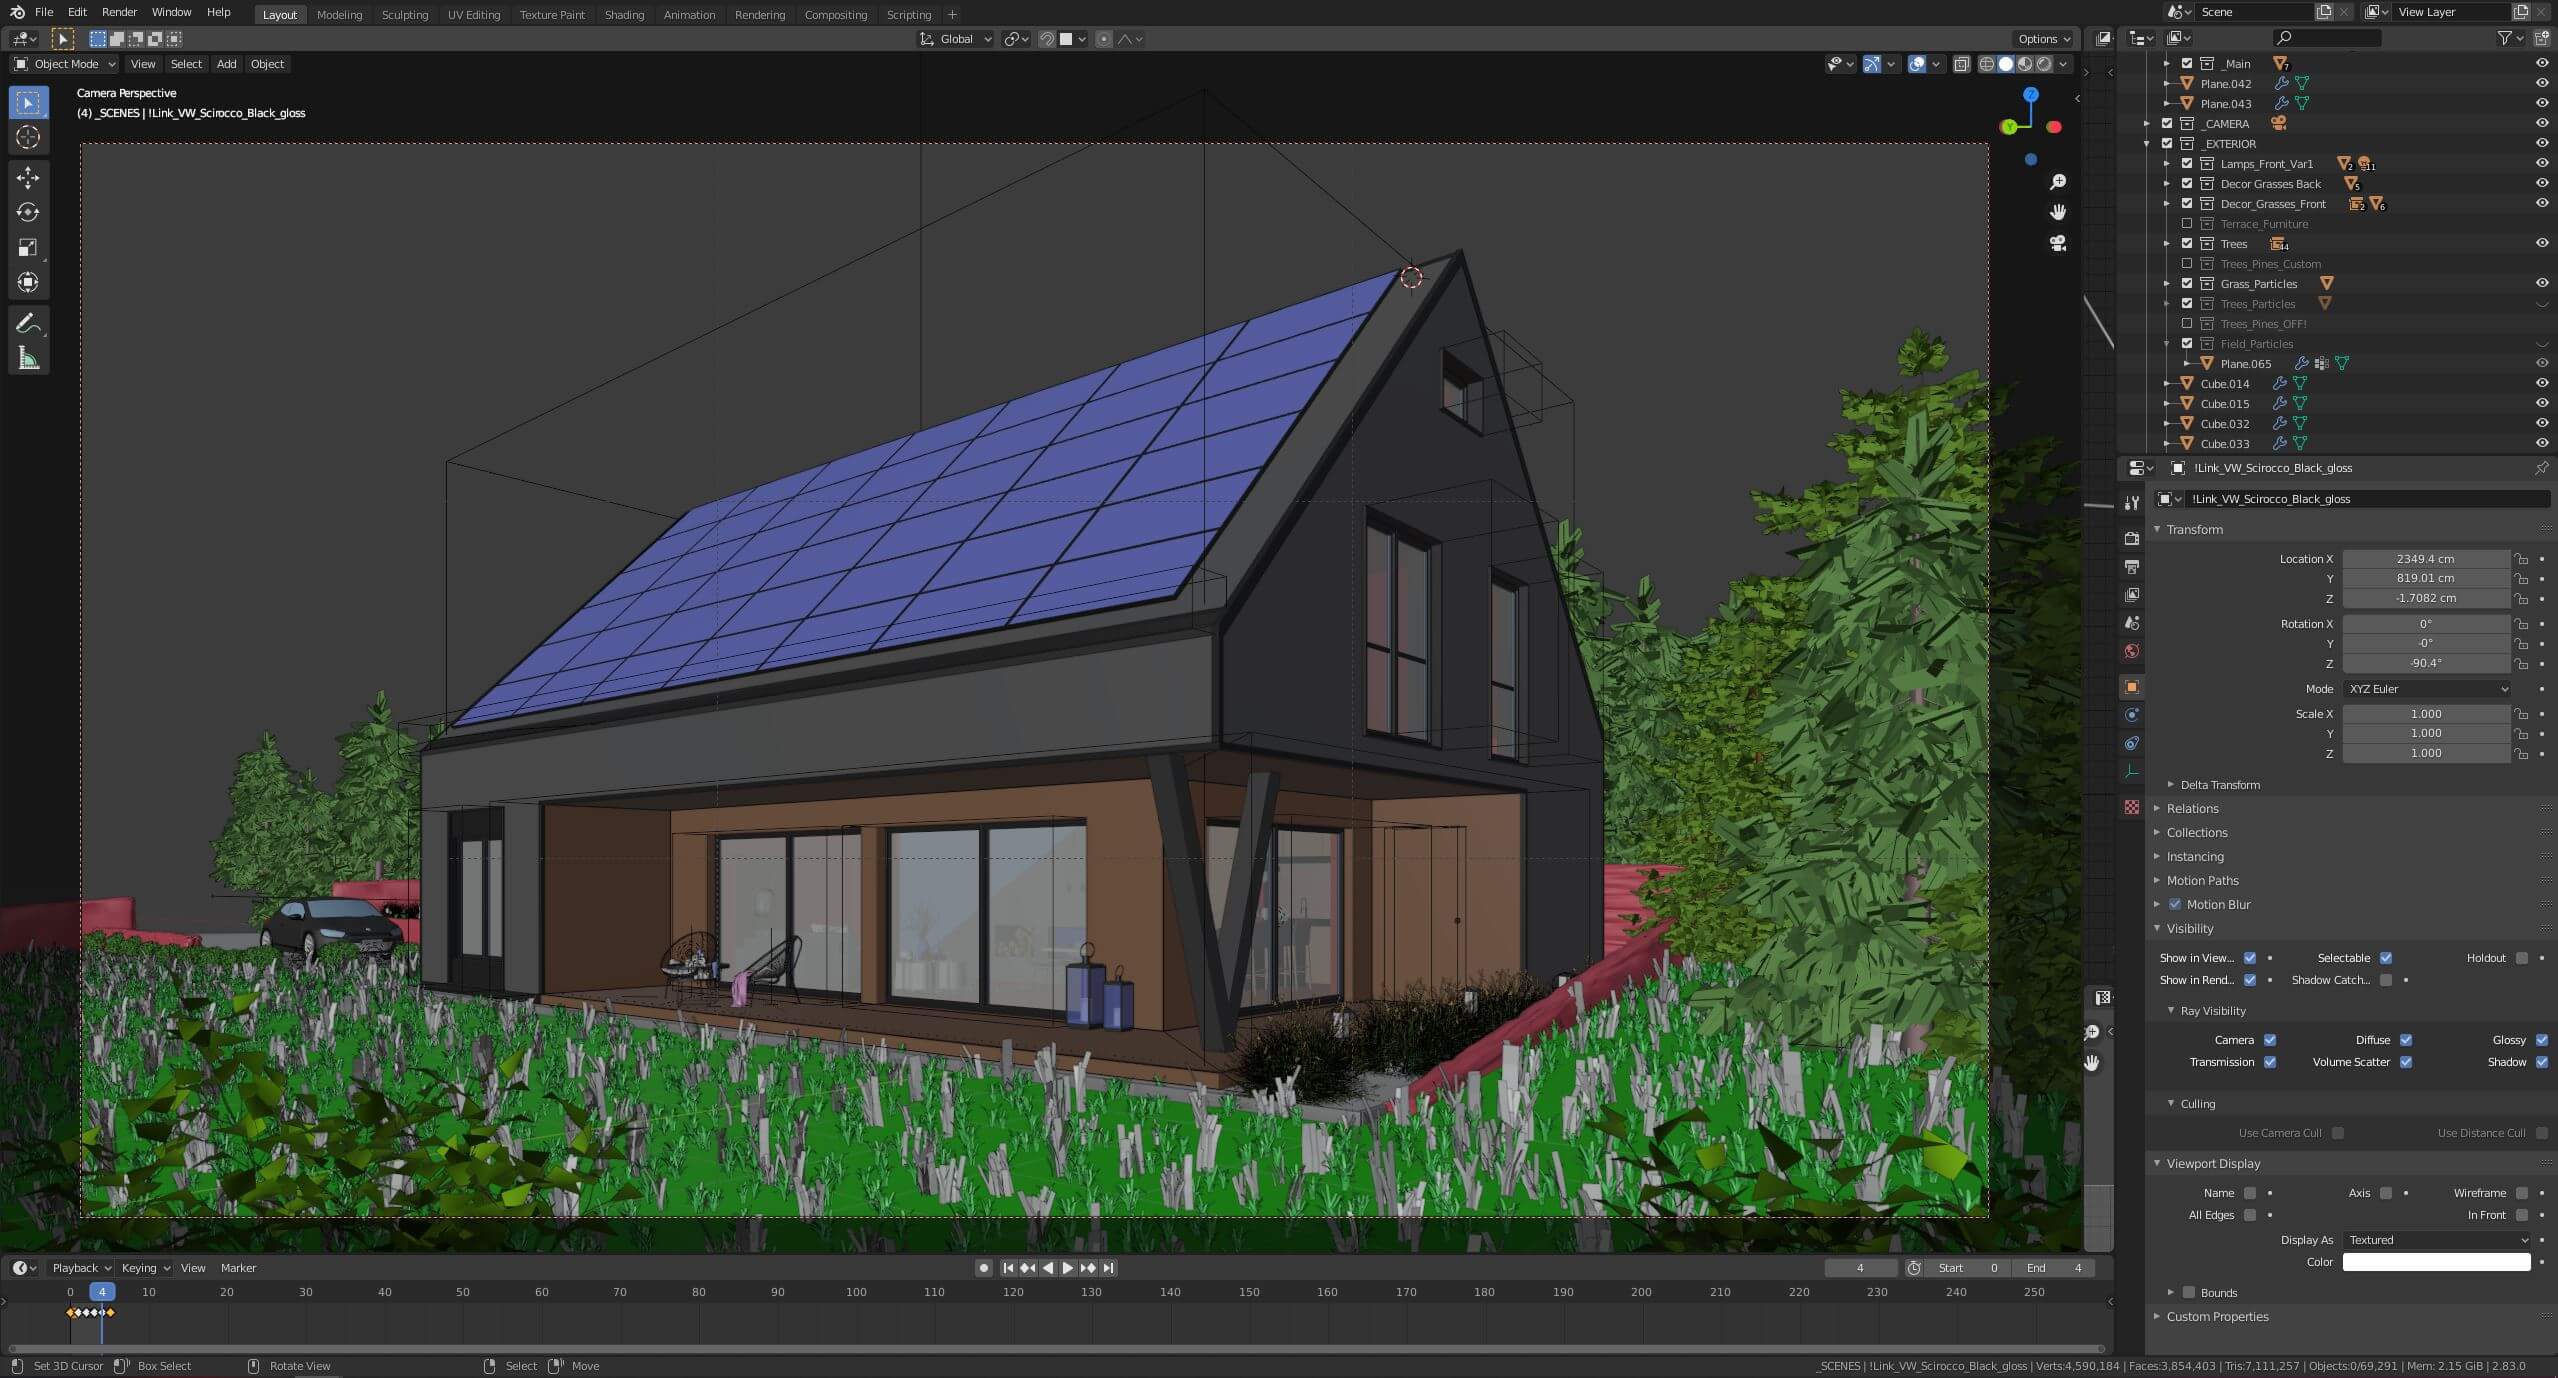
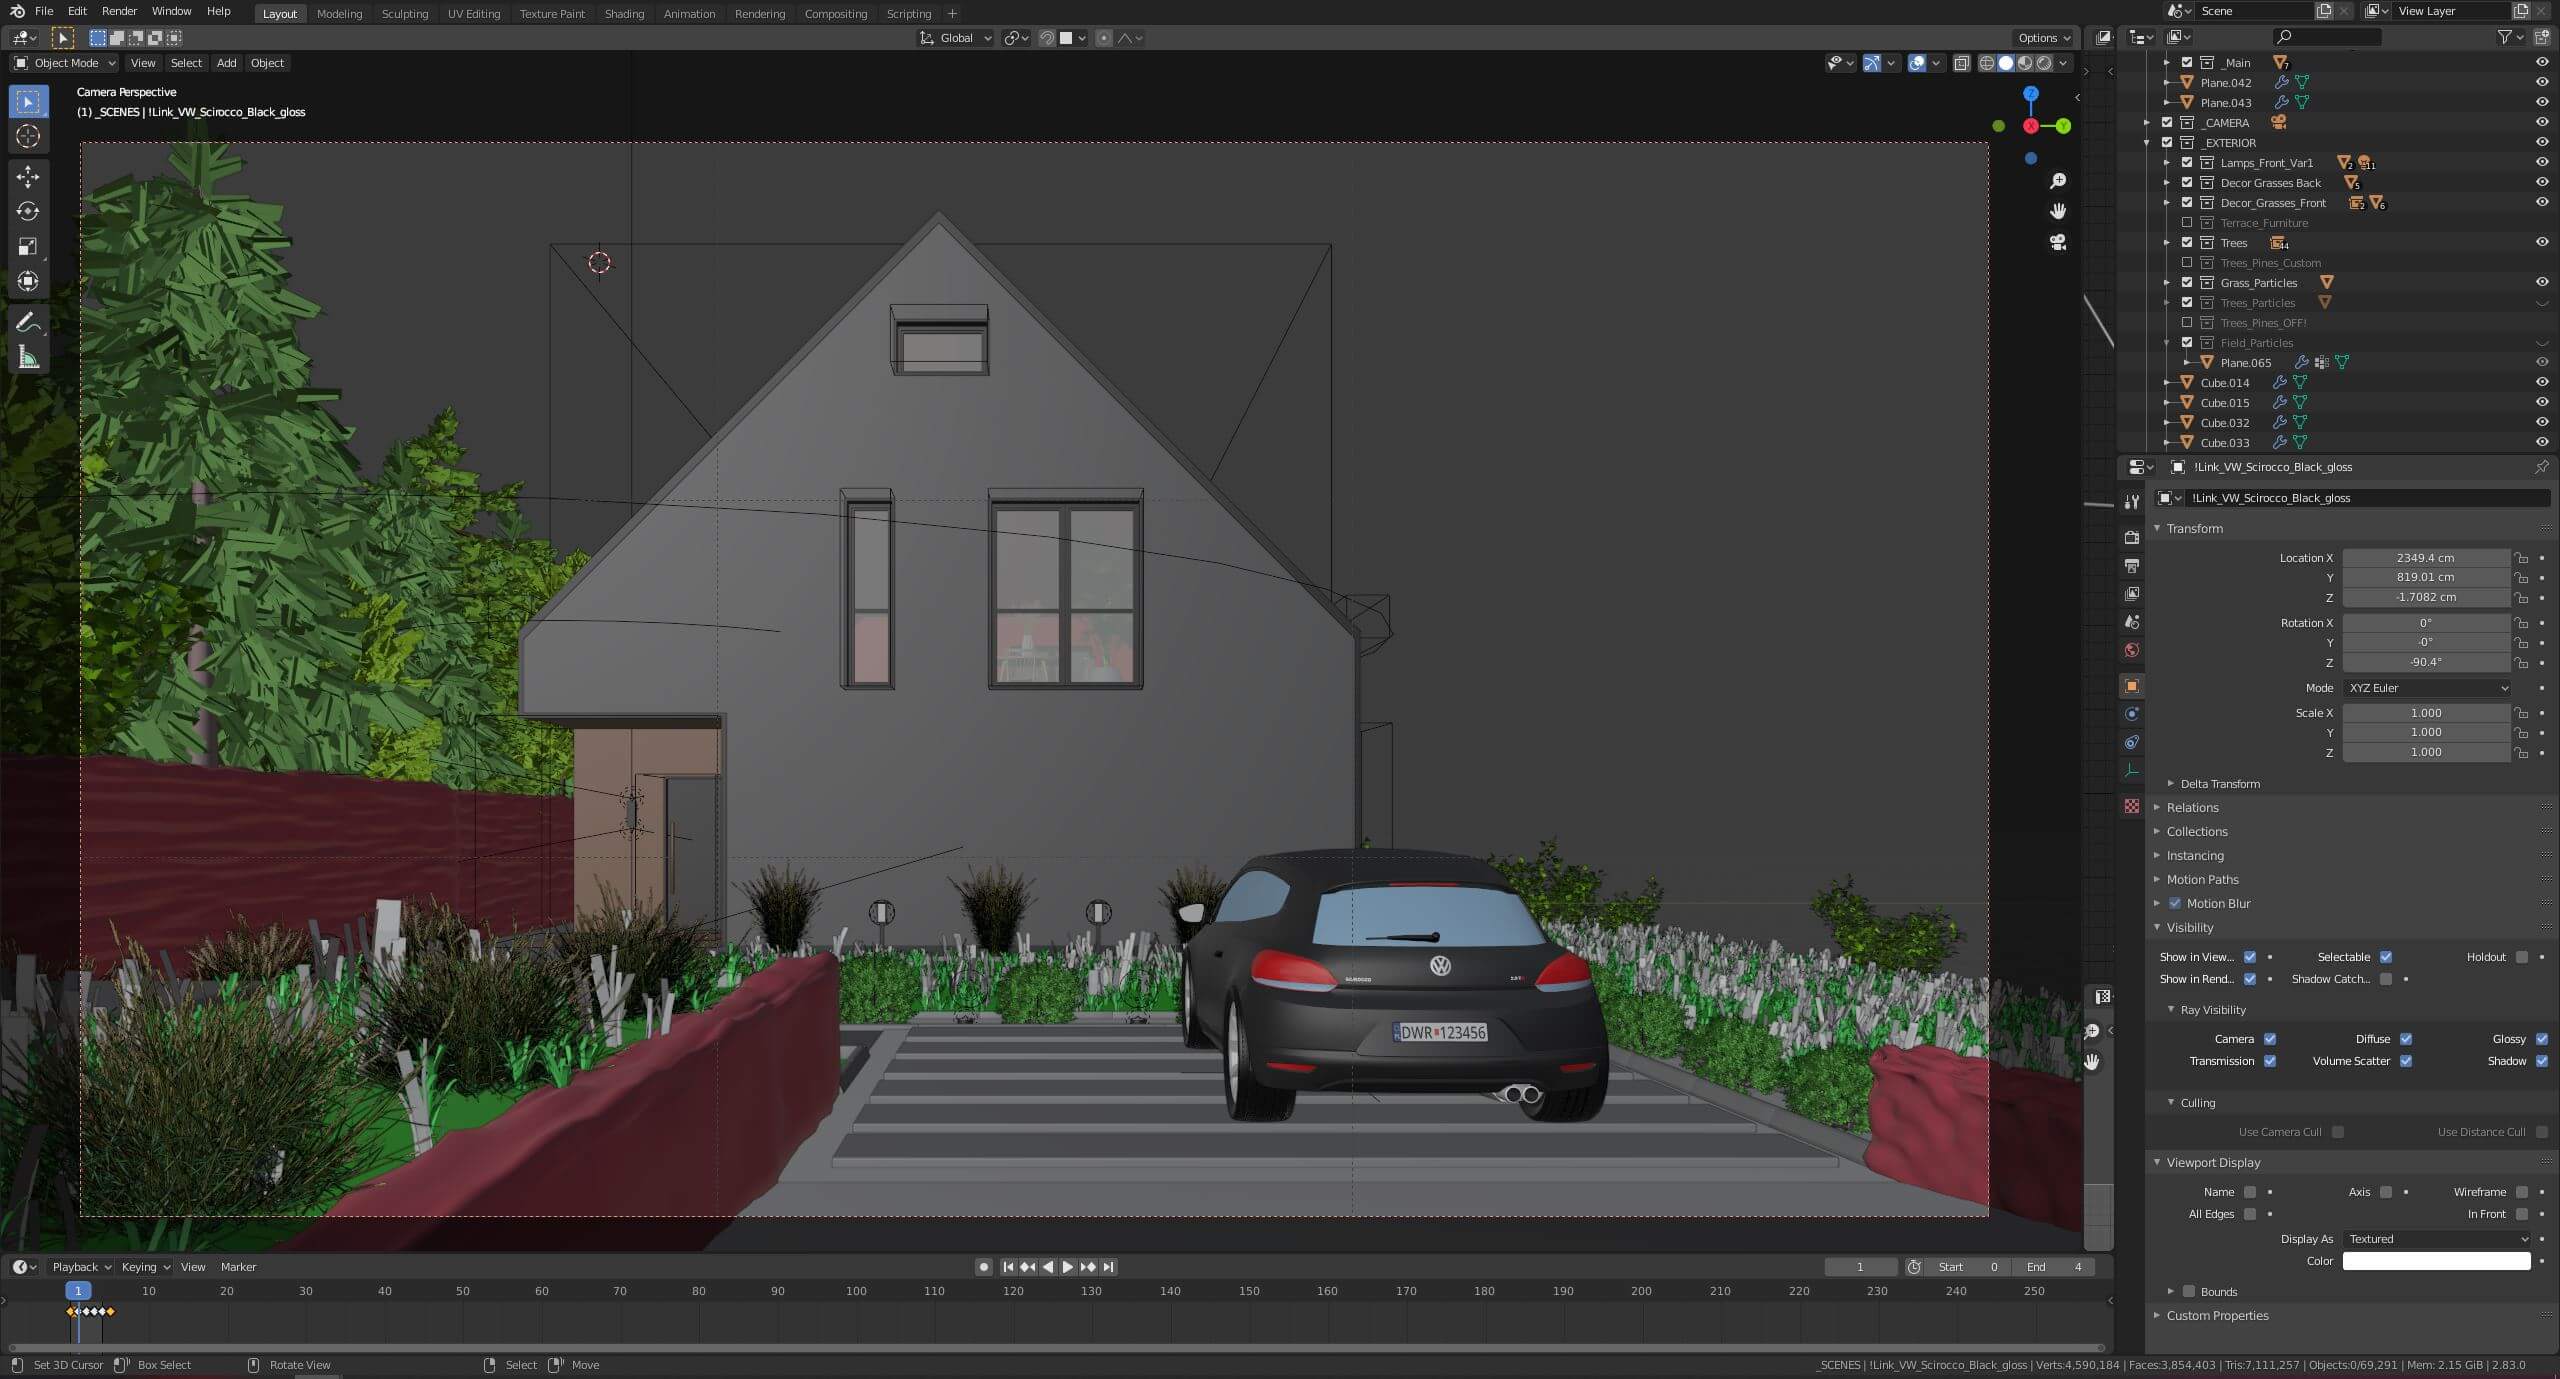
As you will see on the screenshots, most of the objects on the scene will be light grey. This is because I use a lot of collection instancing to make the scene lighter and more optimized. Both Botaniq and my Interior Essentials are using this technique to place objects.
Thanks again to Kamil Golec for sharing details about his work. He is currently working with digital.ARCH visualization studio in Wrocław, Poland. Here is his personal portfolio in ArtStation.
As mentioned by the artist, he makes extensive use of a library of assets developed by his studio: Interior Essentials. The library is available from the Blender Market.