

How to quickly align furniture models for architecture in Blender?

In architectural modeling, you will find all types of designs and shapes used to define walls in a project. Some of them will use orthogonal walls in all spaces, which is great from a modeling standpoint. However, in a few of those projects, you will also get angled walls.
An angled wall might give you some trouble with the alignment of assets if you don’t have an exact value to rotate each asset. Most CAD systems offer an align option to align two shapes or 3D models in any angle quickly. Does Blender have something similar?
From the default options, you won’t find anything working like an align tool in Blender. But, we can solve this with an Add-on. Do you know the Mesh Align Plus?
That is a free Add-on for Blender that includes an option to align 3D objects as if you were in a CAD system.
How does it work? After downloading the add-on and installing it in Blender, you will see a new tab at the Viewport sidebar.
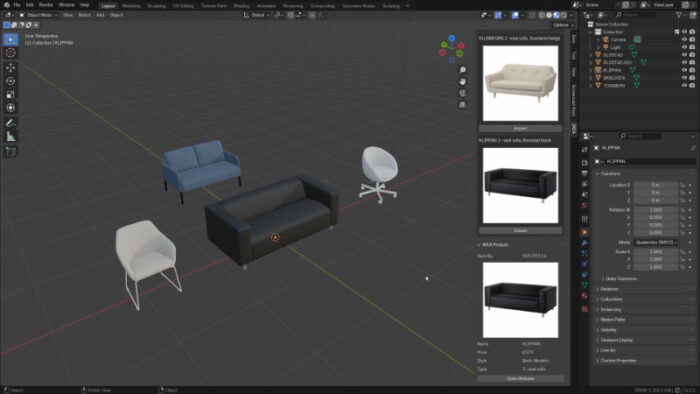
Those are all the options available regarding object alignment. A simple way of using the Mesh Align to handle furniture models is with the “Quick Align Planes.” To demonstrate how it works, we can use the scene below.
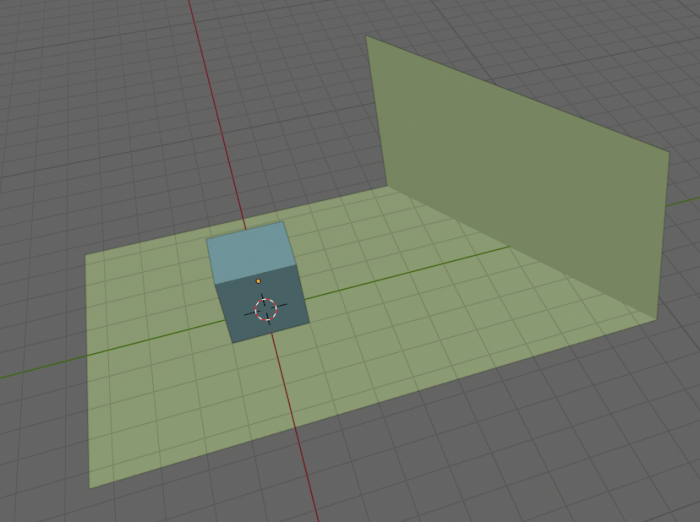
The inclined plane represents an angled wall using a random value, and the cube could be any furniture model. We will align the cube to the wall using the vertices from both the wall and the cube.
As a first step, you will expand the options from “Quick Align Planes” and select your wall object. Go to Edit Mode (TAB key) and select all four vertices from your wall plane.
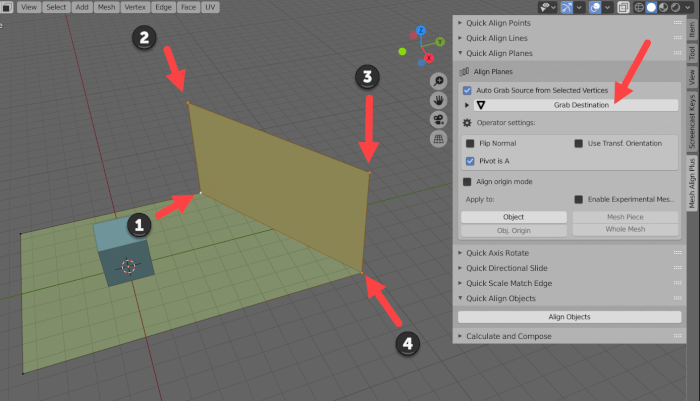
Press the “Grab Destination” button.
One important aspect of your selection process is to set a pivot point for your alignment process. By default, the first selected vertex is your pivot point.
For this example, I’m using the vertex at the lower-left corner as the pivot.
Go back to Object Mode (TAB Key) and select the model you wish to align with. In our case, the cube. Change the work mode to Edit and select the vertices to align. Notice the order in which I’m selecting each vertex.
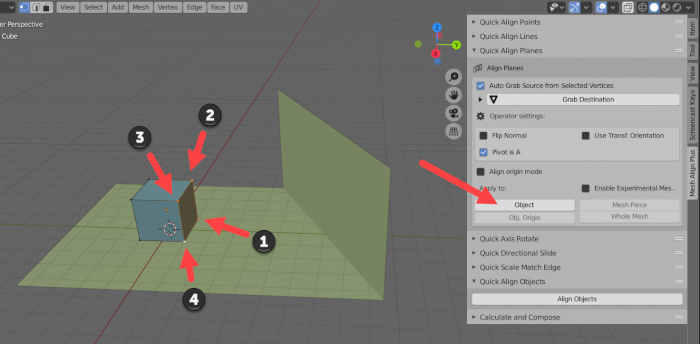
Once you select all vertices, press the “Object” button at the “Apply to:” field. That will move your cube and align it to the angled wall.
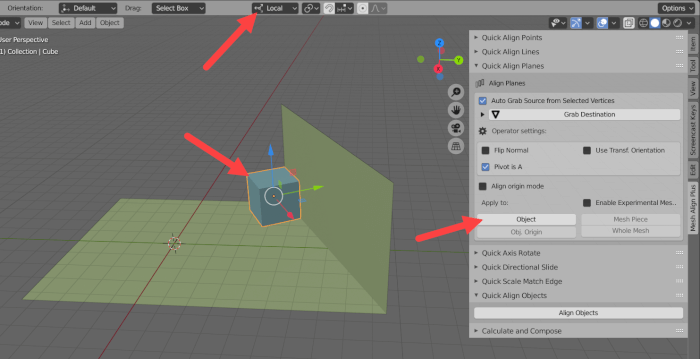
By changing your Transformation orientation to Local, it will be possible to transform your object using the G, R, and S keys and keep the same alignment to the angled wall.
That is a simple example of what you can do with this incredible and useful Add-on. Did I mention it is a free resource?
If you want to expand Blender modeling capabilities for architecture, I recommend you download this Add-on and the following scripts:
- SketchUp importer for Blender 2.82a released
- Fixing Blender snapping system: CAD Like Transform (Free Add-on)
- Creating BIM files with Blender (IFC Export updates)
- MeasureIt-ARCH: Dimension lines for architecture in Blender
- Blender 2.90: The SketchUp killer
Using Blender for architecture
Do you want to use Blender for architecture or render your projects using Cycles or Eevee? We have three books available that could help you!
They cover the use of Blender for producing architectural content and also all information you need to render projects in real-time:
- Blender 2.9 for architecture: Modeling and rendering with Eevee and Cycles
- Blender 2.8 parametric modeling: Drivers, Custom Properties, and Shape Keys for 3D modeling
- Blender 3.0: The beginner's guide
- Blender 2.8 for technical drawing
- Blender Eevee: The guide to real-time rendering with Blender 2.8
You can get them in both digital and paperback formats. By ordering those books, you will not only improve your skills with Blender for architecture but also support Blender 3D Architect.
