

How to setup a render farm in Blender 3D and Indigo Renderer
The look and feel of an image is very important for any kind of rendering related to architectural visualization. The challenge to produce a photo real image is sometimes difficult to overcome, and may let some artists disappointed with their first results. I see that all the time with my students, since they want all renders looking extremely realistic since the beginning. A few days ago I'd published a link to a post at the CG Society forums, where a few artists were pointing out solutions and tips to create a photo real rendering. One of those tips was about the type of render engine used for the project, where an unbiased render engine could make the difference.
If you have ever used am unbiased render engine before, like Indigo Render or LuxRender with Blender 3D, you may have found that the level of realism generated by those renders is incredible accurate. This is because of the nature of an unbiased render engine, which is based in physical aspects light behave and can also simulate chromatic aberrations. That's why sometimes all we have to do to create a great image, is point out the direction of light and place the camera. With the materials and textures configured, hit the Render button and wait until the image is generated.

But, there is something tricky about unbiased render engines. In theory the renders managed by those engines could last forever! In this type of render, we see a complete image right after the render starts. The image is complete, but very grainy and blurred. As times passes by, more interactions are made and we see a cleared image.
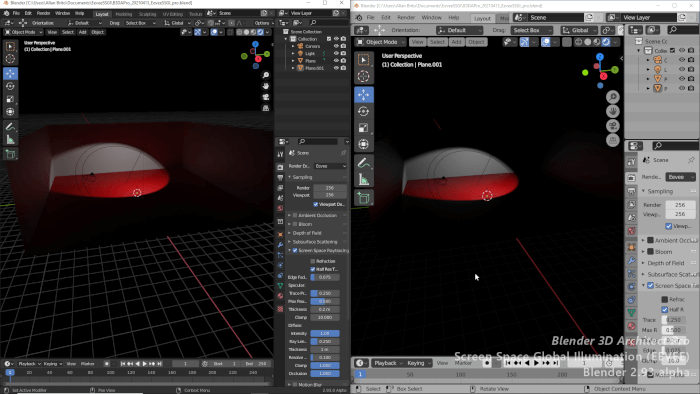
Along with the high level of realism, the unbiased render engines usually requires long render times, and for bigger images this can really be a long time for a single image. How can we speed up the rendering? One the ways we have to speed up the render is to use a small render farm to use more processor during rendering. If you use Blender 3D and Indigo Renderer, and wants to speed up you render, this short but effective tutorial will show you how to setup a render farm with Blender 3D and Indigo.
In the tutorial we will learn how Indigo can be setup to work in slave mode, and receive render jobs from other Indigo instances. The process can be controlled directly by Blender, with the use of Blendigo. If you have a home network or a college laboratory available, I strongly recommend you to try the tutorial. You will be amazed with the performance gain with a distributed render.
The tutorial is only for Windows machines.

I’m looking for how to setup a renderfarm for blender3d files on my mac!
Who can help?
This is not something that you can achieved instantly, if you want to learn on this things simply patience is all your need. I got interest on this post and once i know this one i will inform my classmates.