

Getting started with Blender 3D and LuxRender
In case you didn`t notice, another external renderer that used to be a Freeware is turning into a commercial software. Now it`s time for kerkythea to follow the same steps of Indigo and become a player against Maxwell Render and FryRender. The strange thing is that both softwares made the change to a commercial license almost at the same time! This is another reason to search and learn about softwares like LuxRender, which is an open source Unbiased render engine. The LuxRender is about to receive an upgrade to version 0.6 and at this moment they have a RC3 release available.
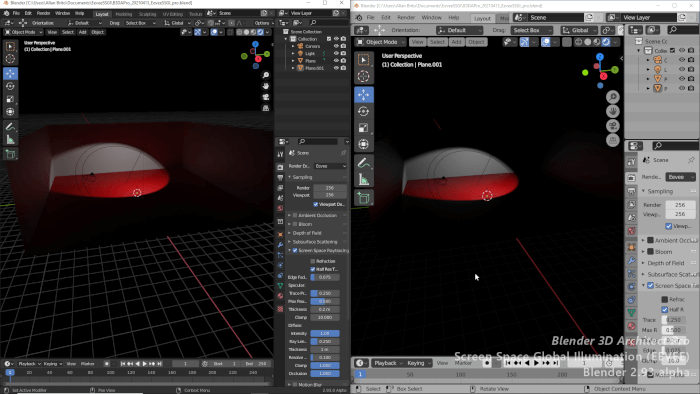
With this release, I manage to produce a short and basic timelapse tutorial, showing everything you will need to start working with LuxRender to create renderings for architectural visualization. The objective of the video is to model and render a simple interior scene, using a Sun Lamp to simulate the light of the sun.
Getting started with Blender 3D and LuxRender from Allan Brito on Vimeo.
The modeling process showed at the video is pretty simple and is intended to represent a basic interior environment, with a window to let the sunlight in. I leave one side of the walls without any surfaces, to avoid the need of use a material as a portal for light.
One the things that will please new user of LuxRender are the presence of presets for the render setup and materials. Just take a look on the video and notice that I didn't made any changes to the rendering parameters, the only thing I did was choosing one of the presets available to render an interior scene. For materials, we have a great list of presets for transparent materials with IOR values for water, glass, jewelry and a lot more.
If you want to use a texture in your scene, just remember to setup in Blender a material and a texture with UVs and in LuxBlend, you have to add the texture map to a channel of the material. In this tutorial I have added the path to the texture map in the diffuse channel of the material.
At the end of the video, I made a few pauses on the recording to speed up the render. I still don`t have a computer capable of rendering that fast! If you want to start using LuxRender to create architectural visualization, just visit the download sections of the LuxRender official web site and download de renderer. The script to export scenes from Blender is included in the Lux file.
Hey, great intro video! Nice to see you using LuxRender.
On this scene, however, you could’ve closed all four walls without using any special material. Just increase the near clipping plane in the “Cam/Env” tab and the camera will peek thru the walls. Very useful for architectural stuff.
Hope to see more of this.
Abraços,
-Ratow
Thank you for sharing your knowhow 🙂
cool. Thanks for the video.
Cheers!