

One of the things that makes most users not migrate to Blender 3D is the fact that they don't know for sure, if they will find the tools required to create the same 3d models created in softwares like 3ds Max. I see that all the time when I show Blender 3d to someone used to work with 3ds Max, Maya or other 3d suite. The best way to show how Blender can create models in a very similar way to those softwares, is by showing a comparison between Blender 3d and other 3d tools.
I was looking at some tutorials and found one that will suite quite well this comparison. An artist called Nick Moutafis, posted at 3d total a tutorial about the modeling process for a pillar in 3ds Max. The tutorial is pretty simple to follow and can be adapted quite easily to Blender 3D as well. If you prefer to watch a video on this tutorial, I have managed to record the tutorial. But, the narration is not in English. Follow the tutorial and then make a visit to the video link, to watch it step by step in HD.
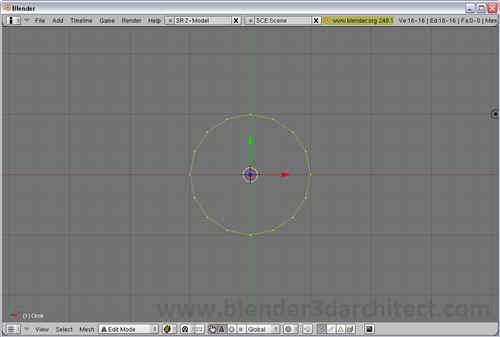
Here is how you can model a pillar in Blender. First of all, we will start with a Mesh circle with 16 vertices. Add the circle in top view.
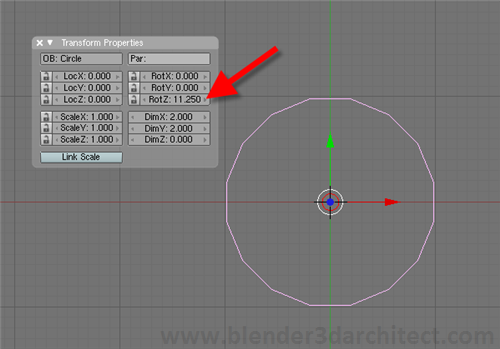
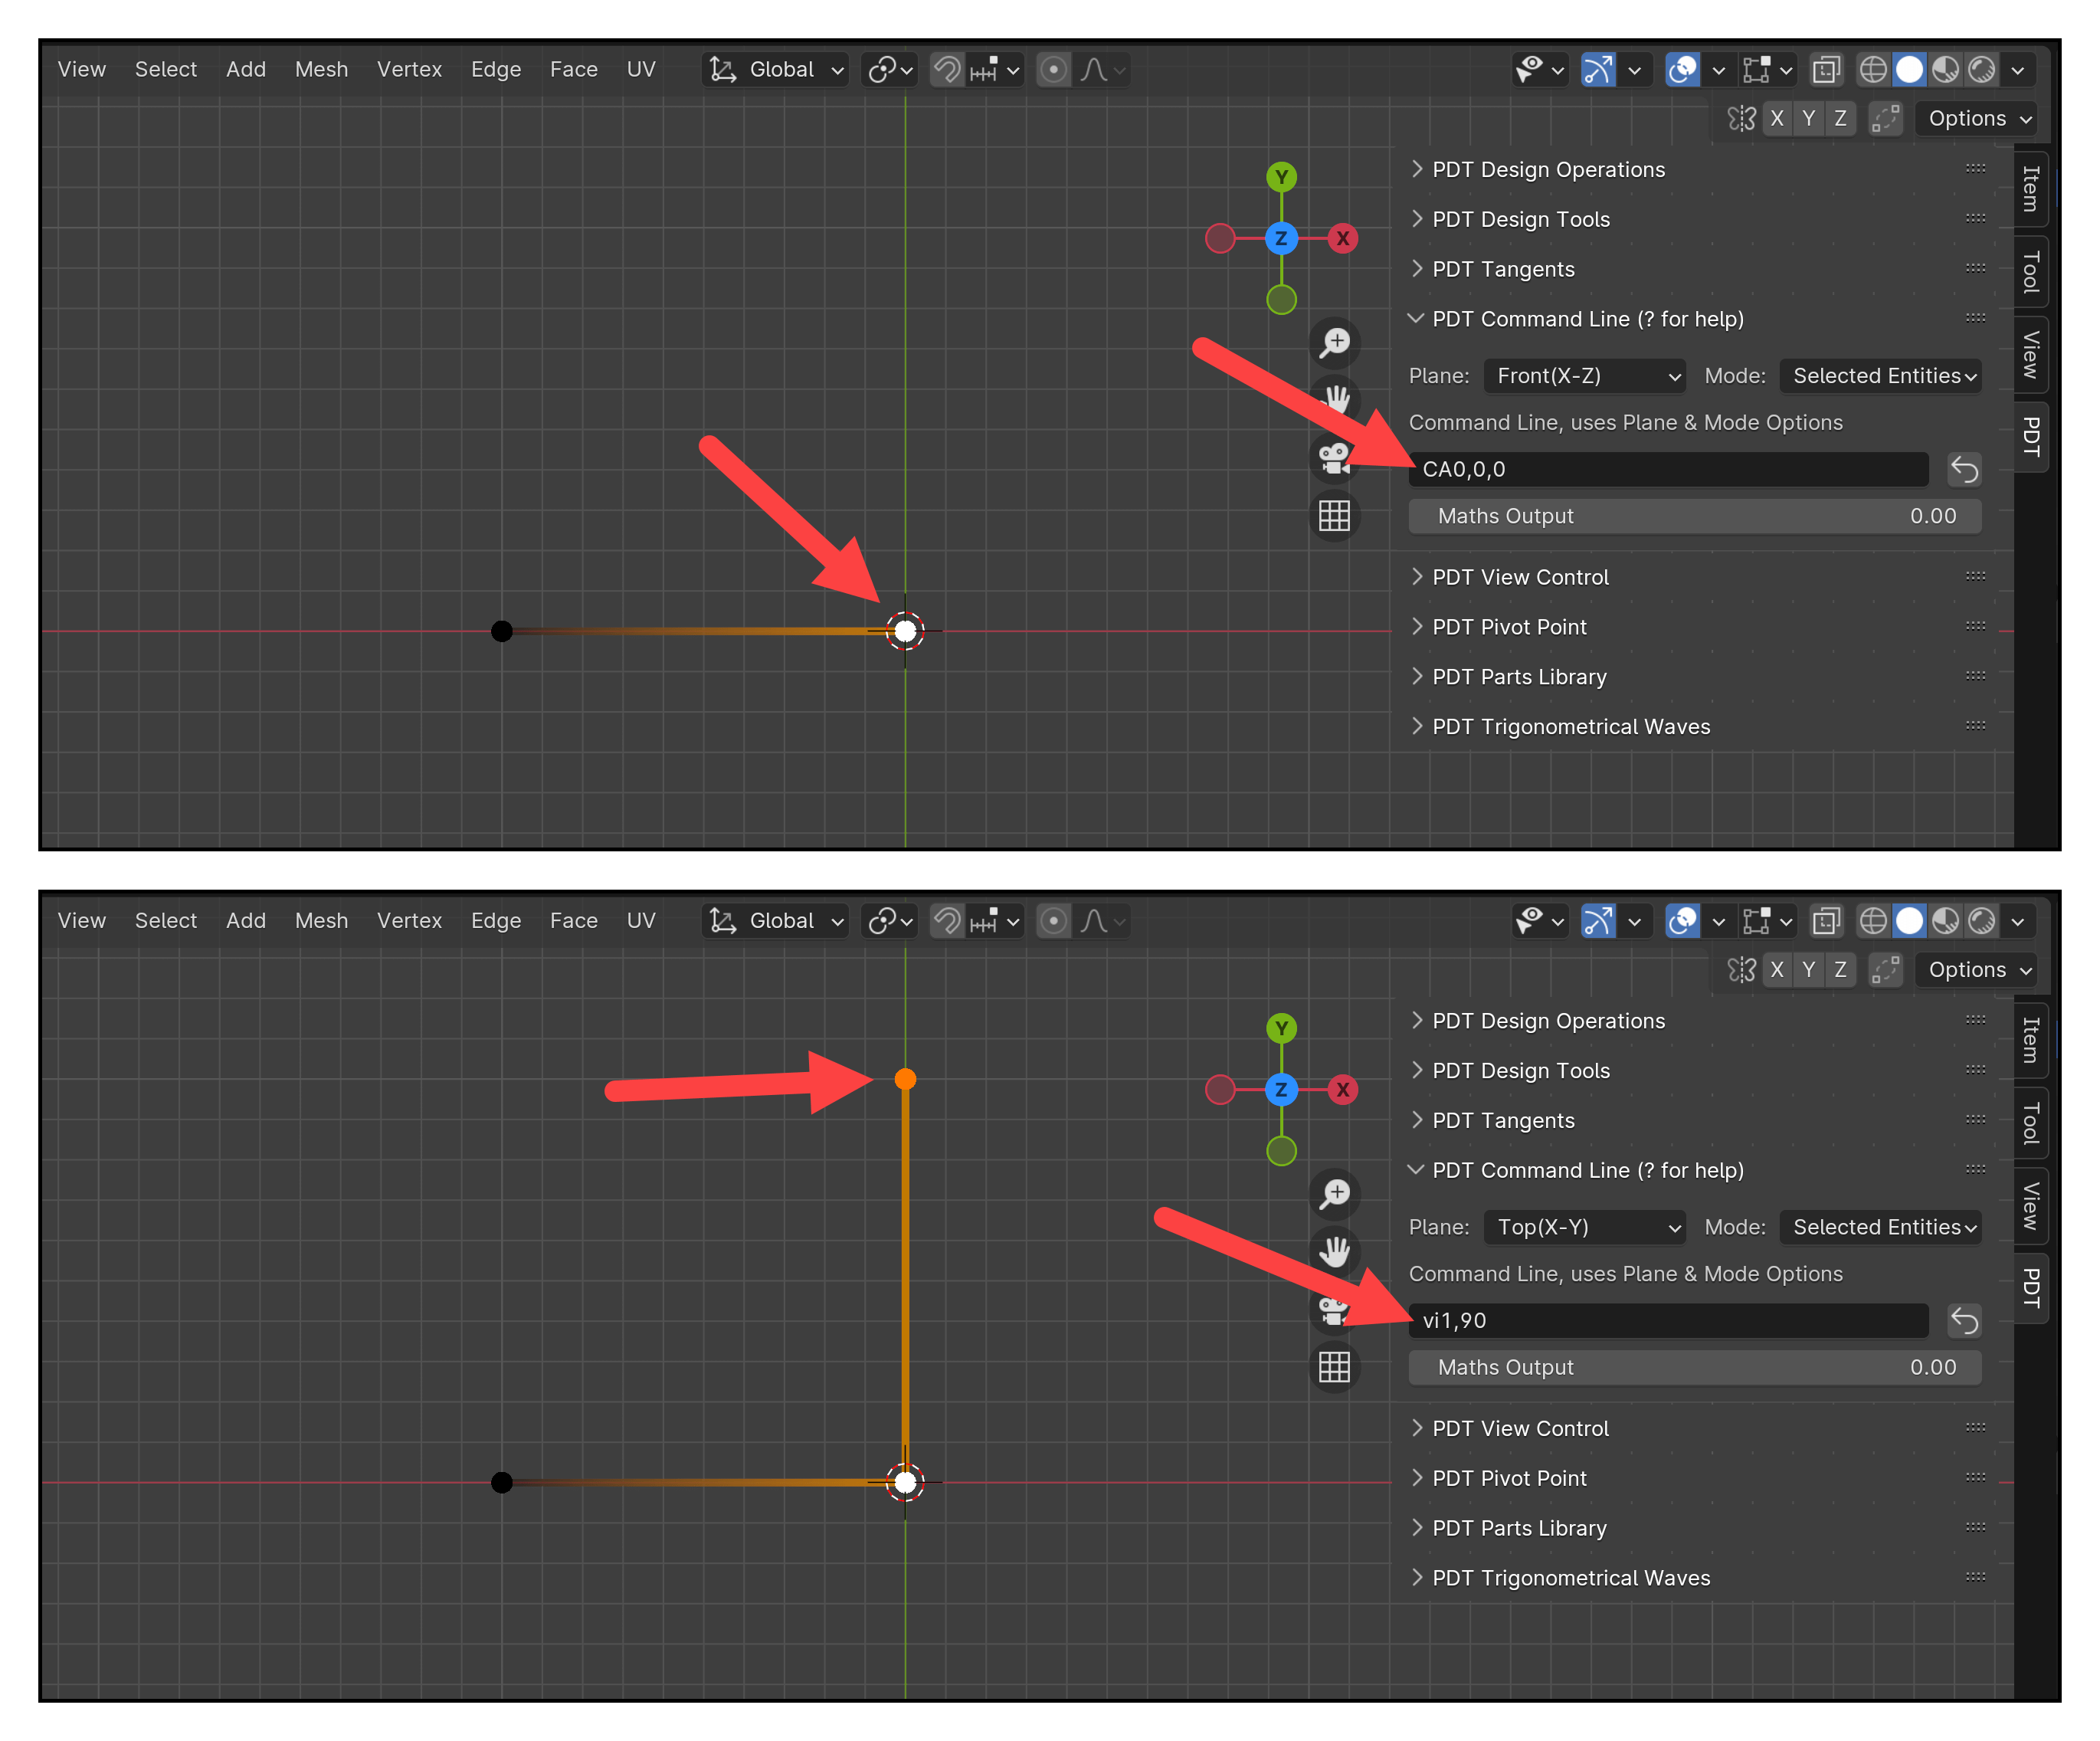
After we create the circle, rotate the object to make either the top or bottom edge parallel with the X axis. To do that, rotate the circle 11.25 degrees.
Now, erase all edges and leave only the top or bottom edge of the circle. This will be the basis for the pillar. Select this single edge and extrude it along the Z axis.
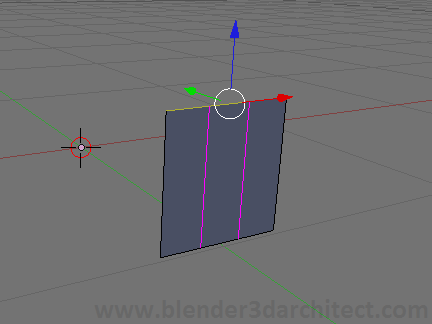
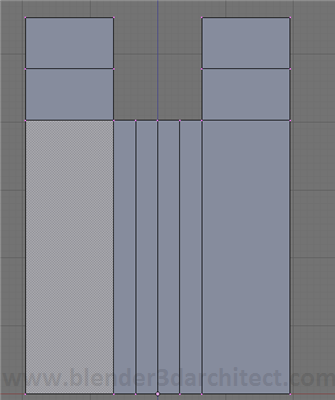
With the Face Loop Cut (CTRL+R), add some cuts to the face, following this sequence:
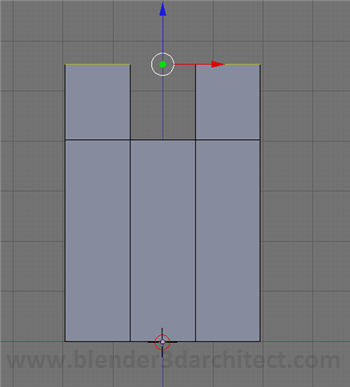
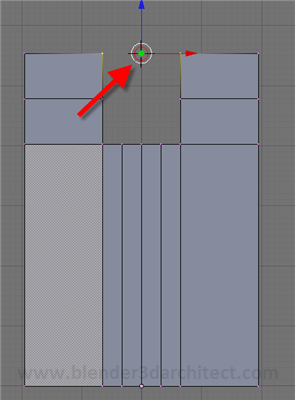
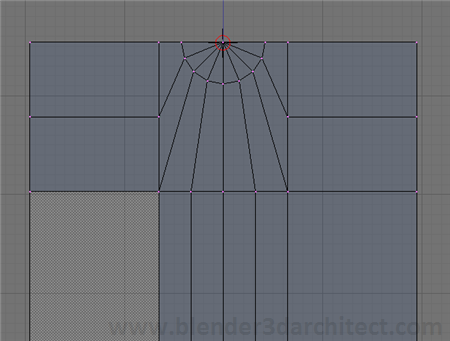
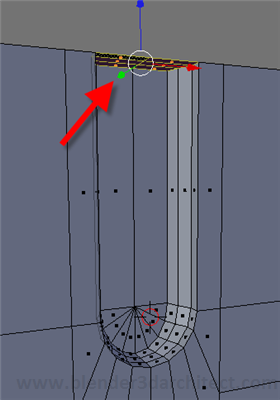
Place the 3d cursor right at the center of the two vertices that are located at the top center of the face. Select those vertices and with the SHIFT+S key choose Cursor->Selection.
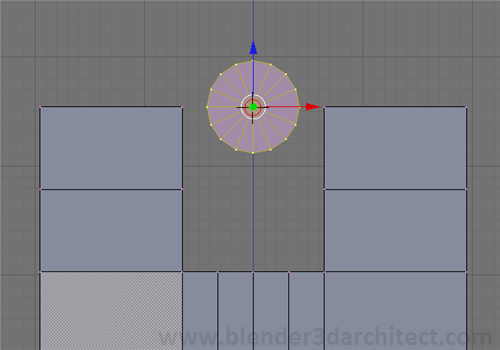
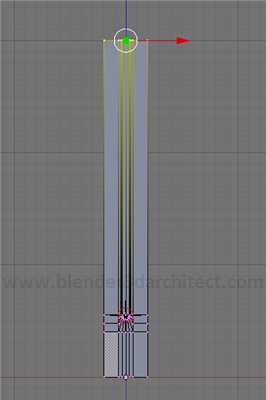
Create a mesh circle with 16 vertices and this time, press the Fill button. Scale down the circle and adjust it to the distance between the vertices, just like the image below. Select and erase the top vertices of the circle as well.
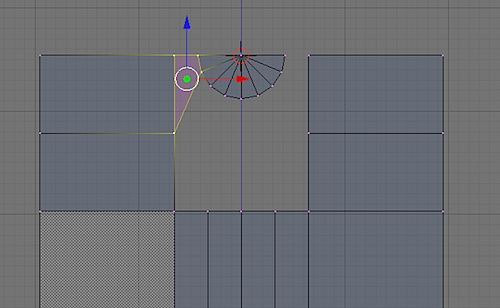
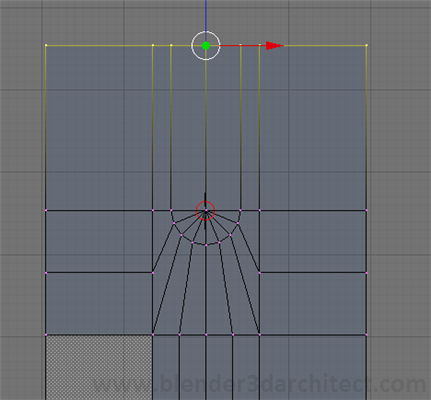
With the F key we will select four vertices and create faces that will connect the circle with the original plane. The final image will look like this:
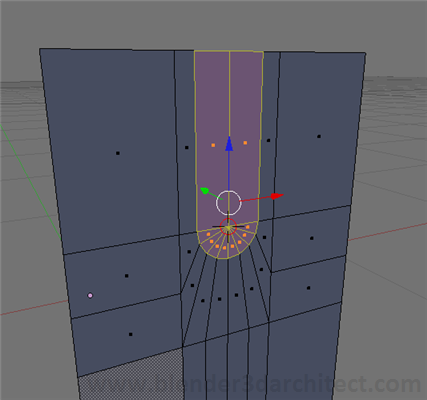
The next step is to select the faces pointed at the image below, and make some extrusions. Actually, for this model you should apply three extrudes, and make scale down the faces, constraining the scale to the X axis. Don't forget to erase the top faces of the model.
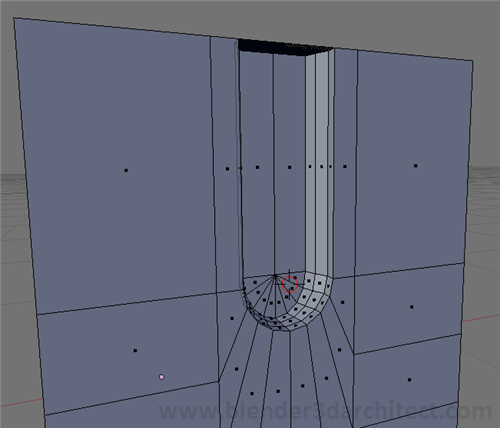
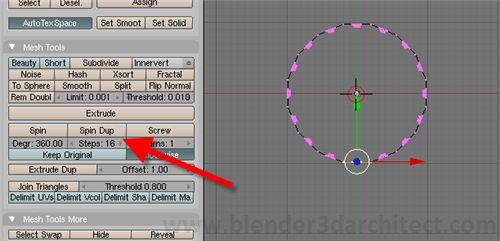
Move the edges up, to give the pillar a height. As a final step to the modeling, use the SpinDup tool to copy the objects around the center point/3D cursor of the object.
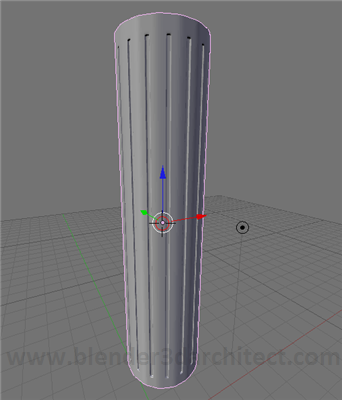
A mirror modifier will make a copy of the object at the Z axis and create the final Pillar model. You can finish up the model by adding some details to the lower and upper part of the Pillar, selecting an edge loop and with a few extrudes and a Subsurf modifier, create ornaments for the model. Now it's up to your imagination.

this is very bad u need to explain how to do everything. I am new to this and i didnt know how to erase the edges.
Hi Bobbby,
Select the edge and press X or Del.
😉
Great tutorial! As a slight improvement it would be good to ensure the pilar is more rounded rather than flat along the sides with the extrusions.
Great tutorial. I’ve modeled at least a thousand fluted columns. . .I can’t believe I never thought of this.
Johnathan, that is very easy to do. Simply start off with a circle of 48 vertices, and after rotating it use three faces instead of one.
but really, as long as you understand the basic process of the tutorial, you can swap out any number of faces and indents to get the effect you want.
I miss boolean operations and revolution transforms with instancing.
I came at modeling from the technical side, where making things like this would be fast and painless. 3dsMax was always awkward and weak for a lack of many of the features I became accustomed to, and the demands of stretching my own mesh to nodes is even more painful.
Isn’t there a quicker or at least less labor intensive way of making simple features in blender?
Hmmm, it looks simple and hard at the same time, will need to try it by myself.