Bathroom renovation with Cycles in Bern, Switzerland (Profile)
The project profile series of Blender 3D Architect is a collection of articles aiming for feature projects related to architectural visualization. We invite talented artists to share additional details about each project to demonstrate how they approach each stage. And also allow each author to publicize their work among our readers.
How does it work? It is like an interview, where we sent a couple of questions about a project for the artist.
If you want to check previous project profiles, visit this link.
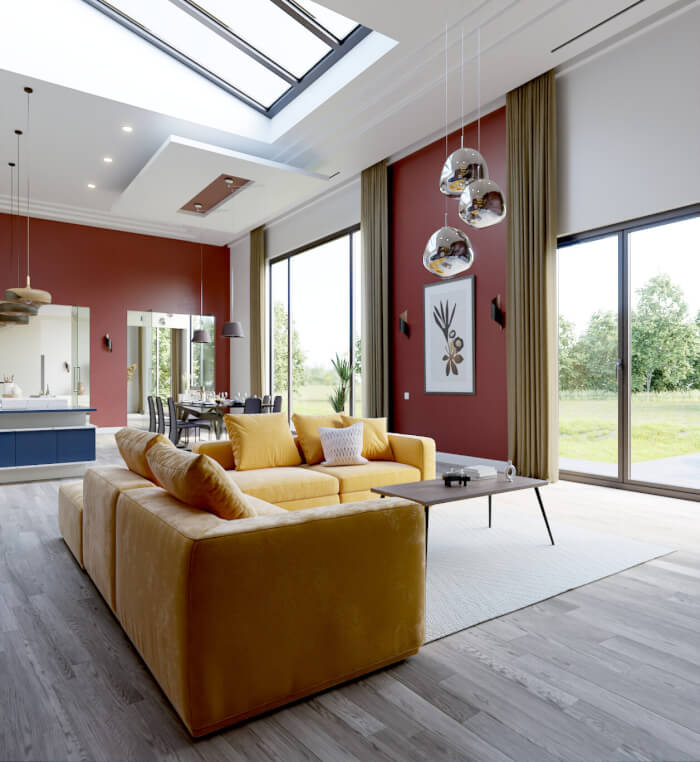
Today we have a project named Bathroom renovation from digital artist Tobias Schmid, which used Blender Cycles to render a huge collection of images from this renovation design.
(Click to enlarge)
What is unique about this project? One of the challenges in a project like a bathroom renovation is the size and scale. An artist usually needs to handle camera FOV with the skill to display all necessary details. Another plus for this project, which might inspire other people, is that it is a debut commissioned work for an artist that was only using Blender as a hobby. The overall result is impressive and fulfills the main objective, which is to visualize the renovation proposal.
Let me thank Tobias Schmid for sharing the details about the project with Blender 3D Architect readers.
Was it a commercial project? What can you tell us about the motivation for this project?
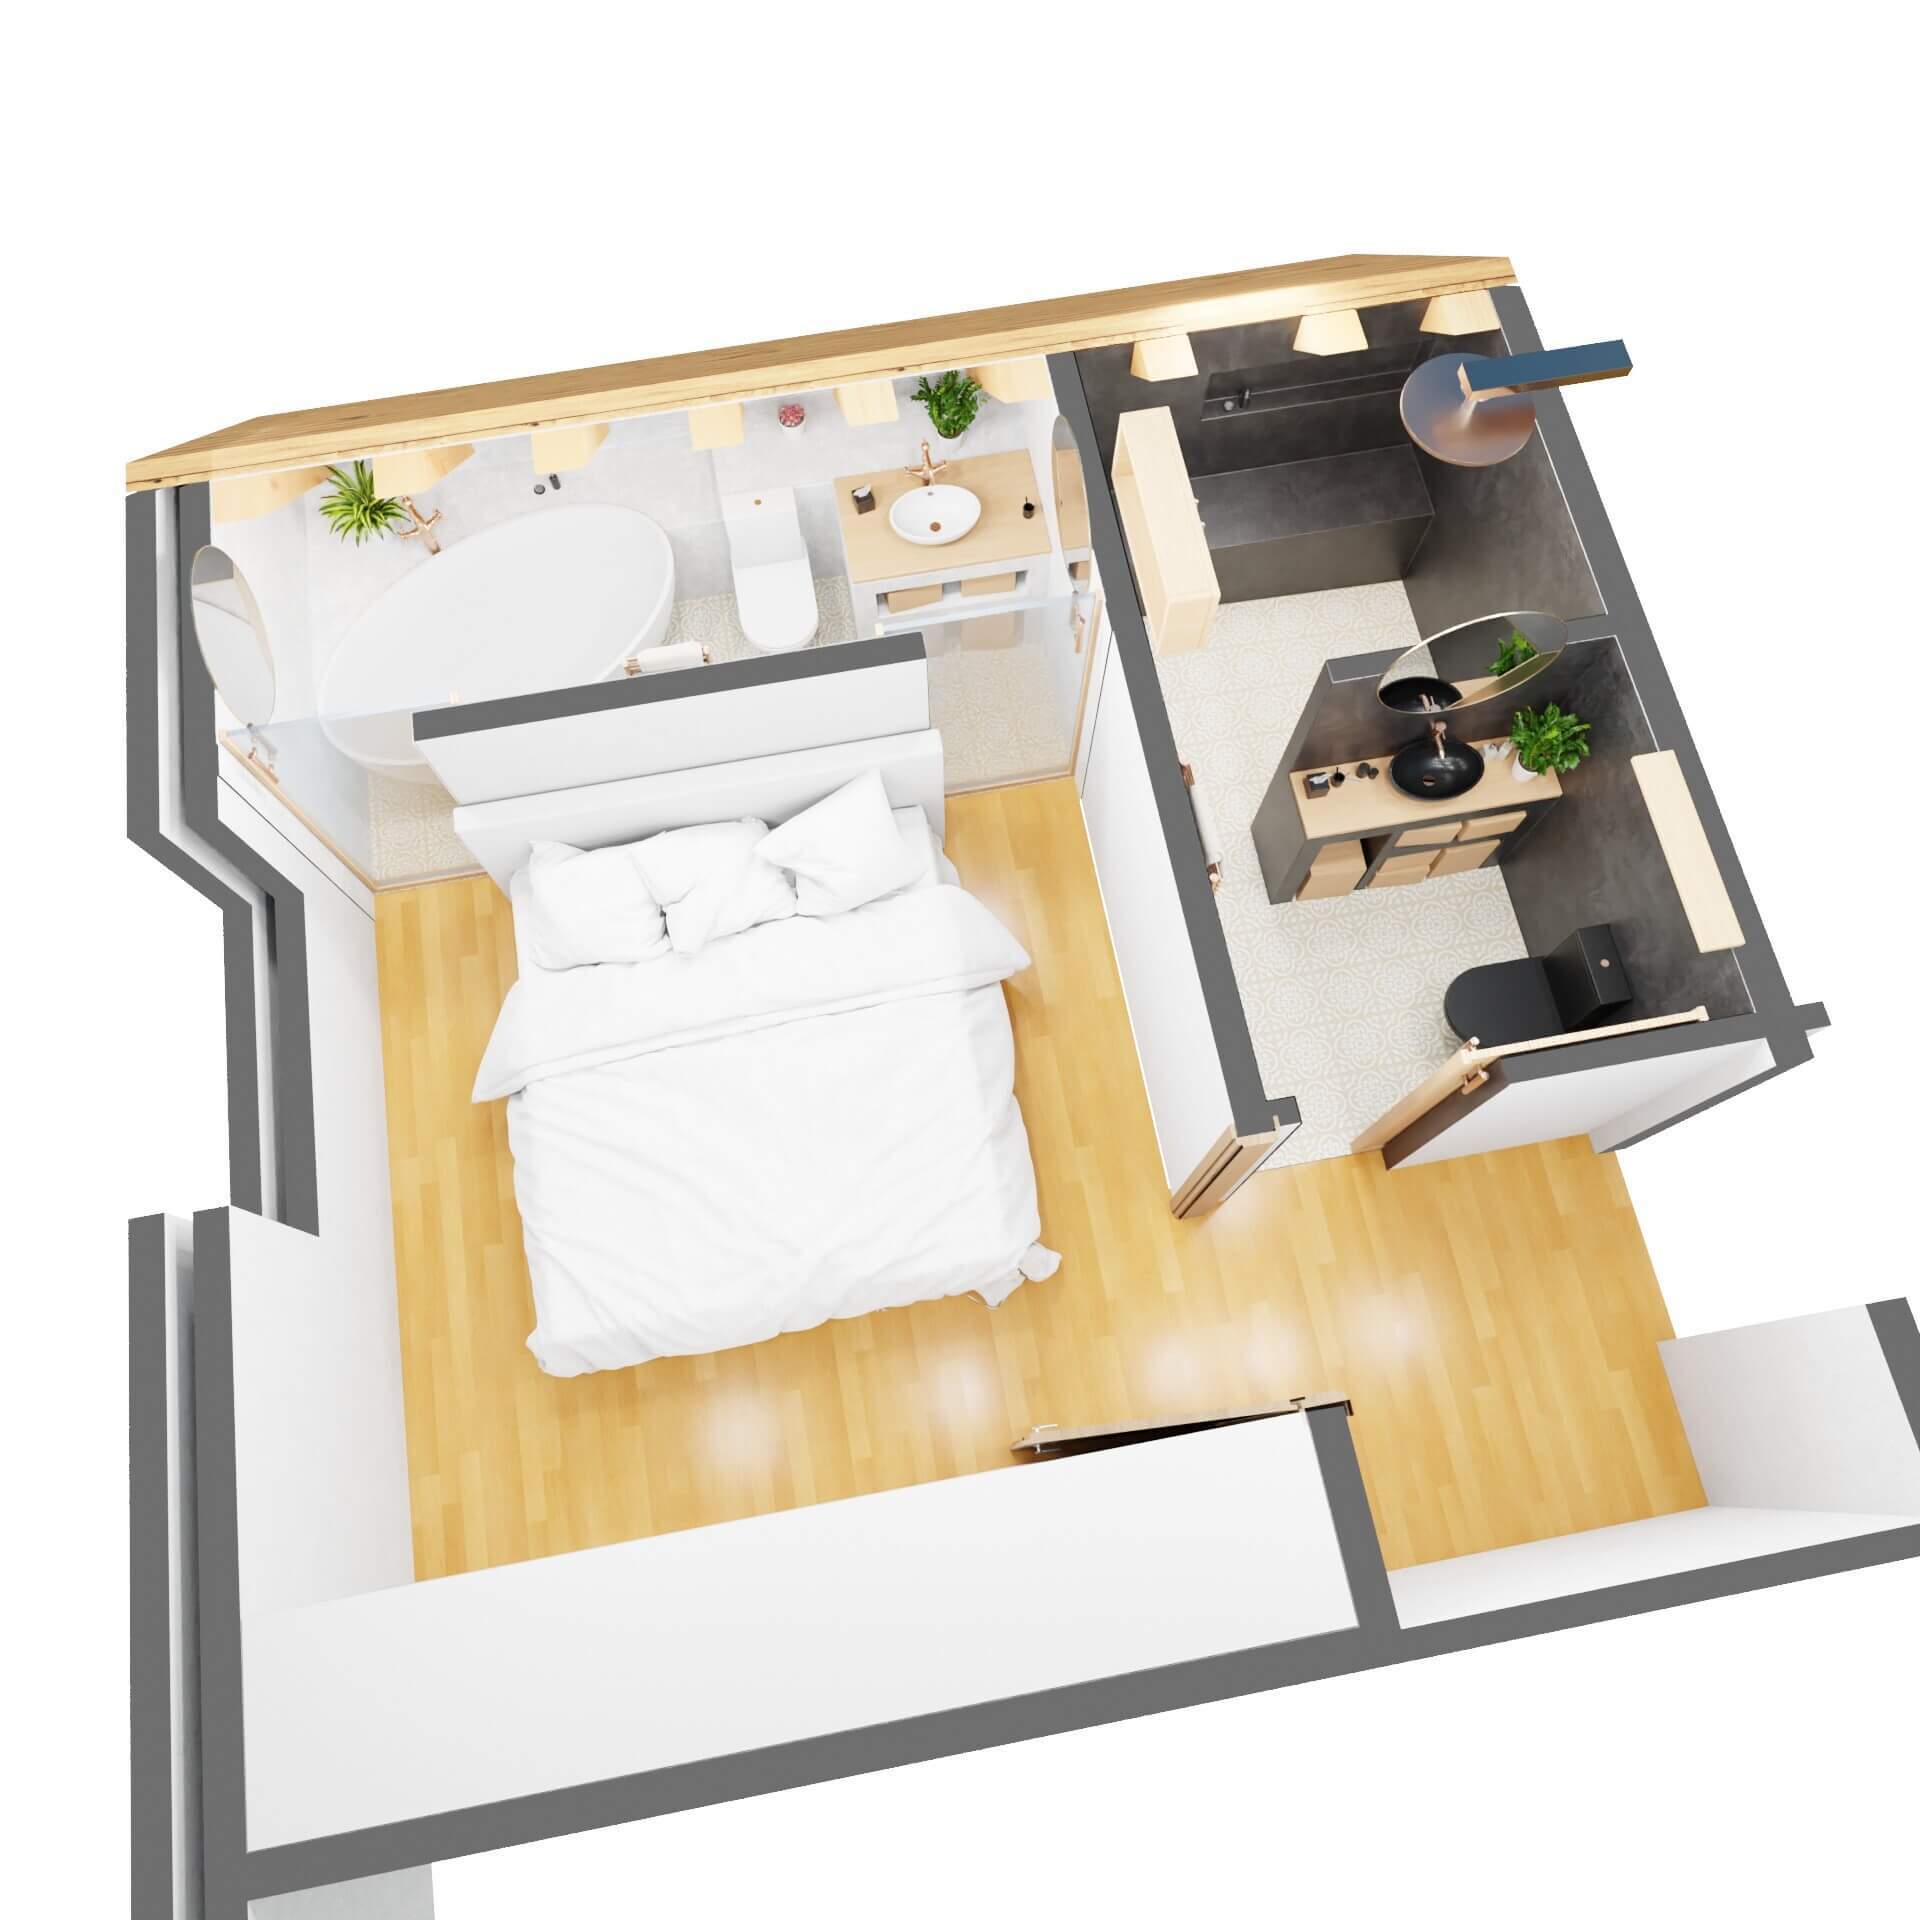
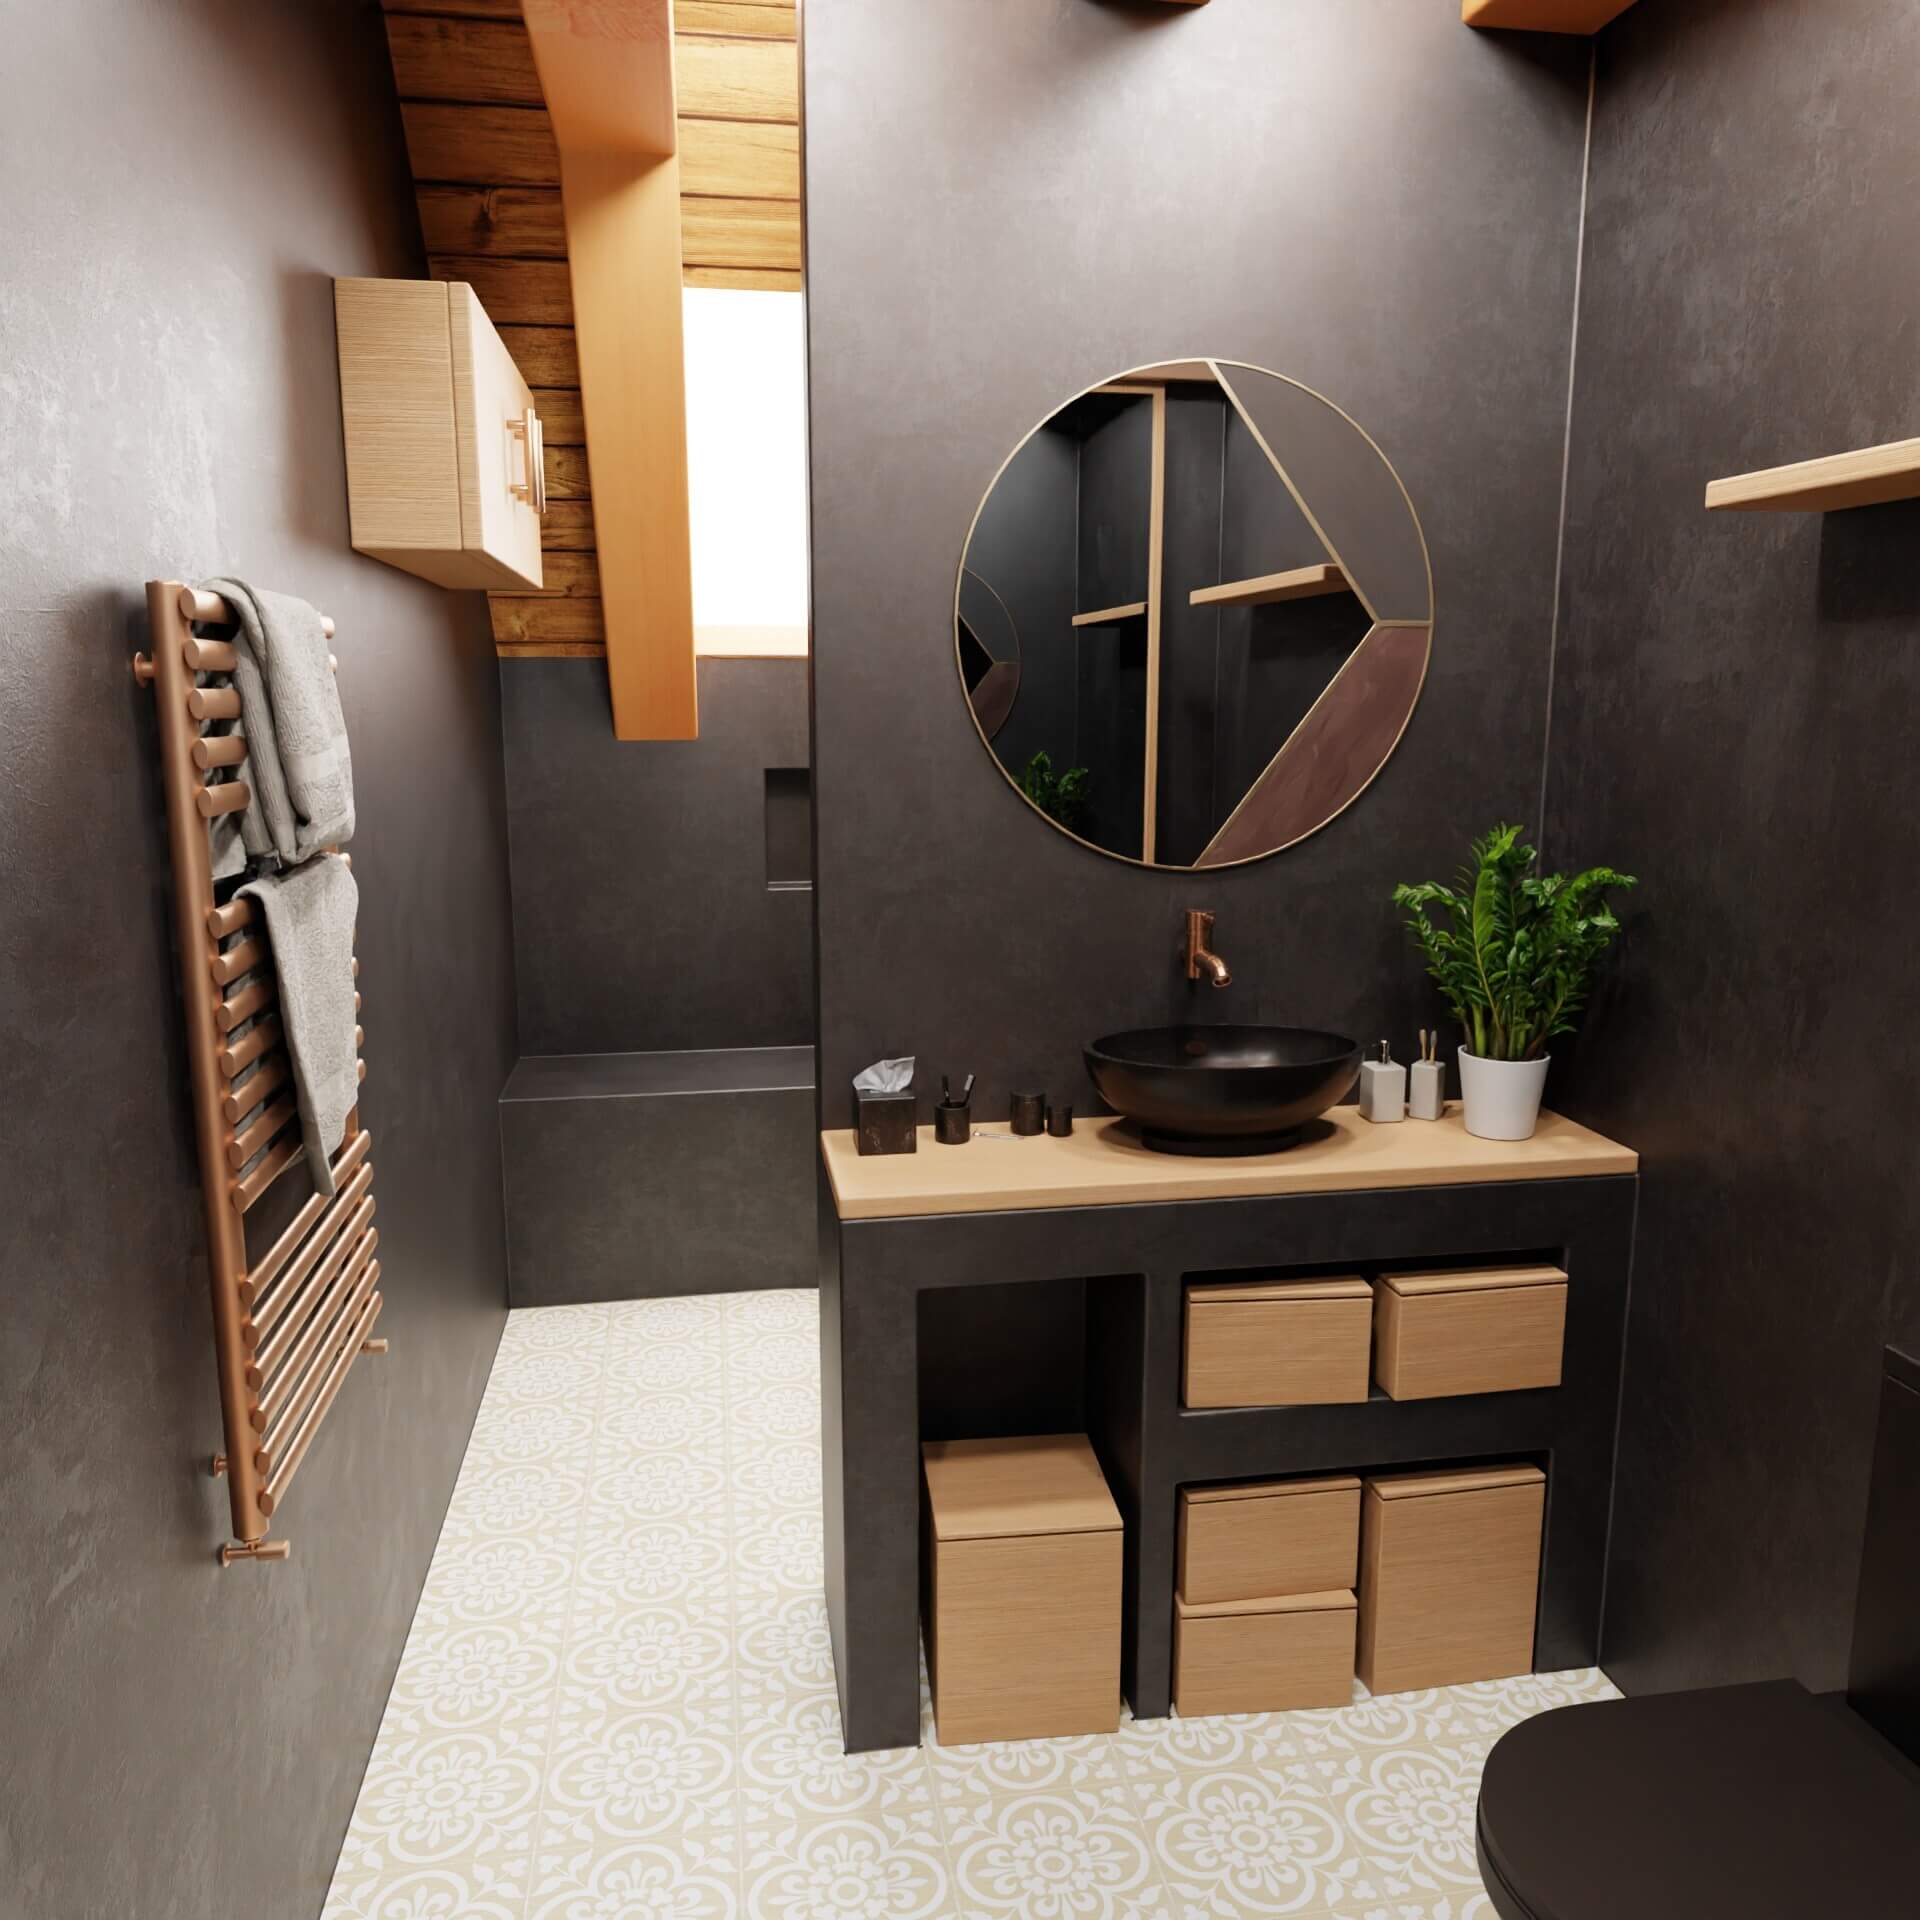
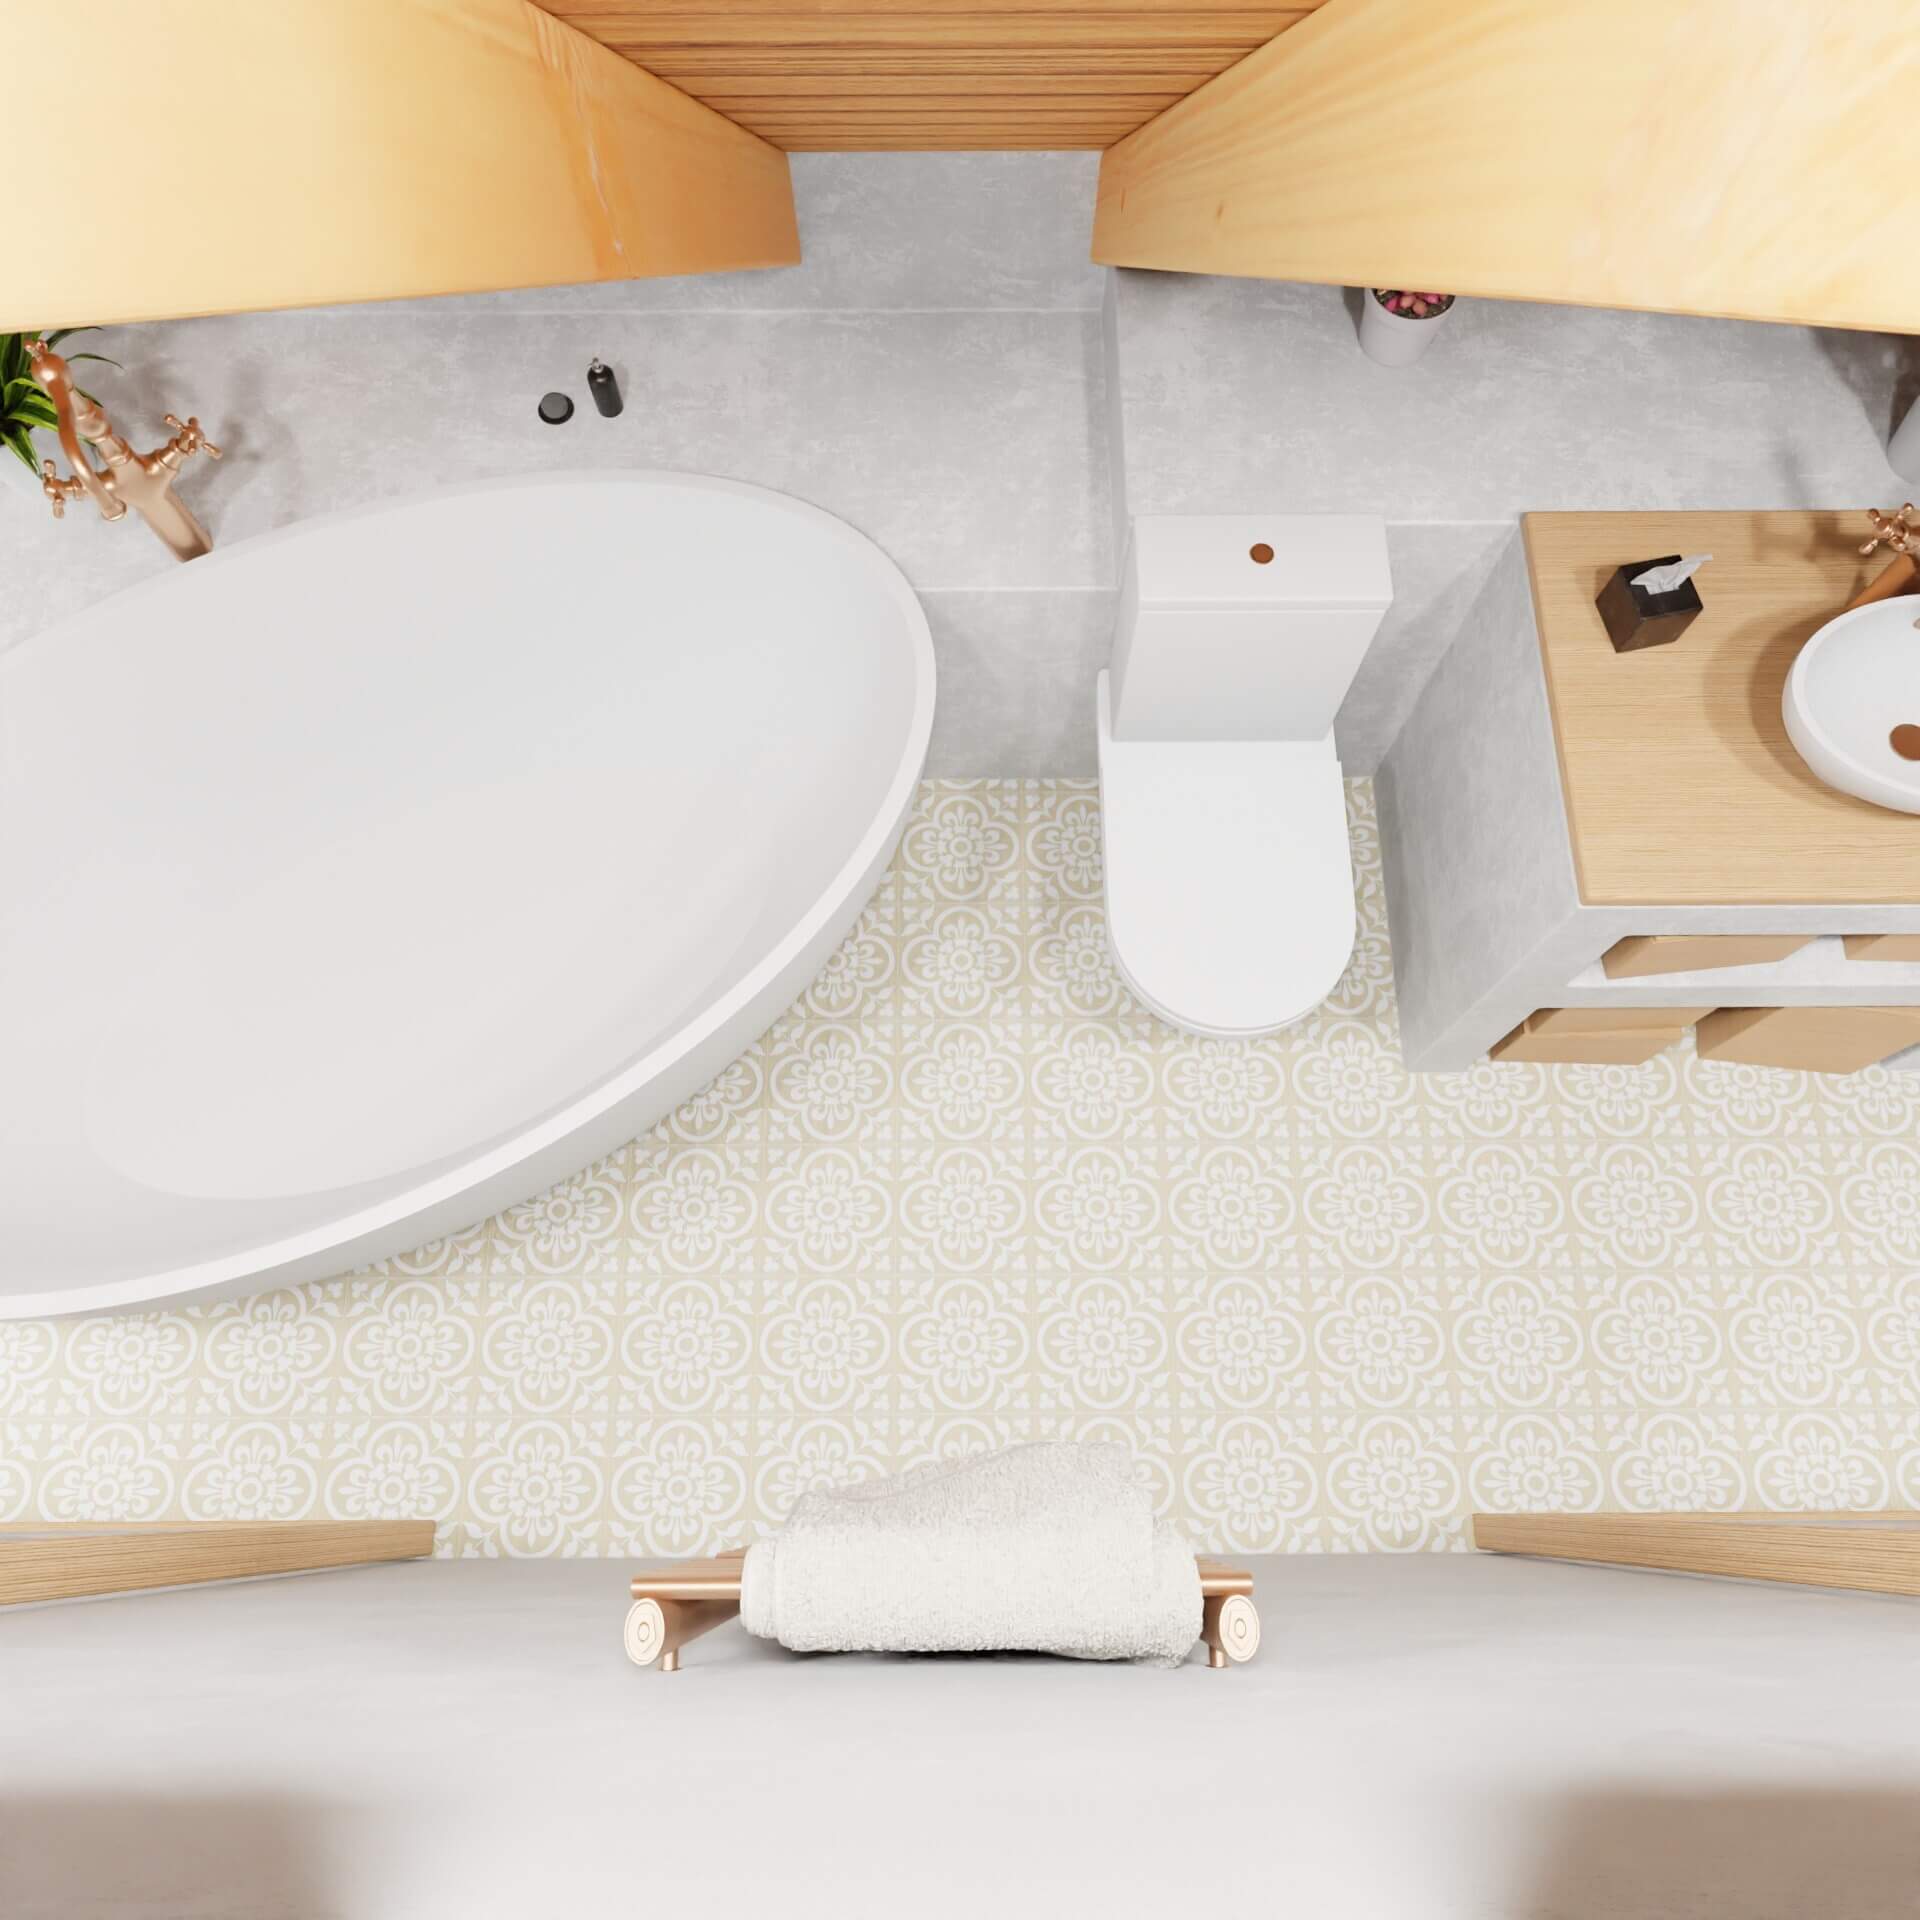
This was a commercial project I did for a friend in Bern, Switzerland. He wanted to renovate the bathroom, and he knew, 3d visualizations are my hobby. So he asked me to do a visualization to see how it could look and if it’s possible to build because space was limited. There is currently one bathroom, and he wanted to make two separate bathrooms and use the space efficiently.
(Click to enlarge)
Did you use any references for modeling, like technical drawings?
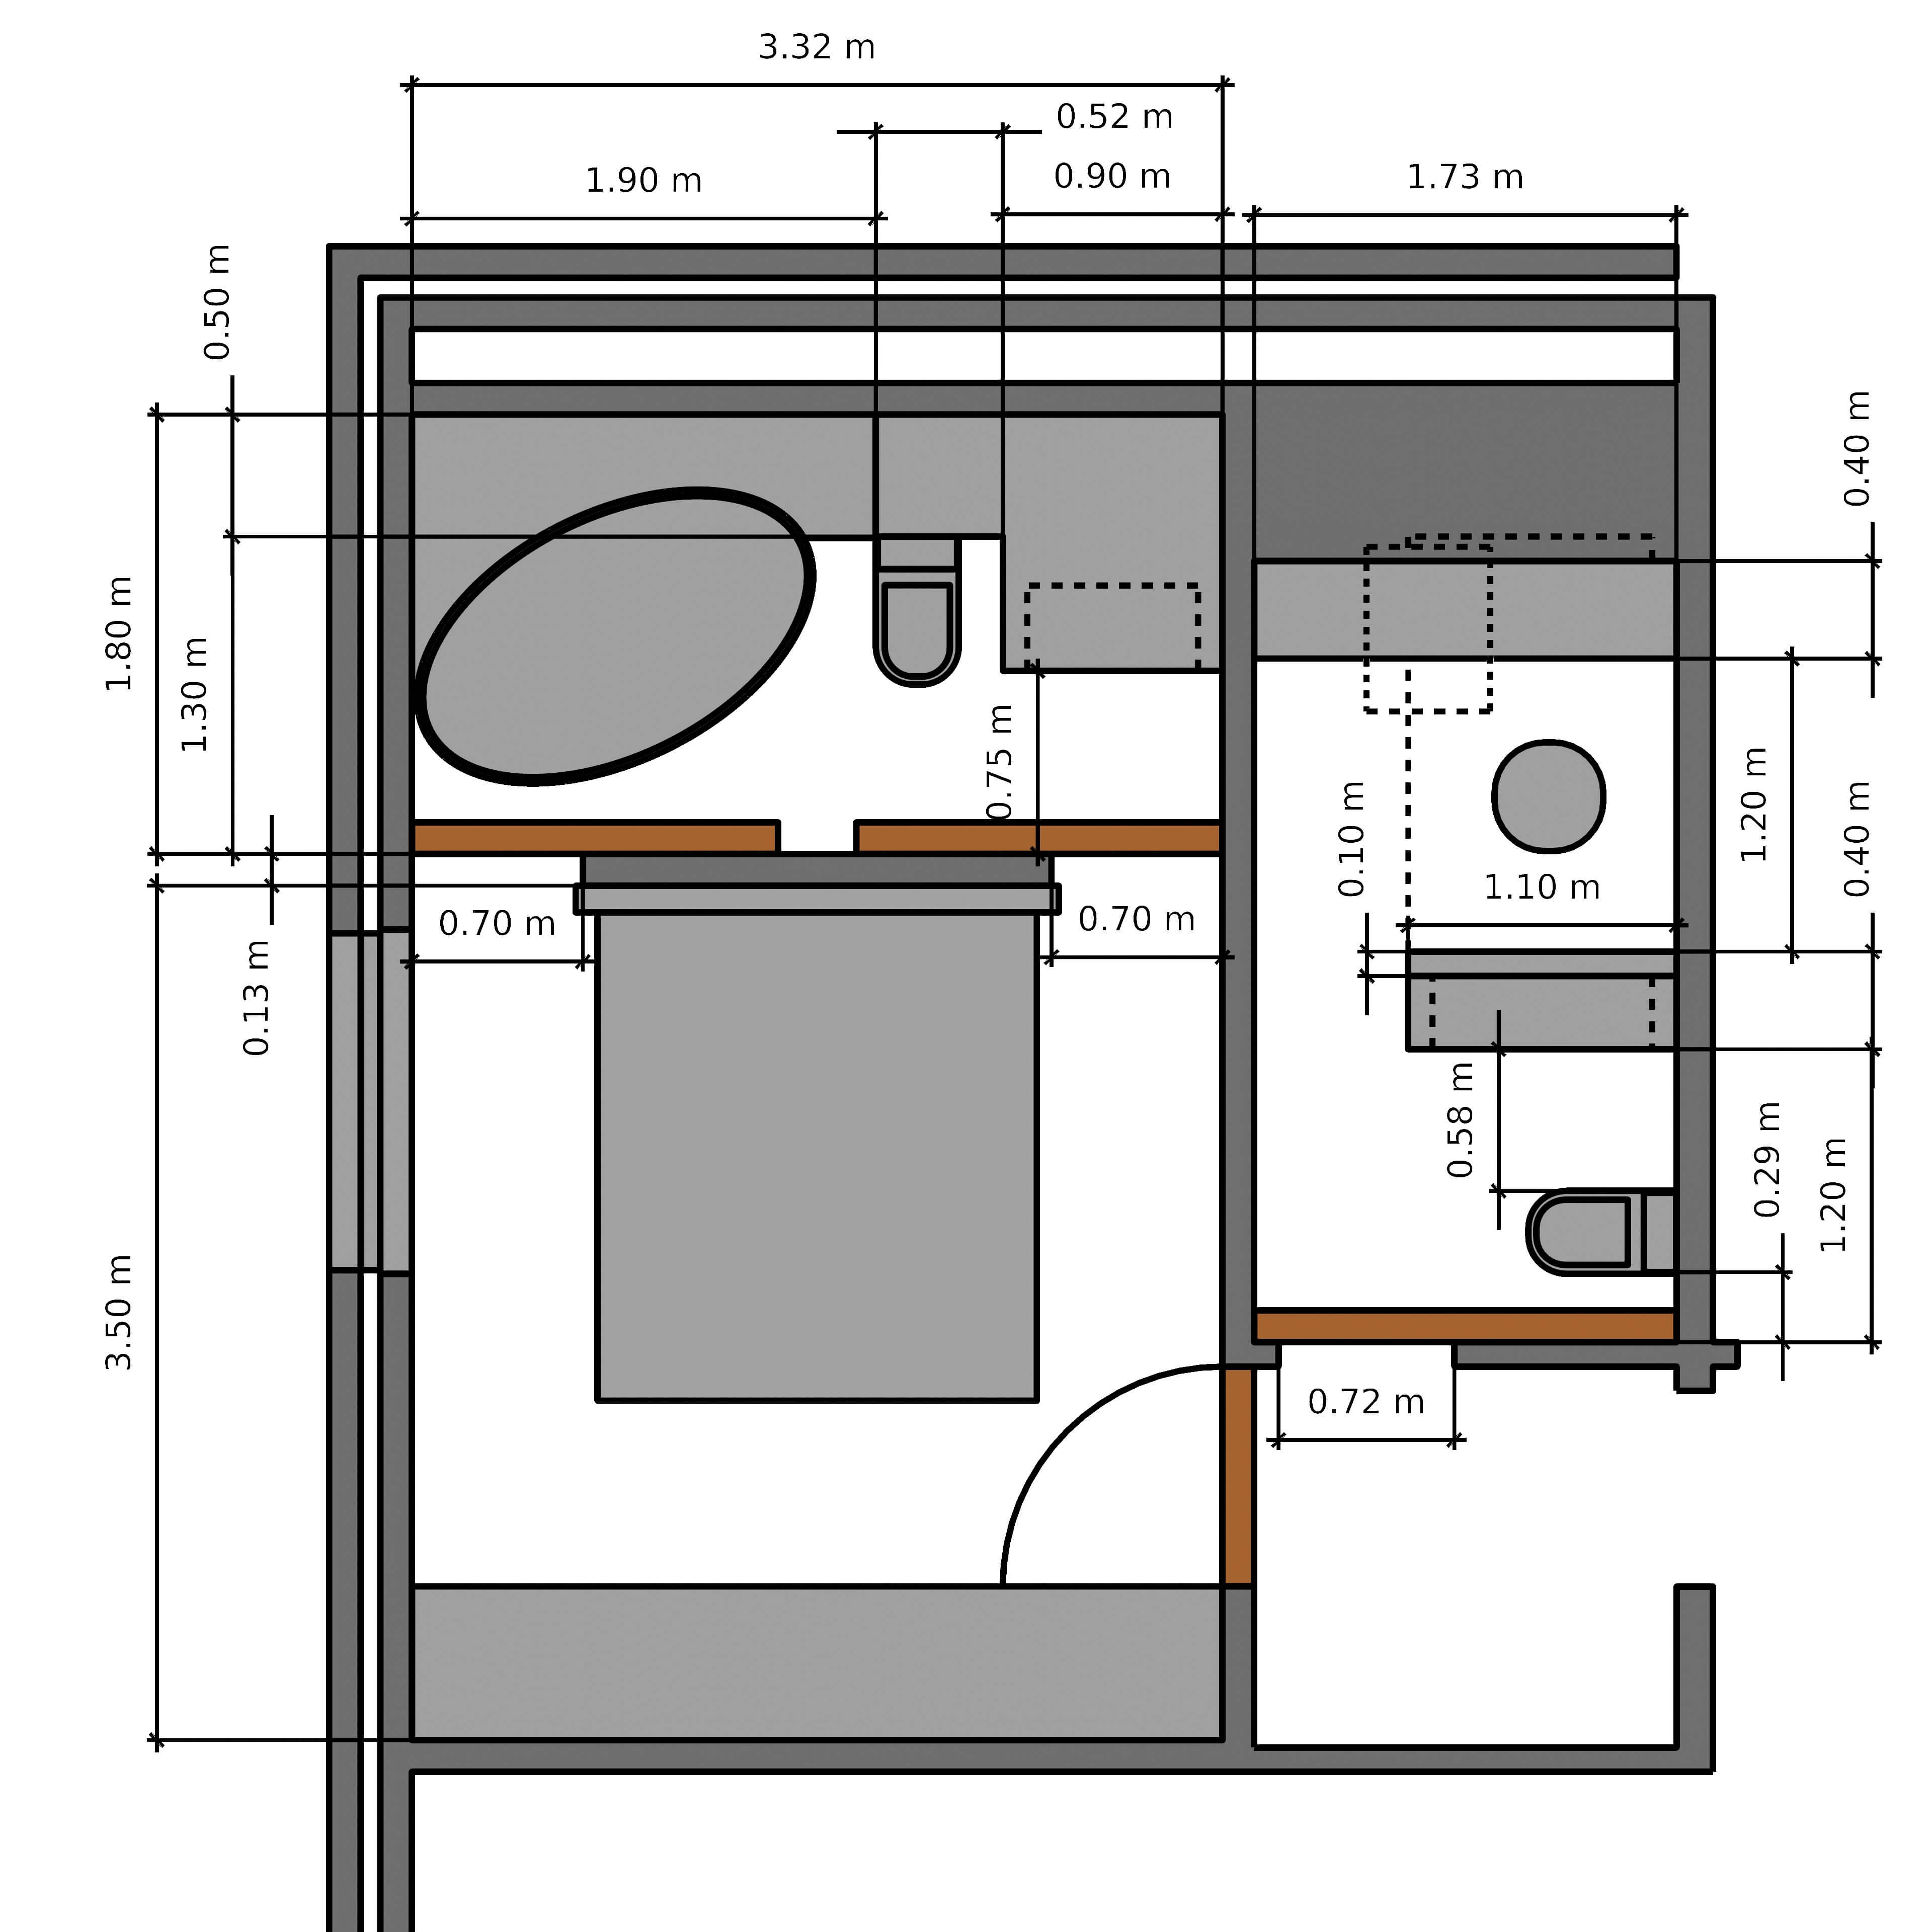
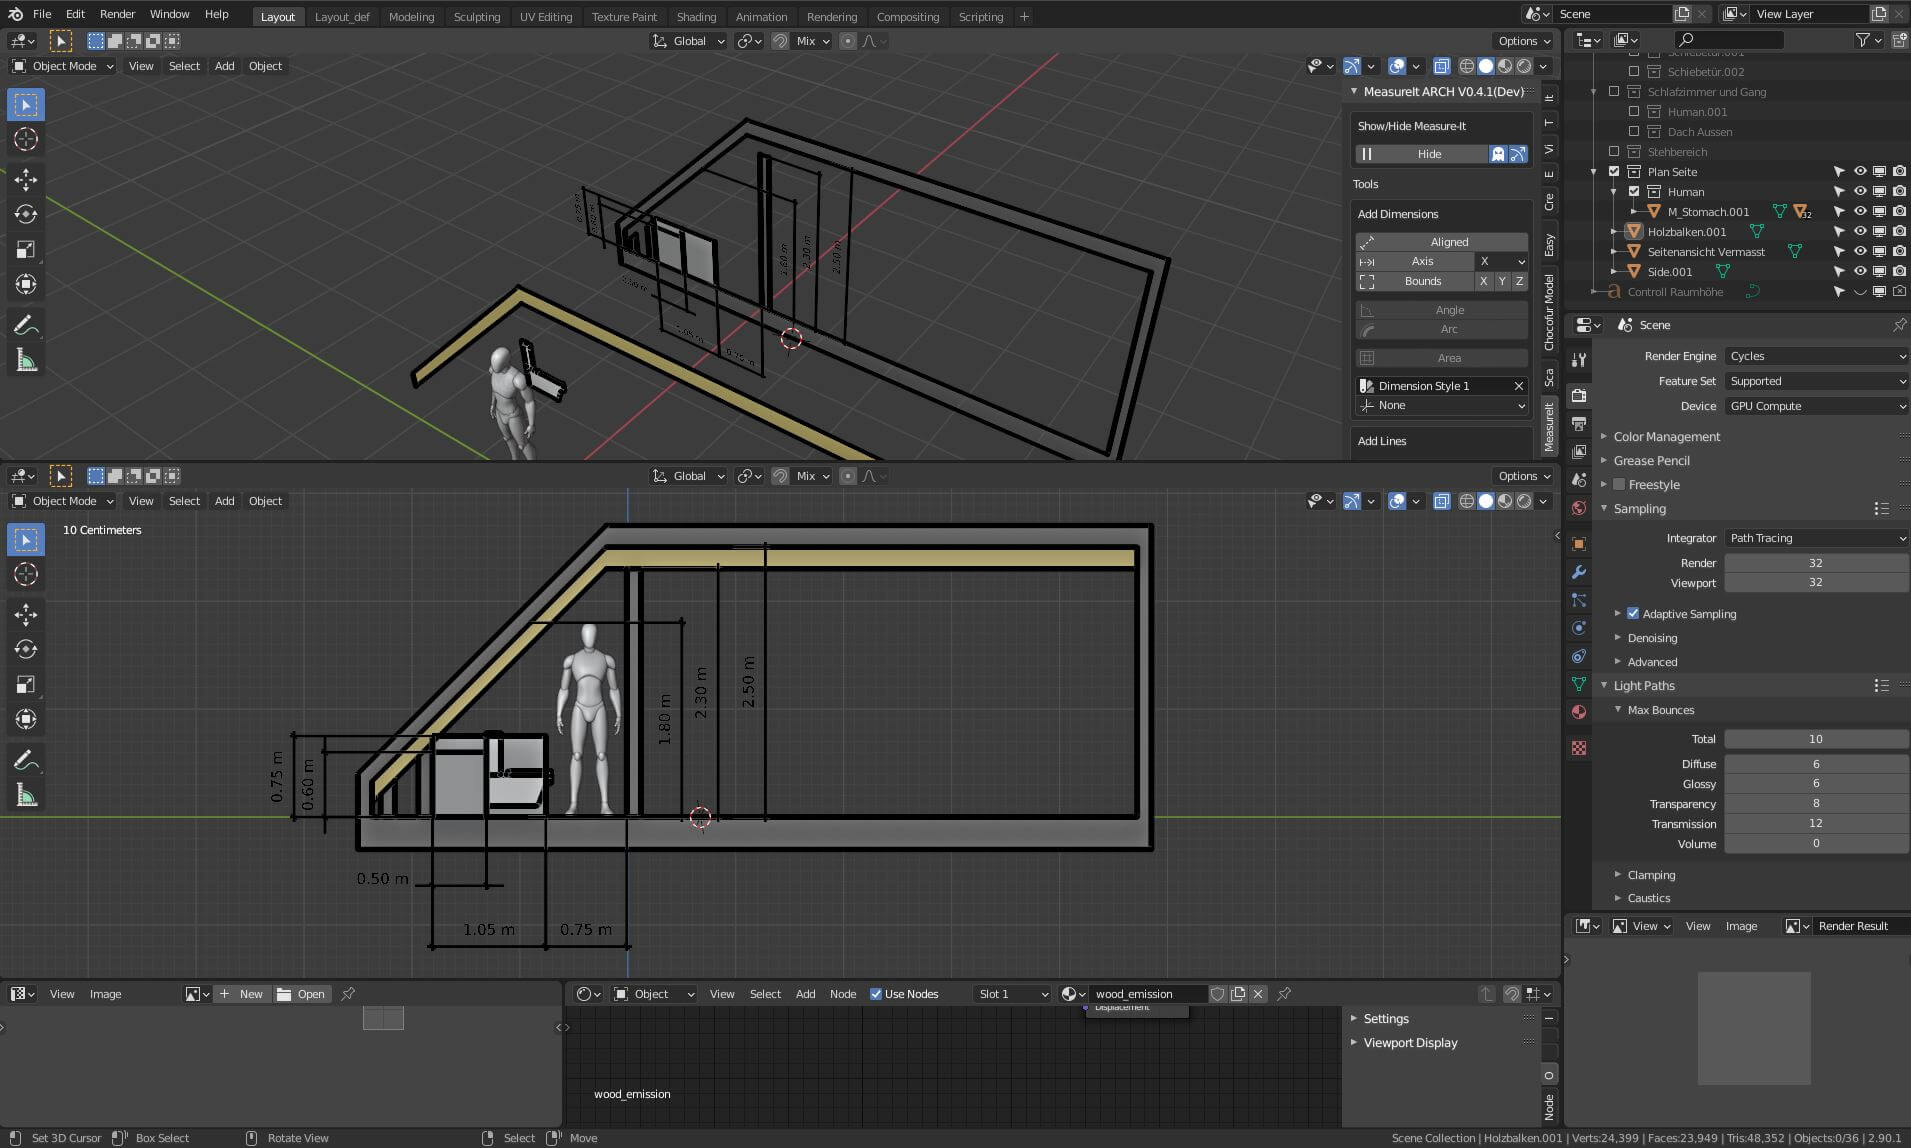
I got the building floorplan, which I loaded as an image reference in Blender, to model the walls and doors with exact measurements. Also, I was on-site and took several photos of the rooms to get the mood and lighting reference.
(Click to enlarge)
Did you model everything in the project, including furniture and props?
I started modeling with the general shape of the rooms. Then I needed the objects' size to see how they can be arranged within the limited space. I created a basic 3d block out of each element. After the Layout was confirmed, I replaced the blockouts with the final models. I used mainly models from imeshh, and some from poliigon. Simple models I created myself like the bath, doors, and the wooden baskets and shelf.
I used a big boolean object to cut through everything from the top, so I don’t always have to hide the ceiling and high walls.
(Click to enlarge)
What can you tell us about the interior design (Layouts, materials, and props)? Did you have to create it yourself?
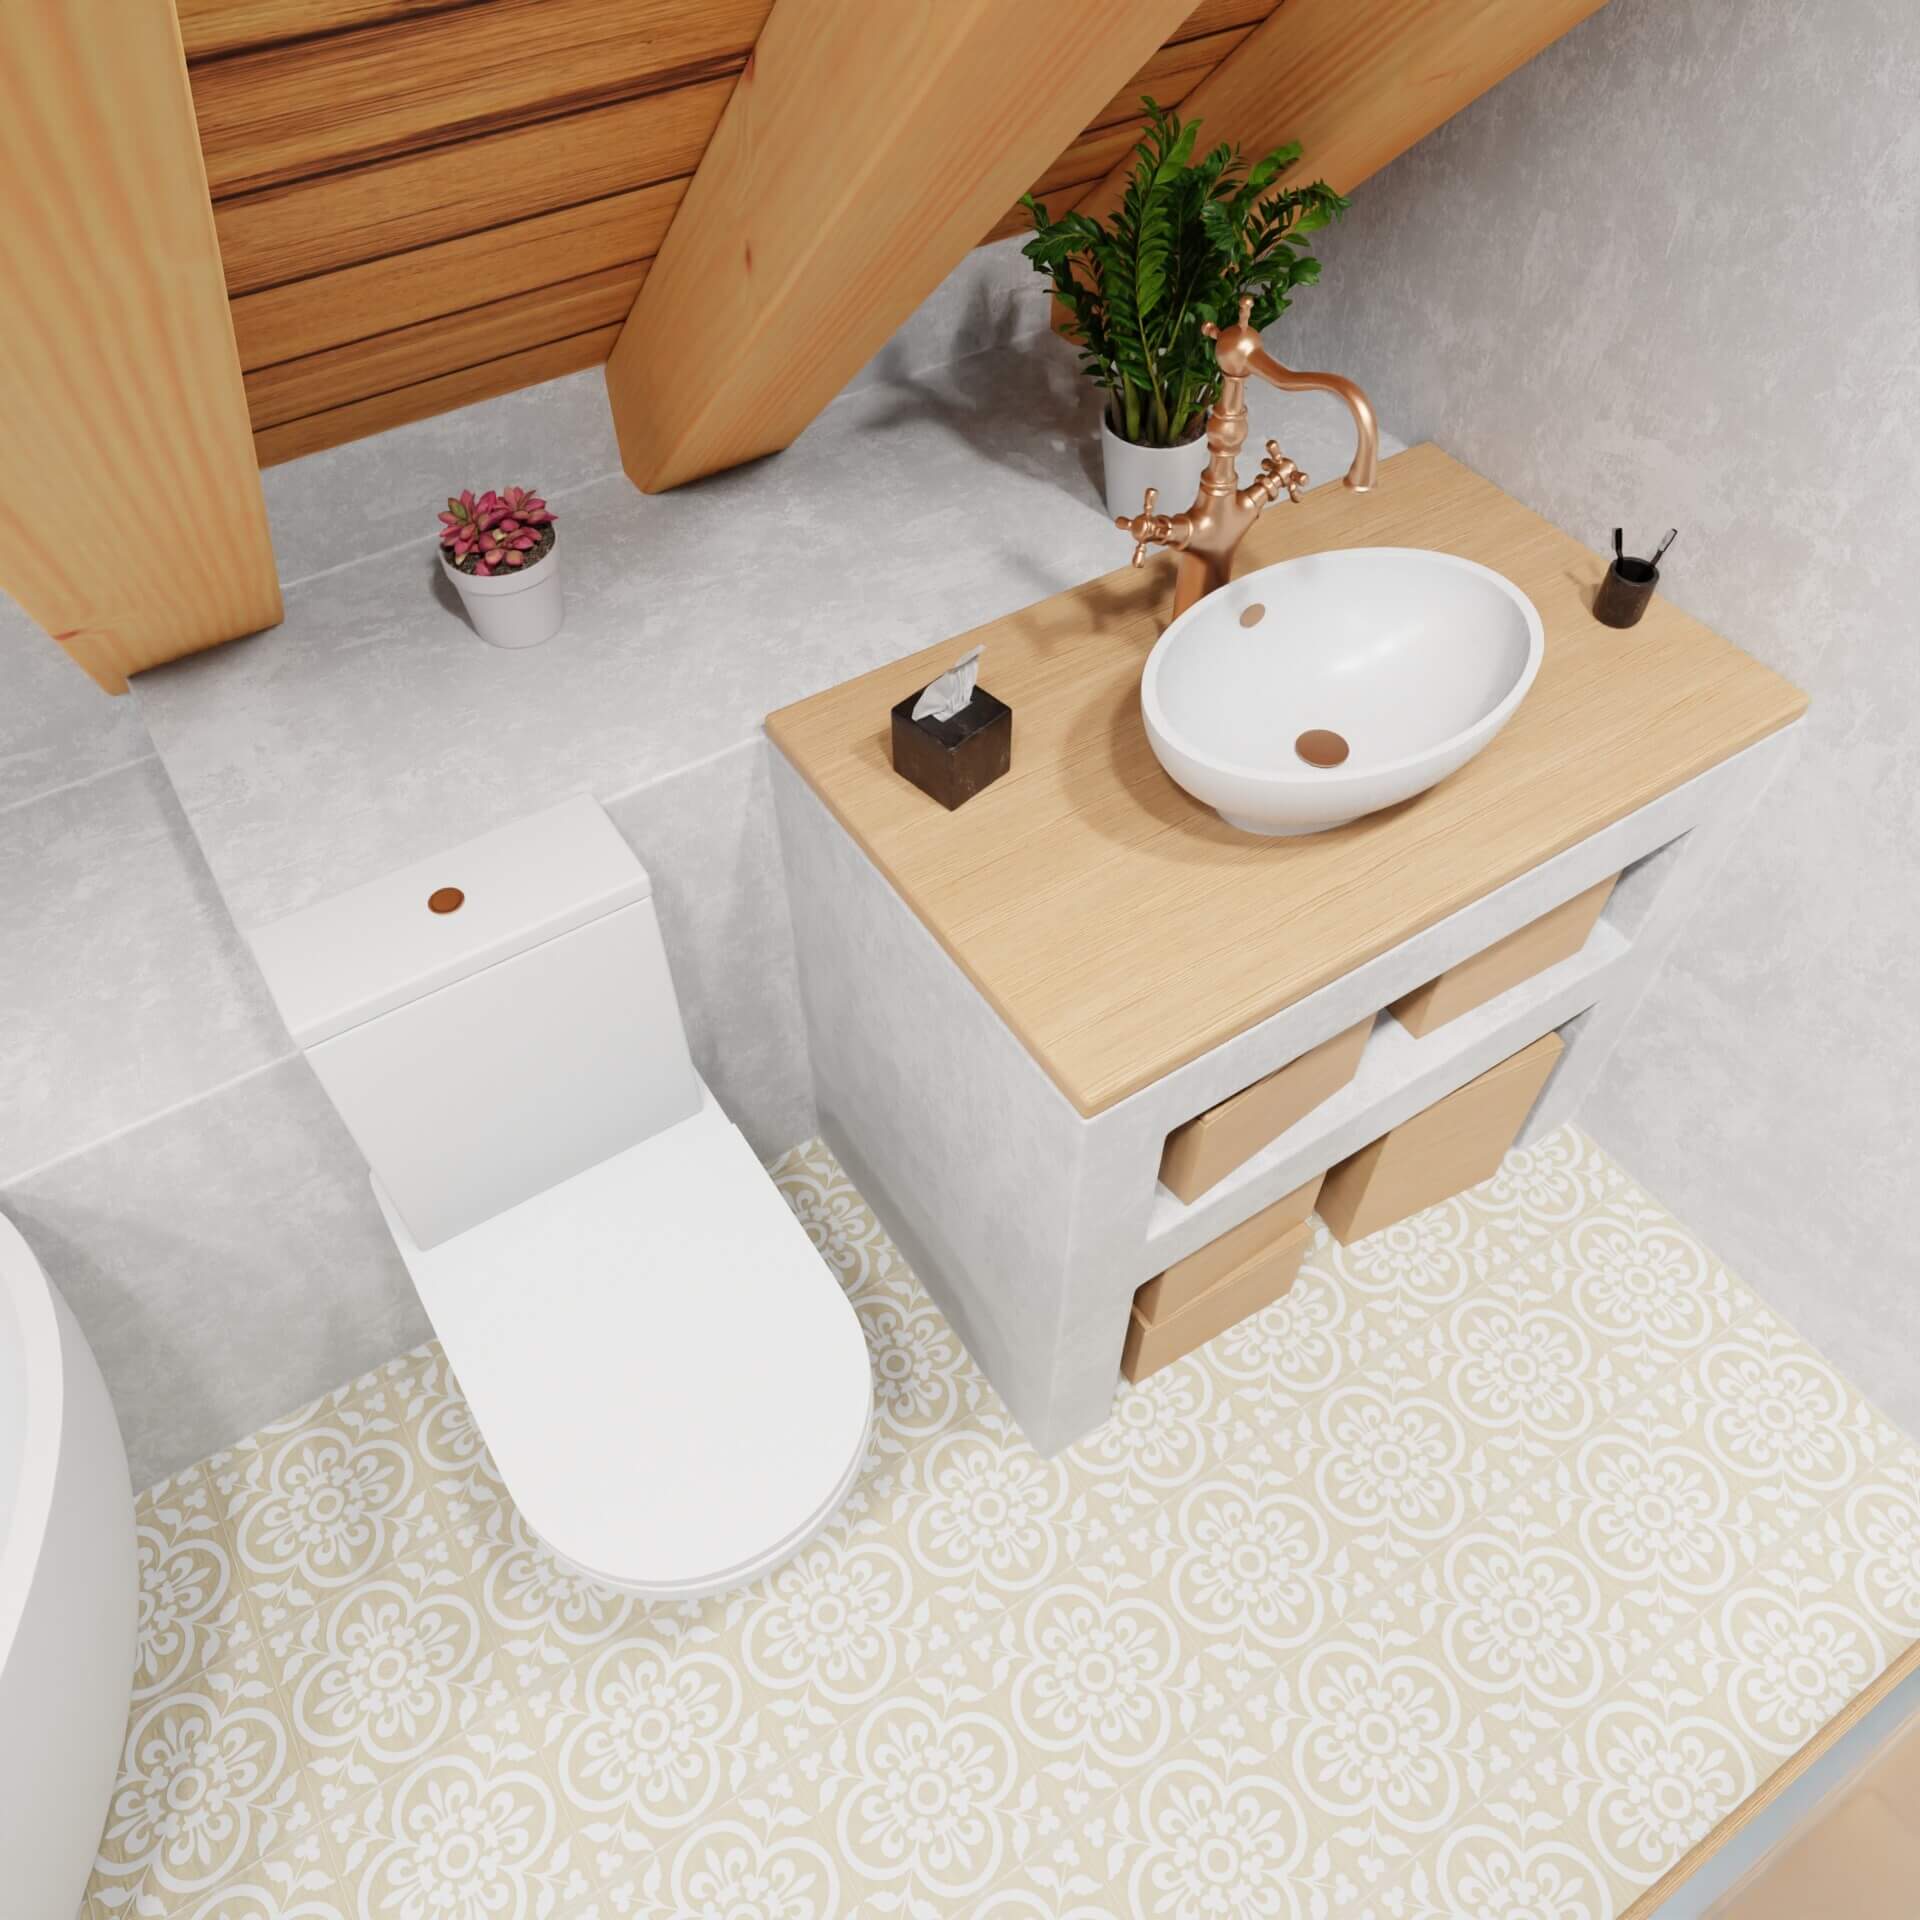
The Layout was decided by the client after I showed him multiple variations of possible layouts, how much space they take, and how accessible it is.
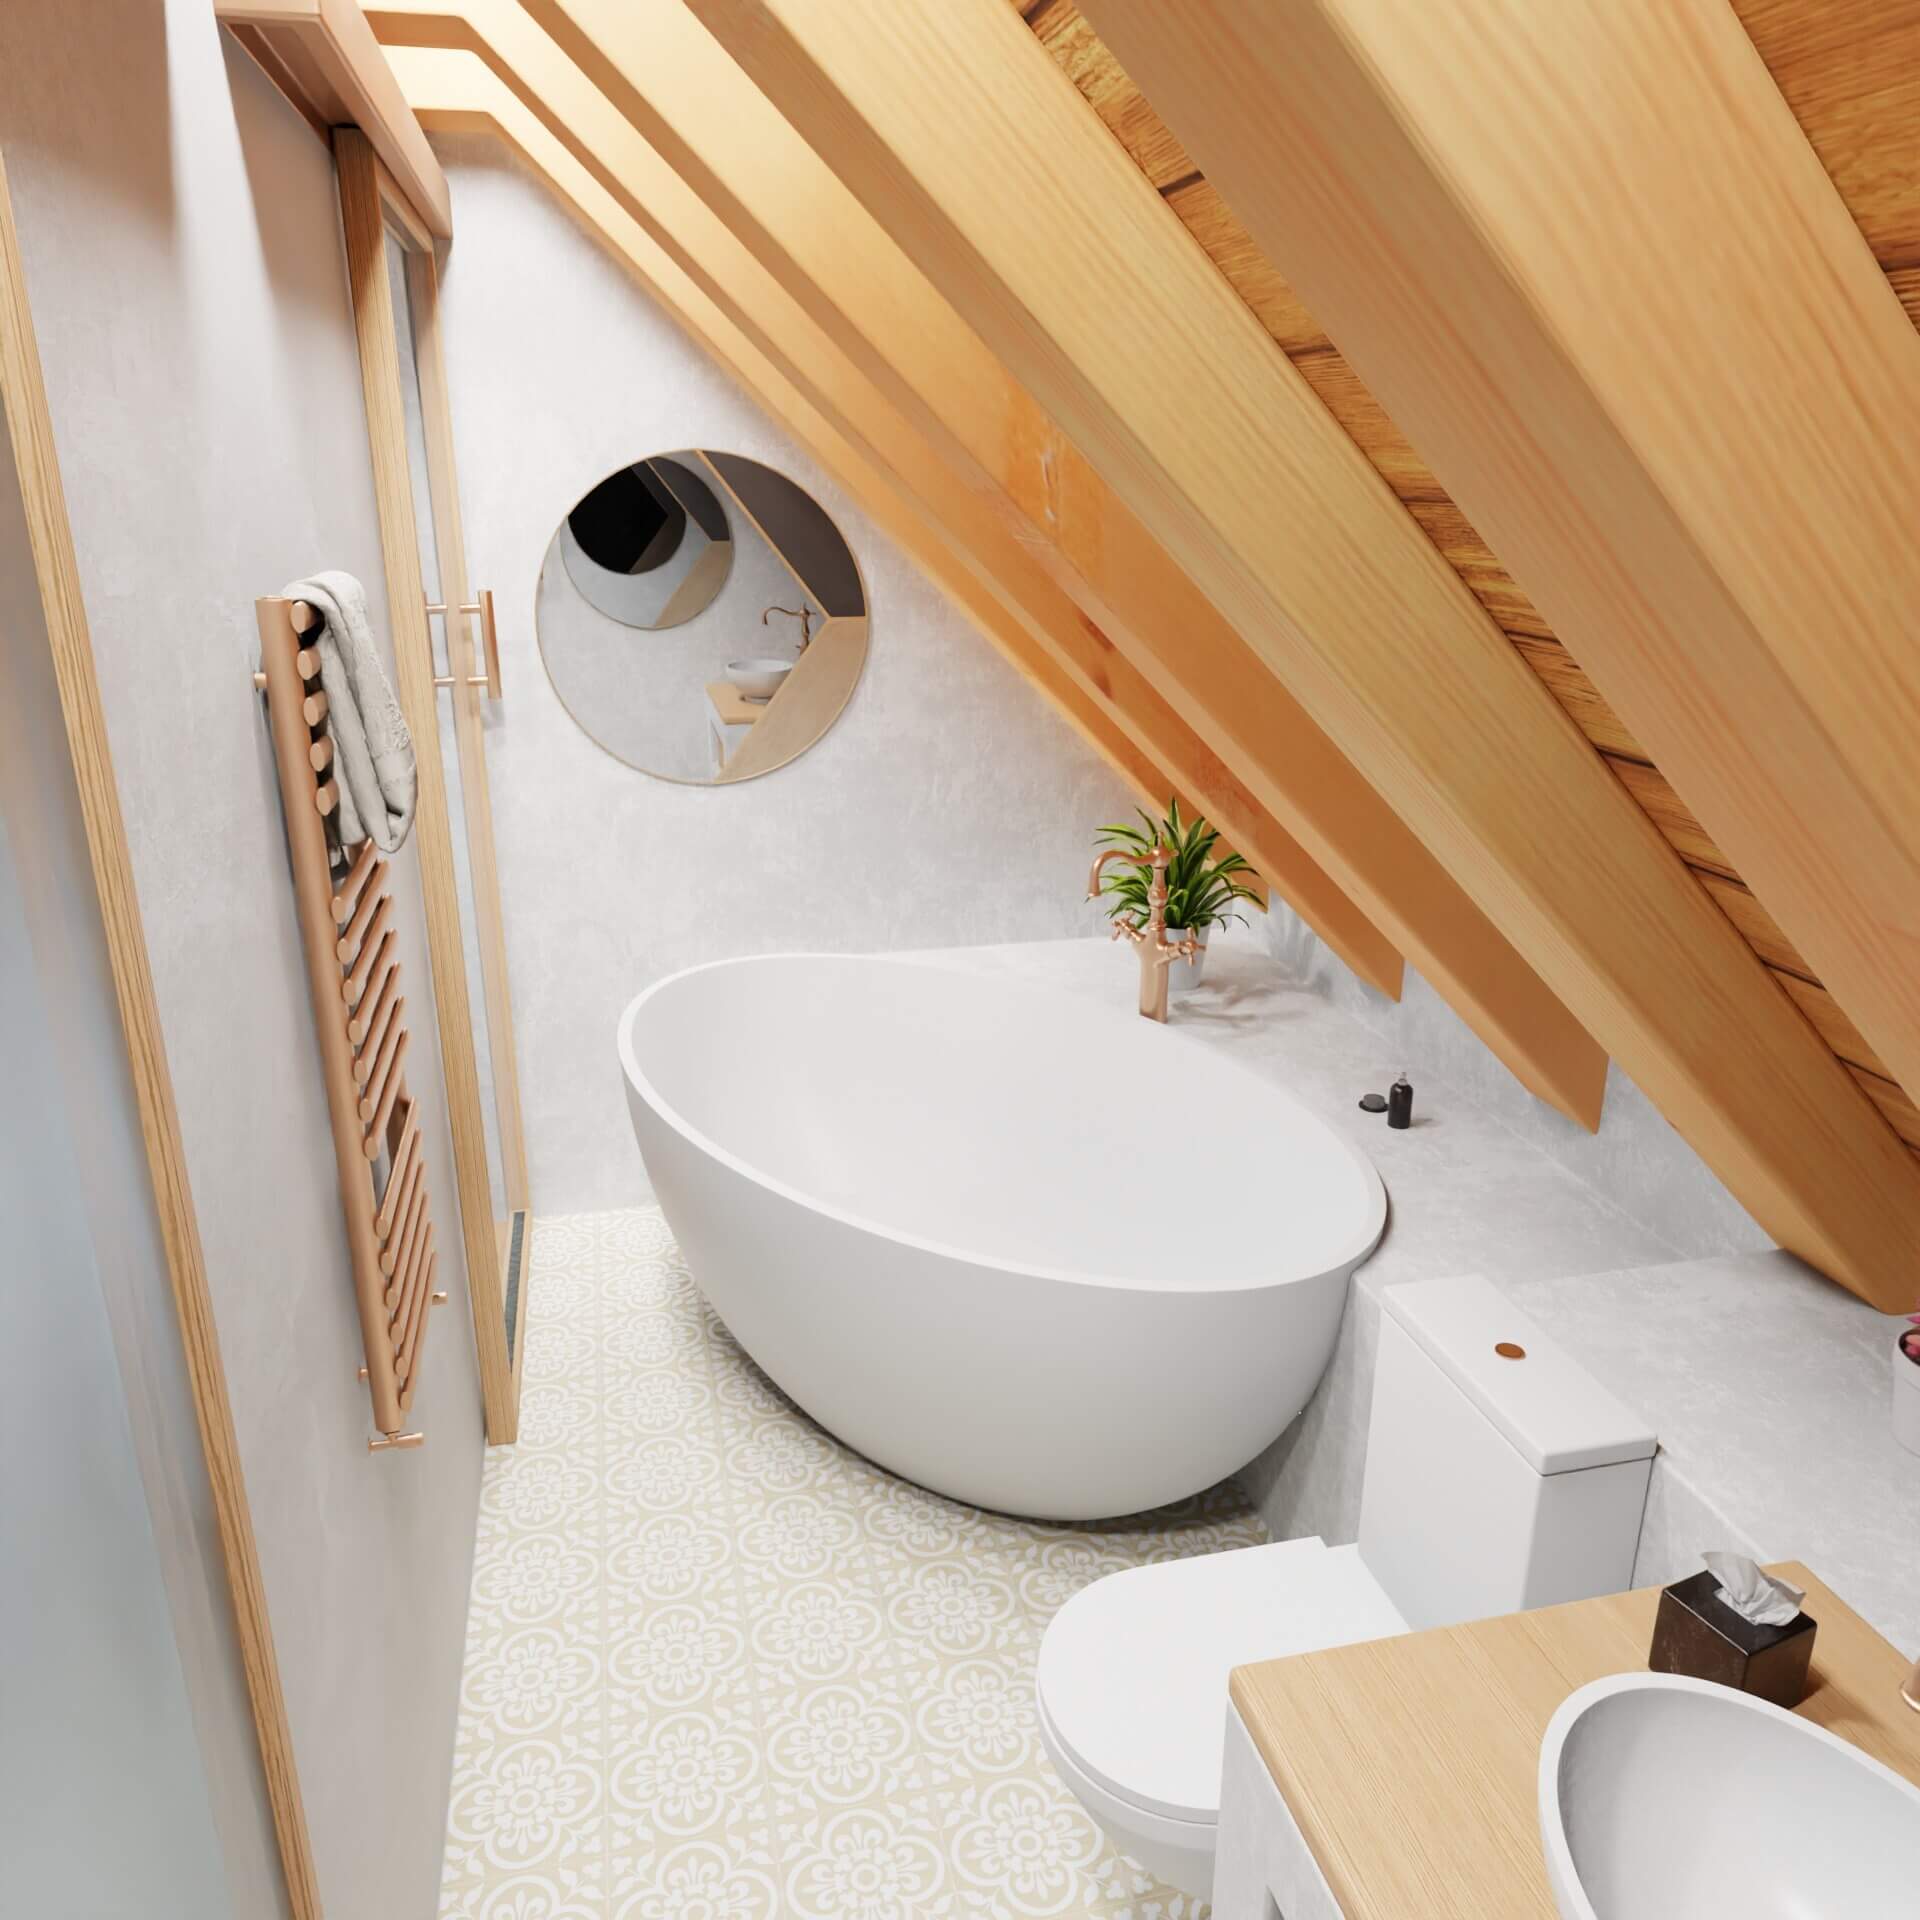
The materials were clearly defined from the beginning. The client sent me pictures of Pinterest with comments. What’s the general style, which materials to use, and the design and size of the Elements.
My influence was to make it as pretty and appealing as possible.
(Click to enlarge)
How long did it take from start to finish?
I spent 30 workhours on the initial project. I recreated the whole project a second time from scratch because I wasn’t happy with the workflow, and I wanted to improve scene organization and general handling of everything. I spent another 24 hours on the rebuild. Before the project was over, I did this and could use the updated version for better showcasing, easier rendering, and simpler 2d line-drawings. It saved me a bit of time there, but the big value comes from the learned things for the future.
(Click to enlarge)
What hardware did you use to render? Can you share some render times?
My system is this:
Intel(R)_Core(TM)i7–3770_CPU@_3.40GHz
32GB RAM
NVIDIA GeForce GTX 1070
Rendered in Blender 2.9 Cycles on GPUFor previous renders, I used only 32 samples and denoise, which is done in about 2 min.
For the final render, I used 512 samples in 7 minutes.
Most of the time, I work in solid mode or material preview in Eevee.
Can you share any details about the lighting process?
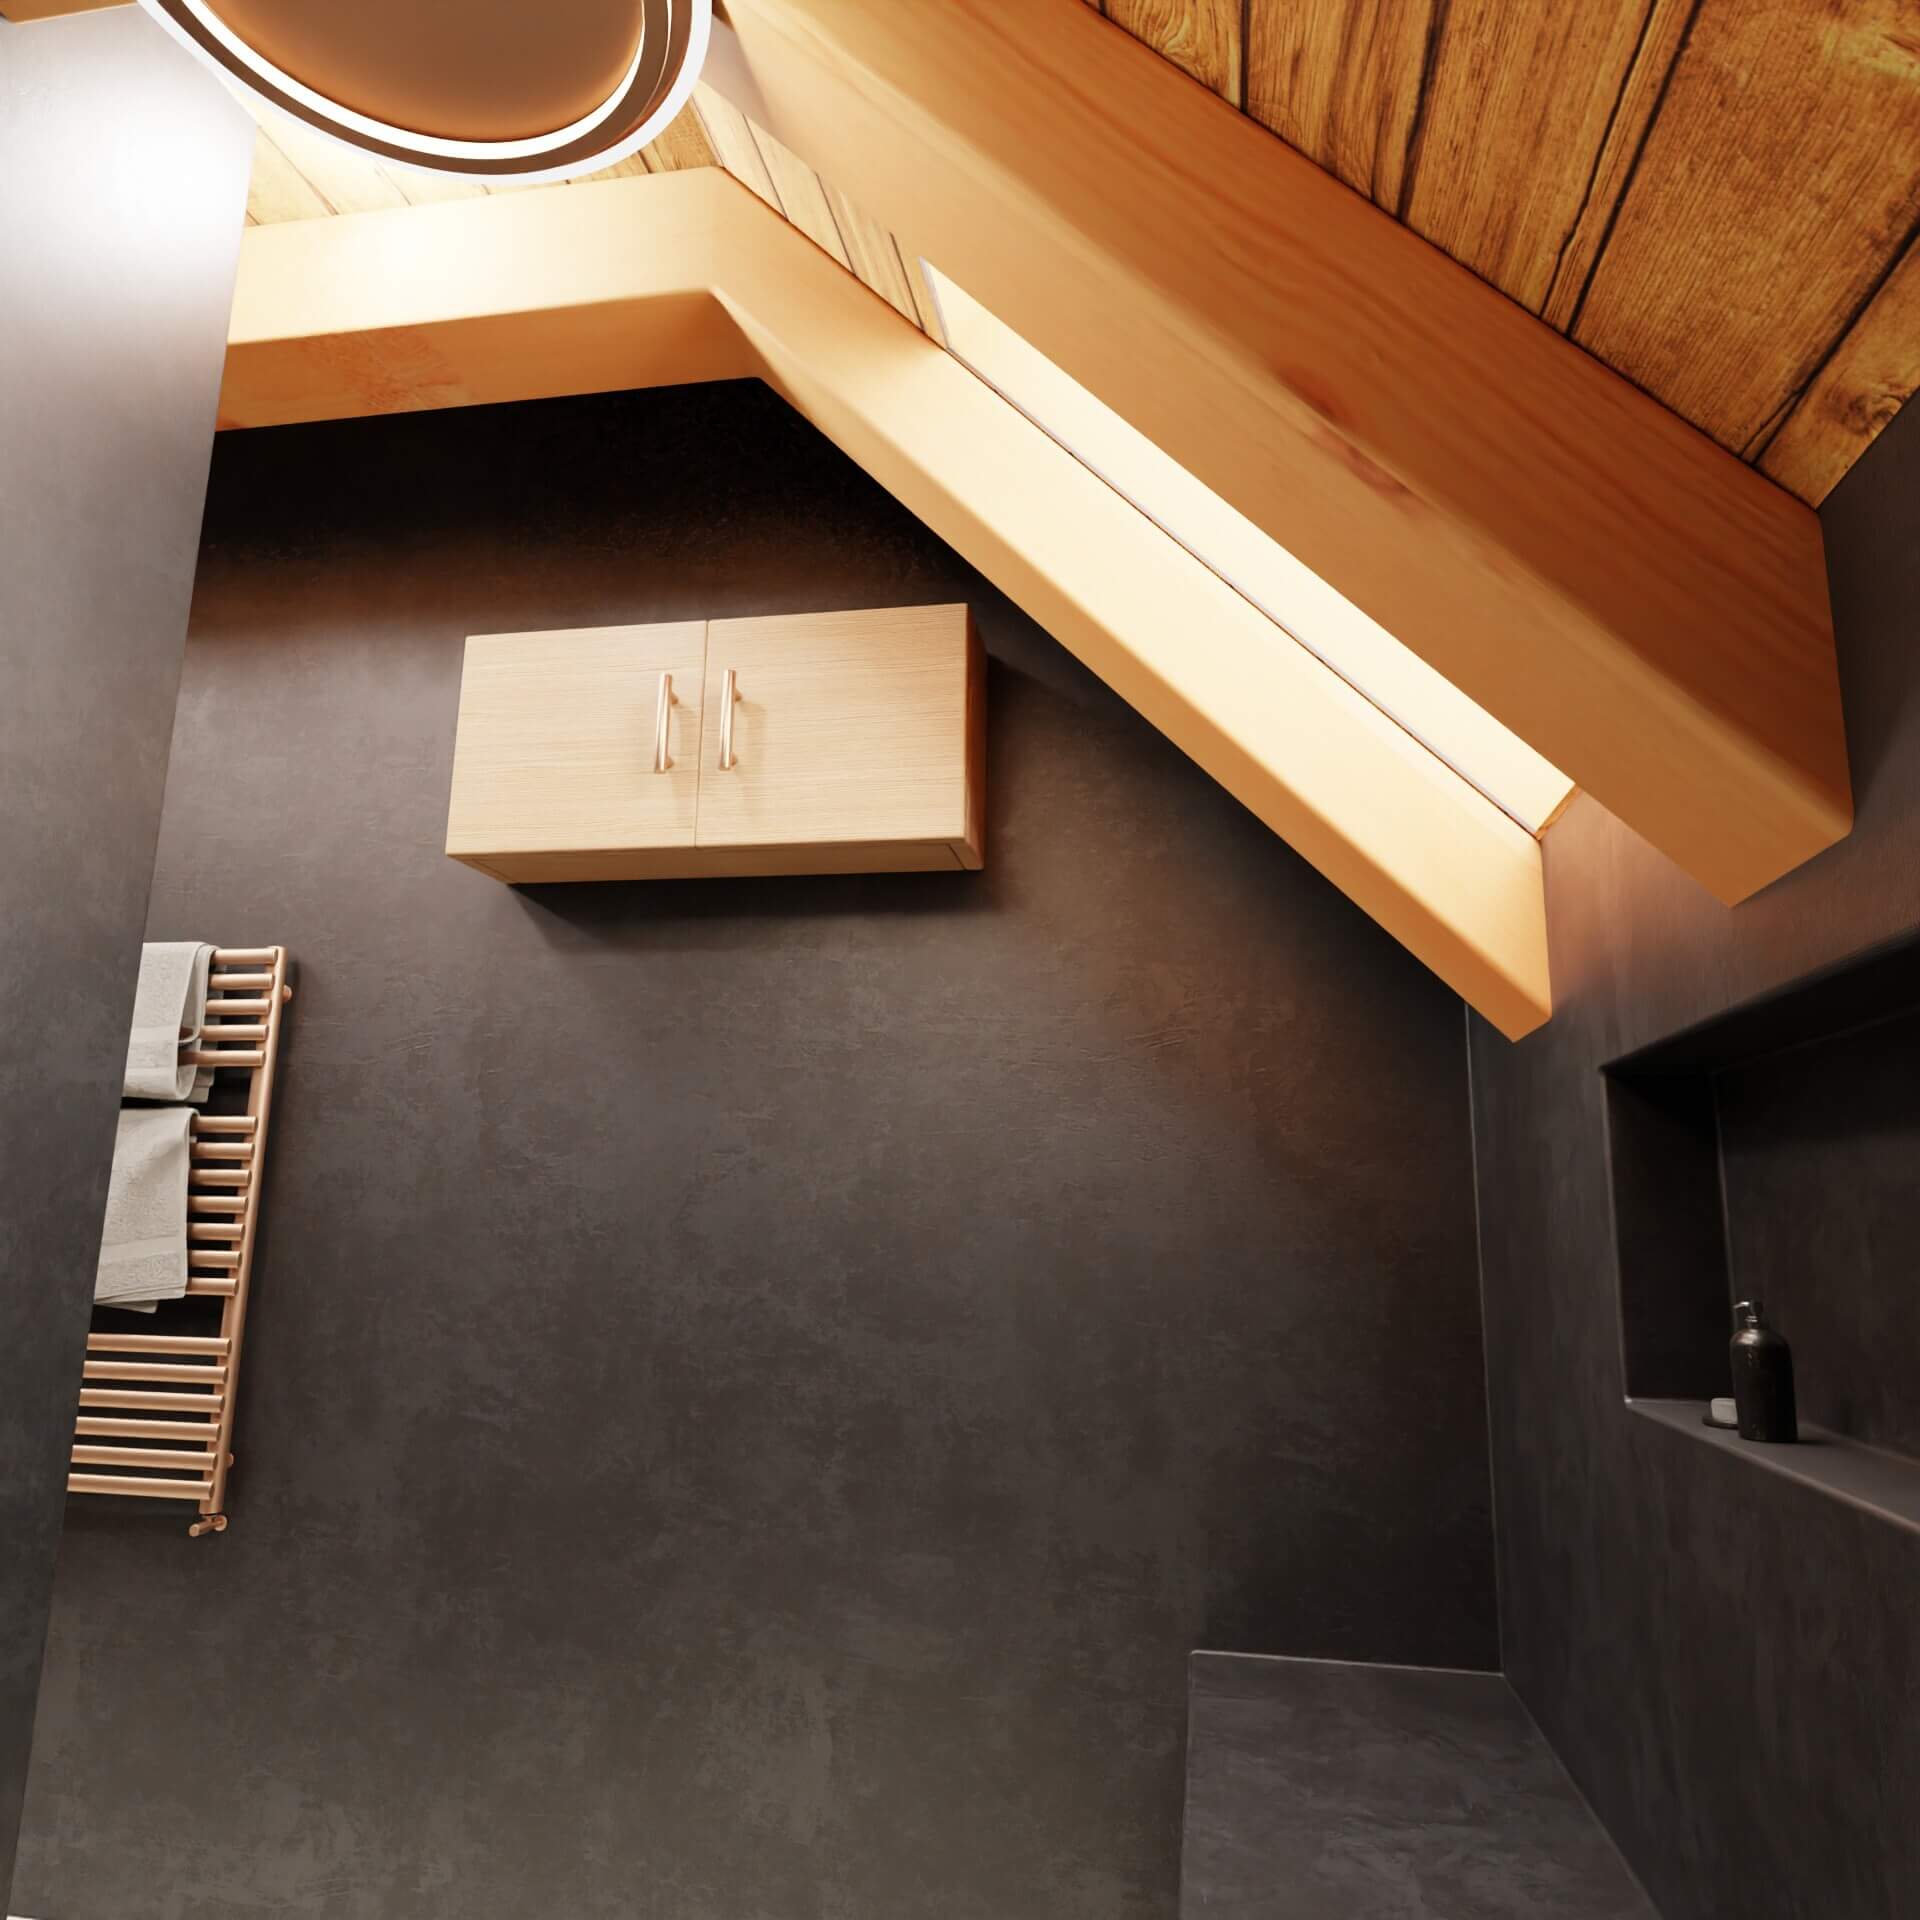
For this one, I couldn’t use HDRI because there are fewer windows. I used area lamps outside the windows and 4–6 point lights on the ceiling in each room and the floor. Nothing special here. In the white room, I used a little cheat; I put a low-intensity area lamp on the left wall to reduce shadows and noise in render.
(Click to enlarge)
Did you use any Add-ons or external tools to create the project?
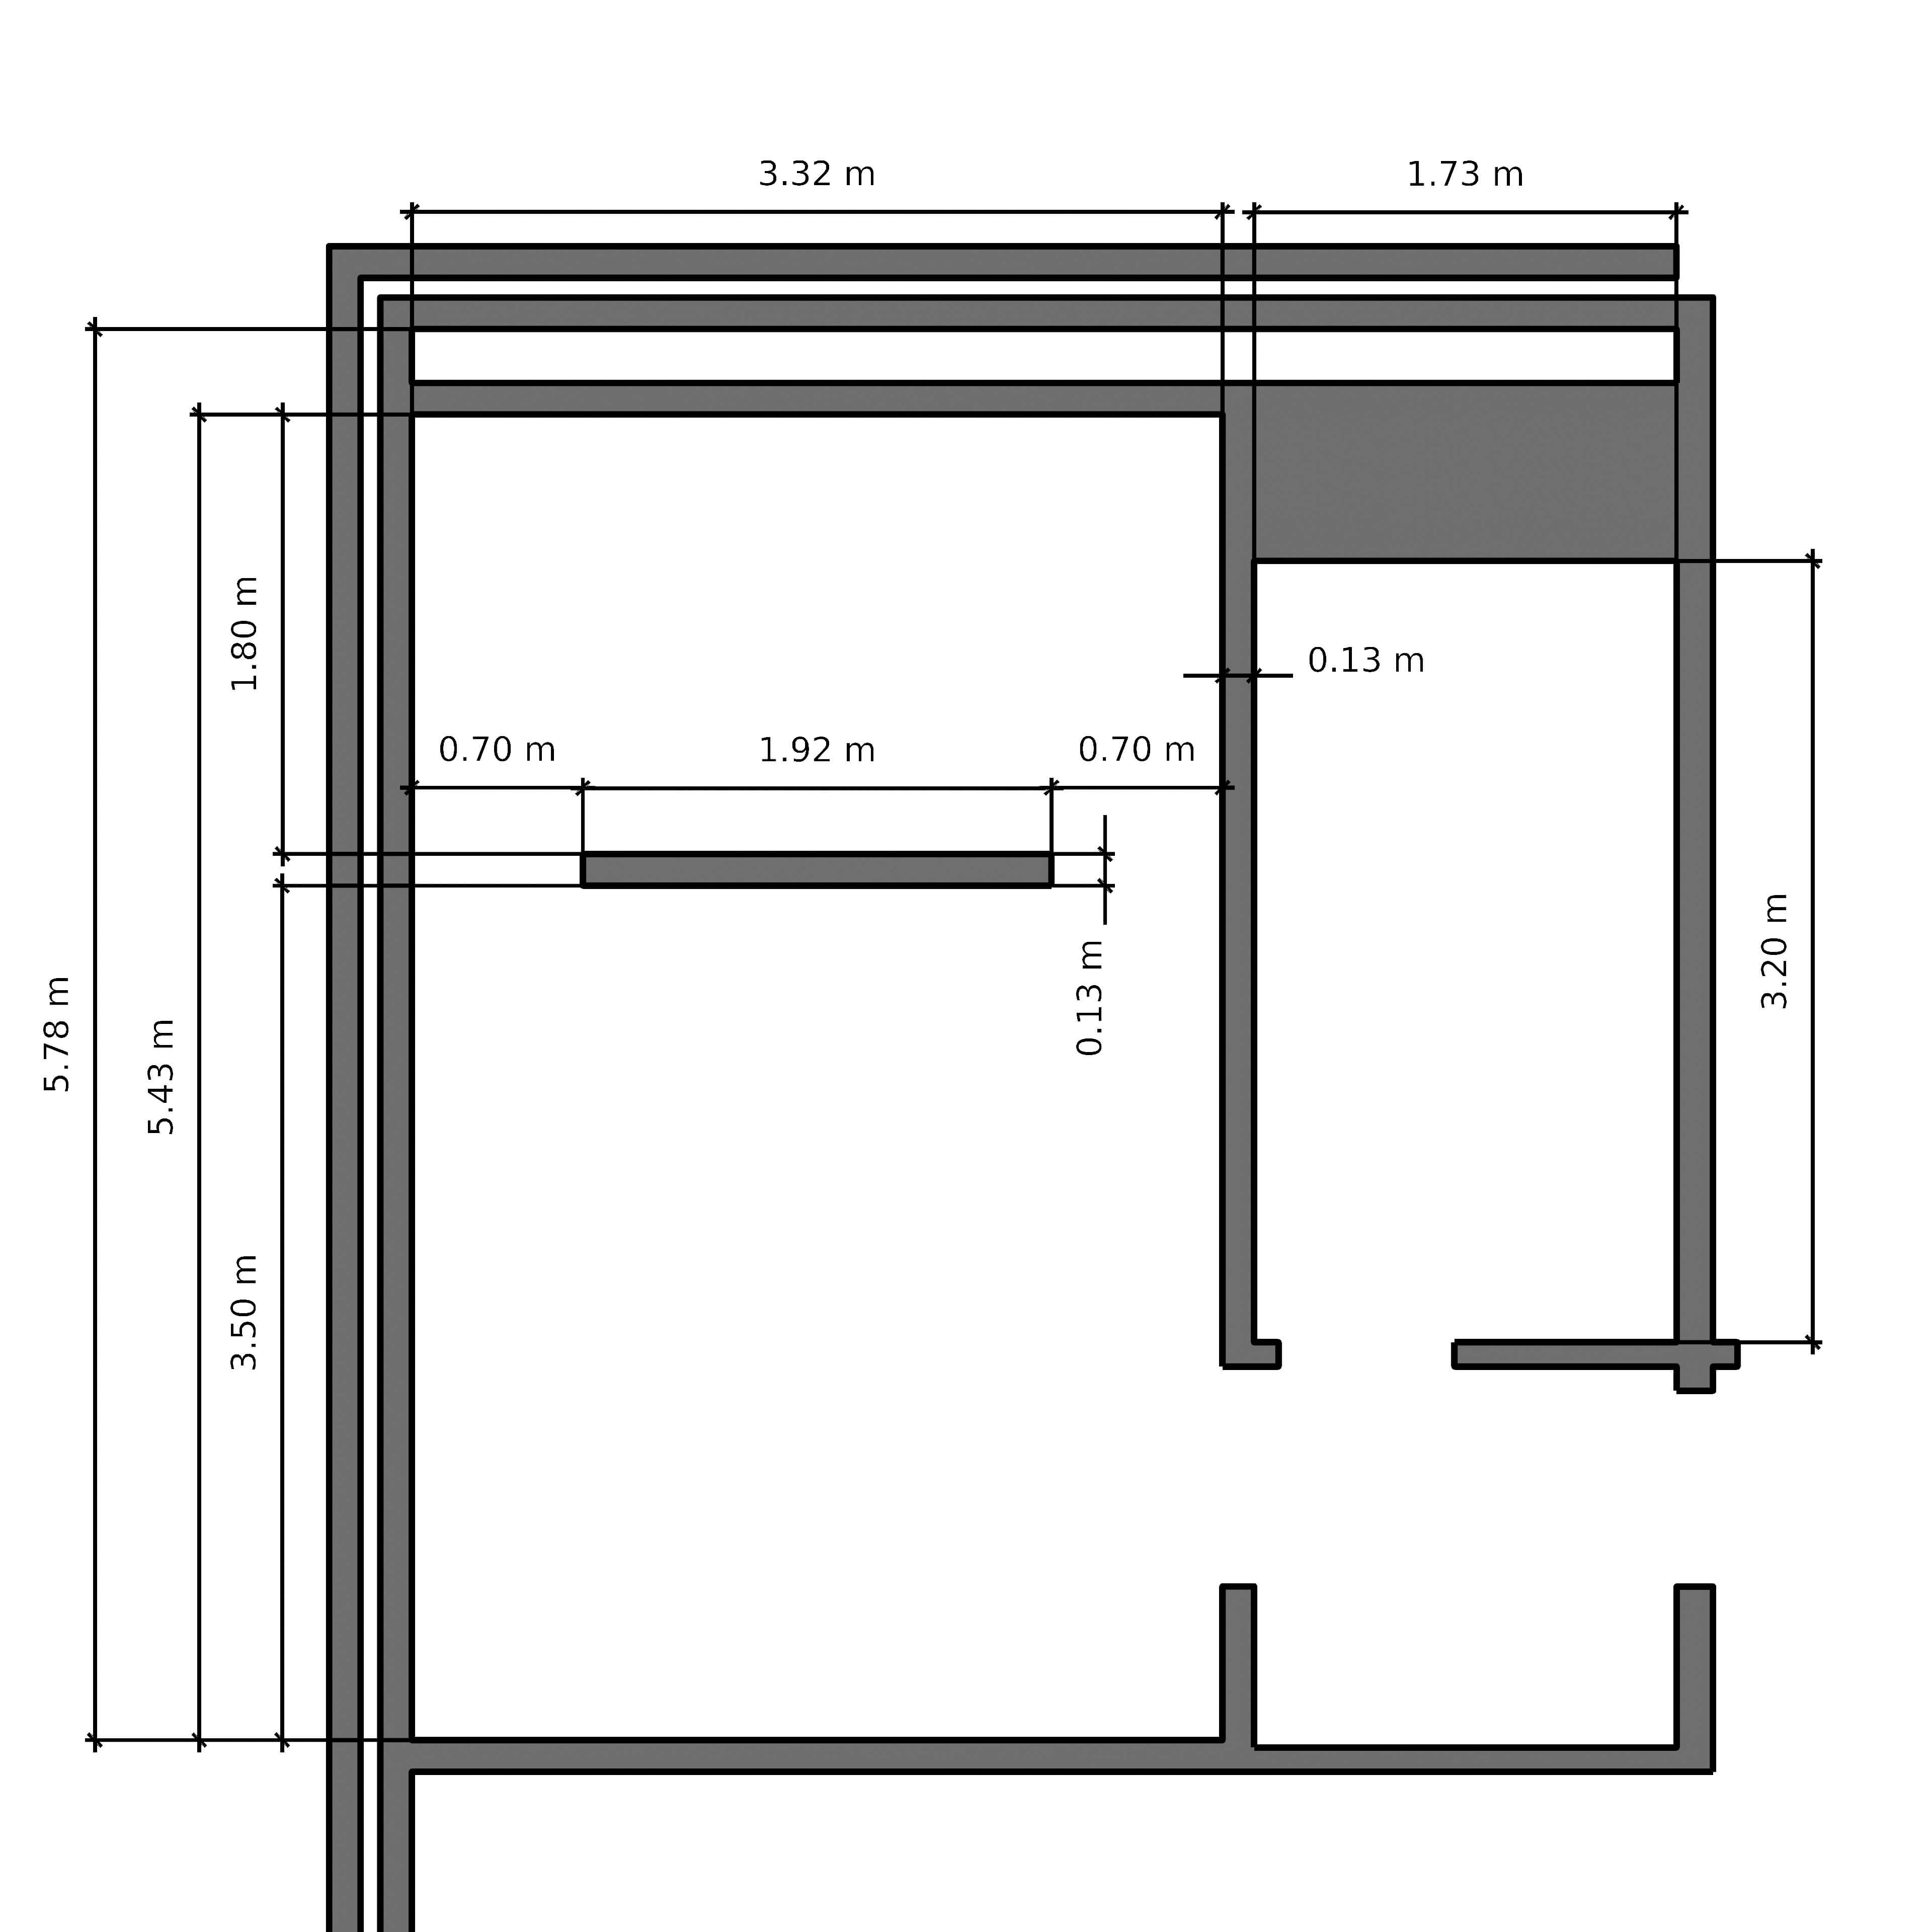
The main addon was the Measure-it arch. I used it to create the 2D plans with the line-drawings.
Besides that, I used booltool for cutting doors and windows: the imeshh manager to load assets and poliigon material converter for the materials.
For my reference, I put all images in a pure ref file, which is easy to make notes.
(Click to enlarge)
What would you say was the most challenging aspect of working on this project?
There are two big things.
First one was to do a precise base modeling. I learned that while redoing the whole thing. Don’t use modifiers in the early stages or turn them off (like solidify and bevel). If you do so, you can perfectly snap to existing vertices.
A challenging one was scene organization because I knew I needed multiple camera angles and 2D renders from the scene. I learned to group each room separately in a collection and activate only what is visible in the render. For the 2D render, I wanted to use the 3D model, but I didn’t find a proper way. I then duplicated everything needed for each 2D view in a separate collection and used the method above to measure it.
And for the future, I make sure the client approves the layout before doing detailing.
(Click to enlarge)
If you want to share any additional details about the project, feel free to send it!
This was my first commercial project and also one of the biggest I’ve ever done. I’m happy with the result and the client as well. I learned many new things; if you have some limitations or requirements, you need to be flexible and adjust your workflow and learn new things. And take notes of what you learned and what can be improved.
Thanks again to Tobias Schmid for sharing details about their work. You can check more projects from him at ArtStation.