How to set the radius for round shapes in Blender 2.8? (Spin)
Once you start working with Blender to create architectural models, you will quickly notice how fast you can create geometrical shapes with tools like the extrude. The extrude is an easy and powerful way of making 3D geometry for architecture, but it won’t give you all the shapes needed for a typical project. In some cases, you must go beyond simple extrudes to create 3D models.
For instance, when you have to create something like a curved extrude, you will have to look for a solution somewhere else. Does it make sense? Let me elaborate.
In Blender, you will find options like the curve objects and the Spin tool to create rounded shapes. For architectural models, it is most likely to find a use for the Spin.
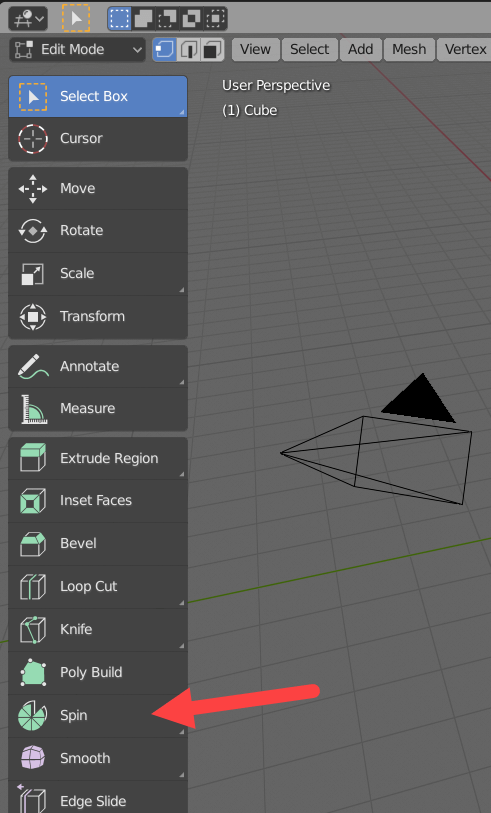
(Toolbar in Edit Mode)
The Spin works by taking any selected parts of a Mesh object and turn them around an axis. As a reference, it uses the 3D Cursor as the pivot point for that turn.
For people coming from CAD tools, you will be able to use the Spin as if it was:
- Polar Array / Radial Array
- Curved extrude
- Revolved surface
Setting the radius for curved walls (Before using the Spin tool)
One of the most straightforward examples regarding the Spin is a curved wall. A question that often appears with the Spin is; how to set the radius for your curved wall?
To have control over that detail, we must use the Snap option with your 3D Cursor. We can take as an example the wall below.
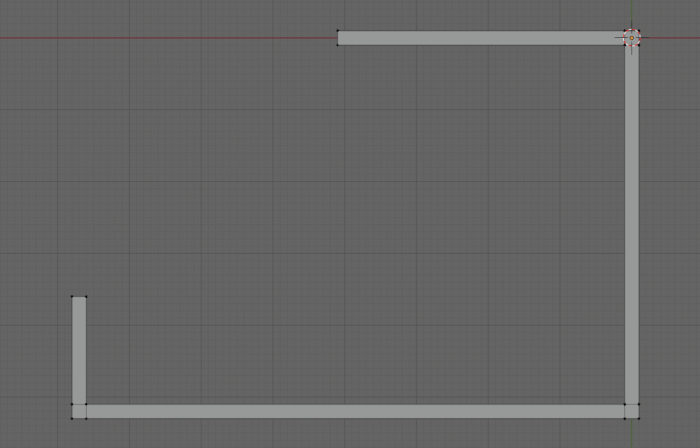
(Wall model – Top view)
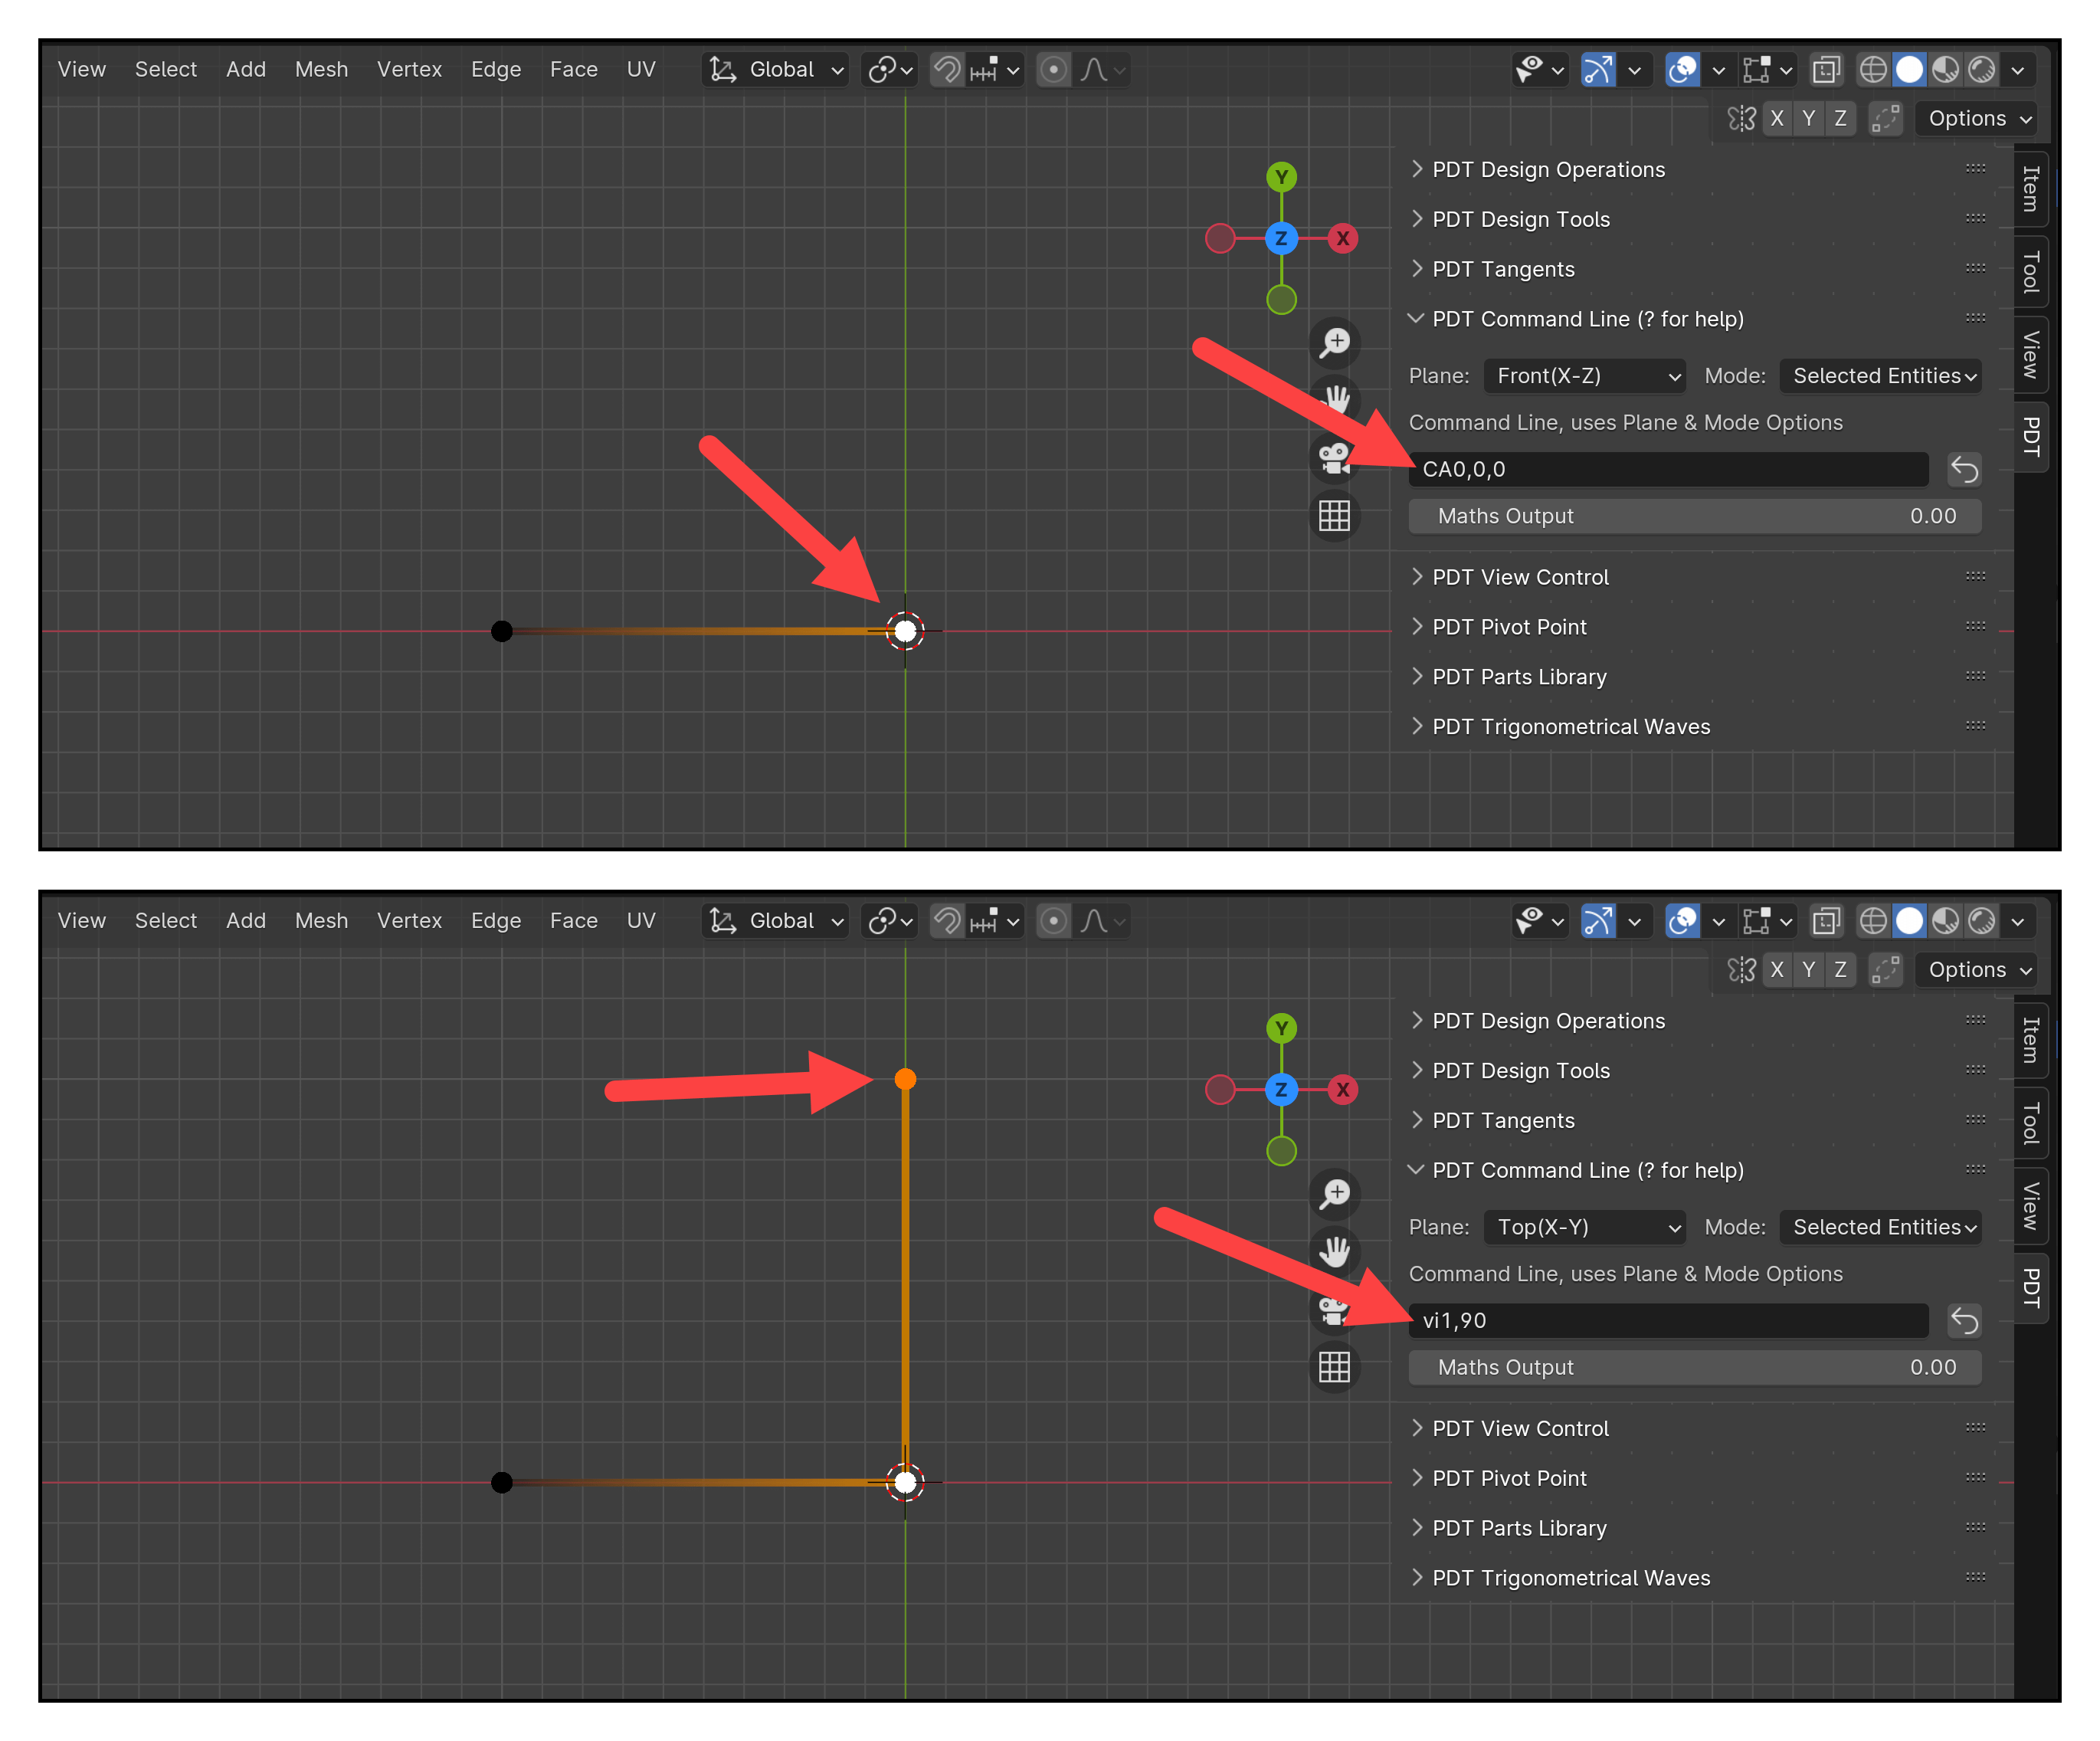
The first thing to do here is set a value for your radius. It could be any value like 2 meters, 7 feet, or any other you need. Regardless of the value, the procedure will be the same. For our example, we can use 3.5 unites as a length. Why? Like any CAD tool, we can measure the distance between each edge of the walls.
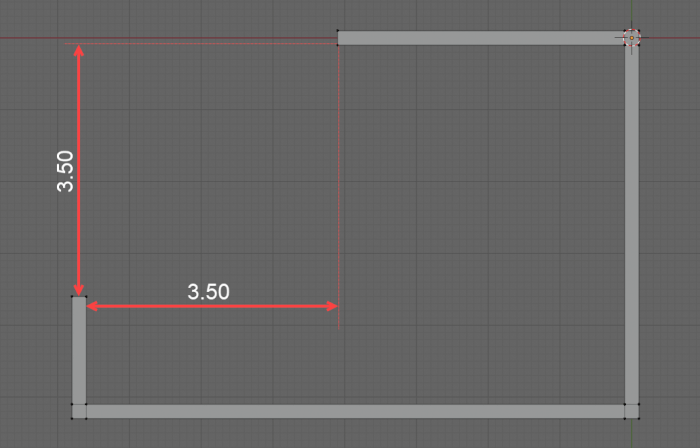
(Lengths)
With that value in mind, we can place the 3D Cursor at a distance of 3.5 units from the wall. Use the inner vertex from any of the wall end shapes. Select a vertex as the reference to moving your 3D Cursor. In Edit Mode, left click at any vertex.
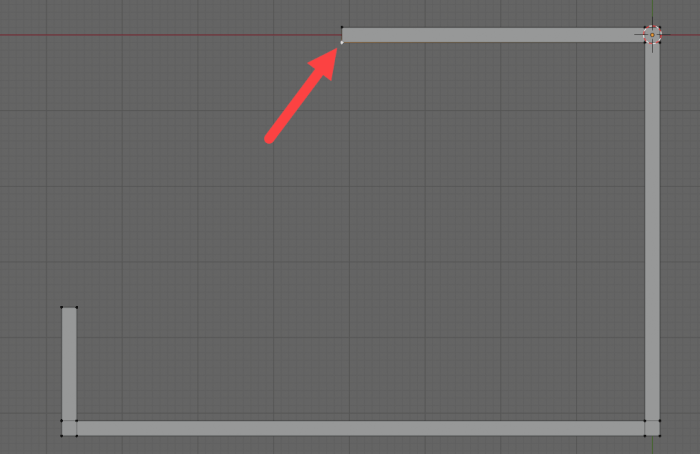
(Selected vertex from wall)
Press the SHIFT+S keys to call your Snap options and choose “Cursor to Selected.” That will make your 3D Cursor align with the vertex.
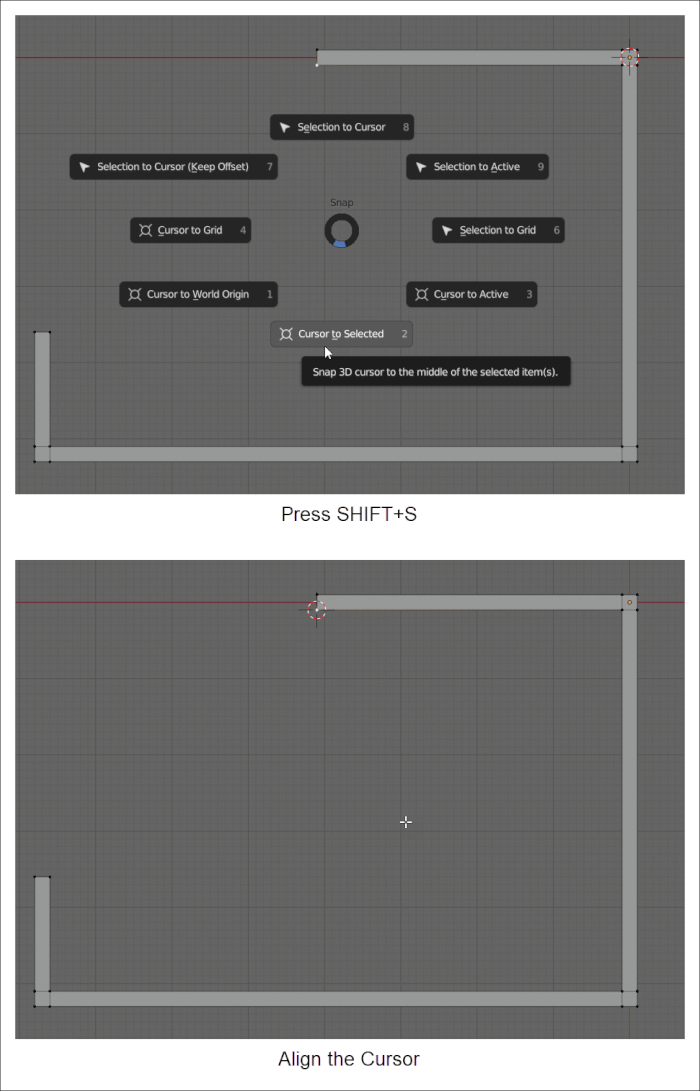
(3D Cursor aligned)
Moving the 3D Cursor with a precise value
The trick now is to place the 3D Cursor exactly 3.5 units away from our vertex, which will set the radius distance for a Spin. By pressing the N key, we can open the Properties Sidebar and locate the View tab. There you find all coordinates for the 3D Cursor.
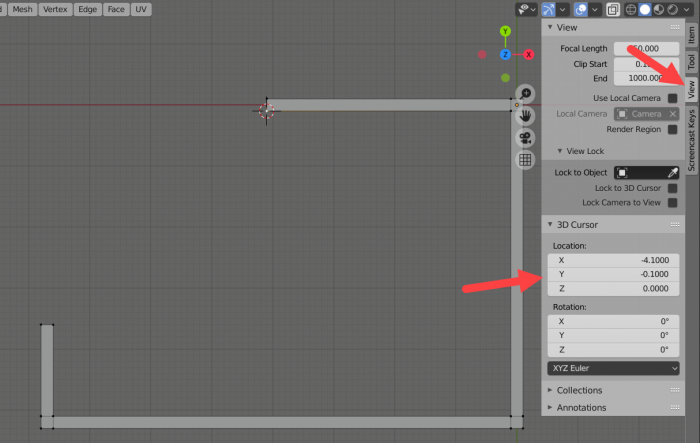
(3D Cursor coordinates)
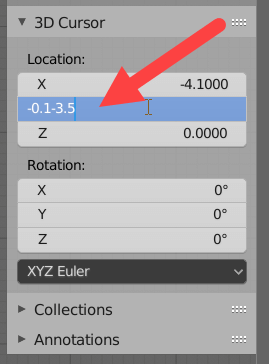
Since we have to move the 3D Cursor in the vertical axis, assuming you are using the top view, we must change coordinates at the Y-axis. At the coordinates field, you can use a simple expression to move your Cursor 3.5 units downwards. Click at the field and add “-3.5” to change your 3D Cursor location.
(3D Cursor coordinates)
 (3D Cursor location)
Starting the Spin: Creating a curved wall
The secret to creating any curved shapes with a Spin in Blender is to place your 3D Cursor at the pivot point and set your view to an orthographic projection (Numpad 5). Another key aspect of your Spin is that it happens in parallel to your view plane.
As a rule, you should always start the Spin from one of the six orthographic views:
- Top (Numpad 7)
- Front (Numpad 1)
- Back (CTRL+Numpad 1)
- Right (Numpad 3)
- Left (CTRL+Numpad 3)
- Bottom (CTRL+Numpad 7)
Using the Top view, you can select the elements you wish to use as a reference. In our case, an edge is all we need.
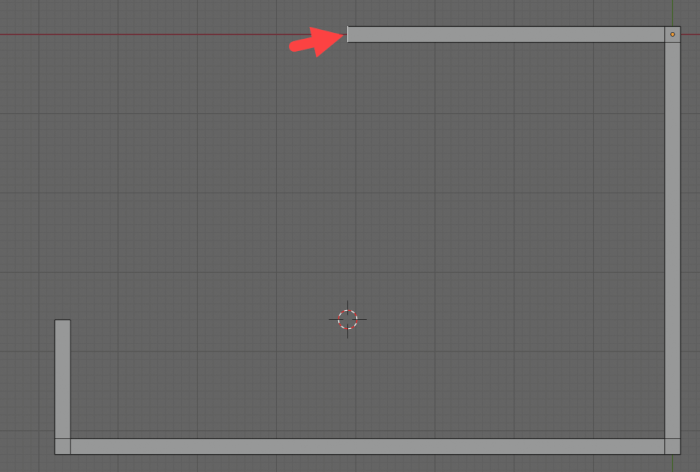
(Selected edge)
Press the Spin button (Toolbar in Edit Mode), and you will see a blue arc above your selected element. If you click and drag that arc, it will start the Spin.
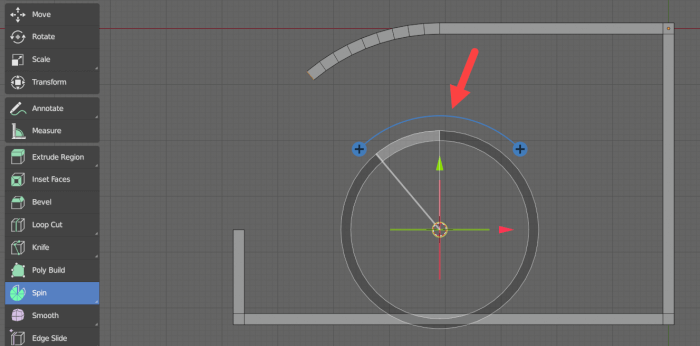
(Arc)
Notice how it is turning around the point set by your 3D Cursor. Using the mouse to control your curved wall might not be the best solution for precision. At the lower-left corner, you will see the floating menu with options regarding your Spin.
Change the values with:
- Angle: Set the length and direction of your curved shape. The length uses degrees and a positive or negative value for guidance.
- Steps: Since we are using polygons for modeling and not curves, you must set the number of divisions for that round shape. Values between 12–24 usually are enough for curved shapes.
Here is the curved wall.
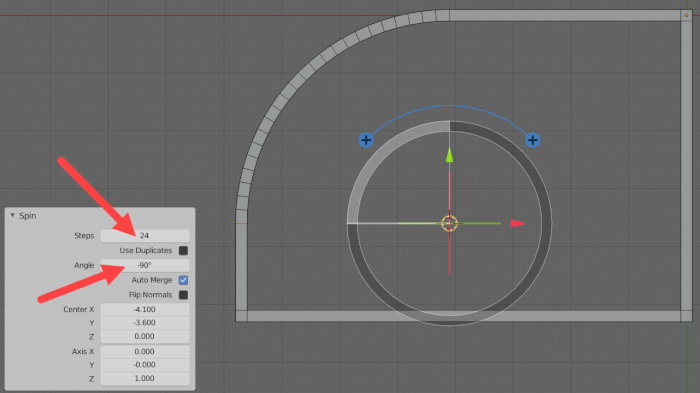
(Curved wall)
Here are a few things you should consider when using the Spin:
- Start by defining the radius length
- Pick an existing reference point and align it to the 3D Cursor
- You can start a Spin using the mouse and get precise control with the floating menu on the lower-left corner
- Always trigger the Spin using an orthographic view parallel to the viewing plane
- The procedure also works when you have a unit system, which will make you type lengths as meters/centimeters or feet/inches
Using Blender for architecture
Do you want to use Blender for architecture or render your projects using Cycles or Eevee? We have three books available that could help you!
They cover the use of Blender for producing architectural content and also all information you need to render projects in real-time:
- Blender 2.9 for architecture: Modeling and rendering with Eevee and Cycles
- Blender 2.8 parametric modeling: Drivers, Custom Properties, and Shape Keys for 3D modeling
- Blender 3.0: The beginner's guide
- Blender 2.8 for technical drawing
- Blender Eevee: The guide to real-time rendering with Blender 2.8
You can get them in both digital and paperback formats. By ordering those books, you will not only improve your skills with Blender for architecture but also support Blender 3D Architect.