

Bentley Street Building with Blender Cycles (Profile)
The project profile series of Blender 3D Architect is a collection of articles aiming for feature projects related to architectural visualization. We invite talented artists to share additional details about each project to demonstrate how they approach each stage. And also allow each author to publicize their work among our readers.
How does it work? It is like an interview, where we sent a couple of questions about a project for the artist.
If you want to check previous project profiles, visit this link.
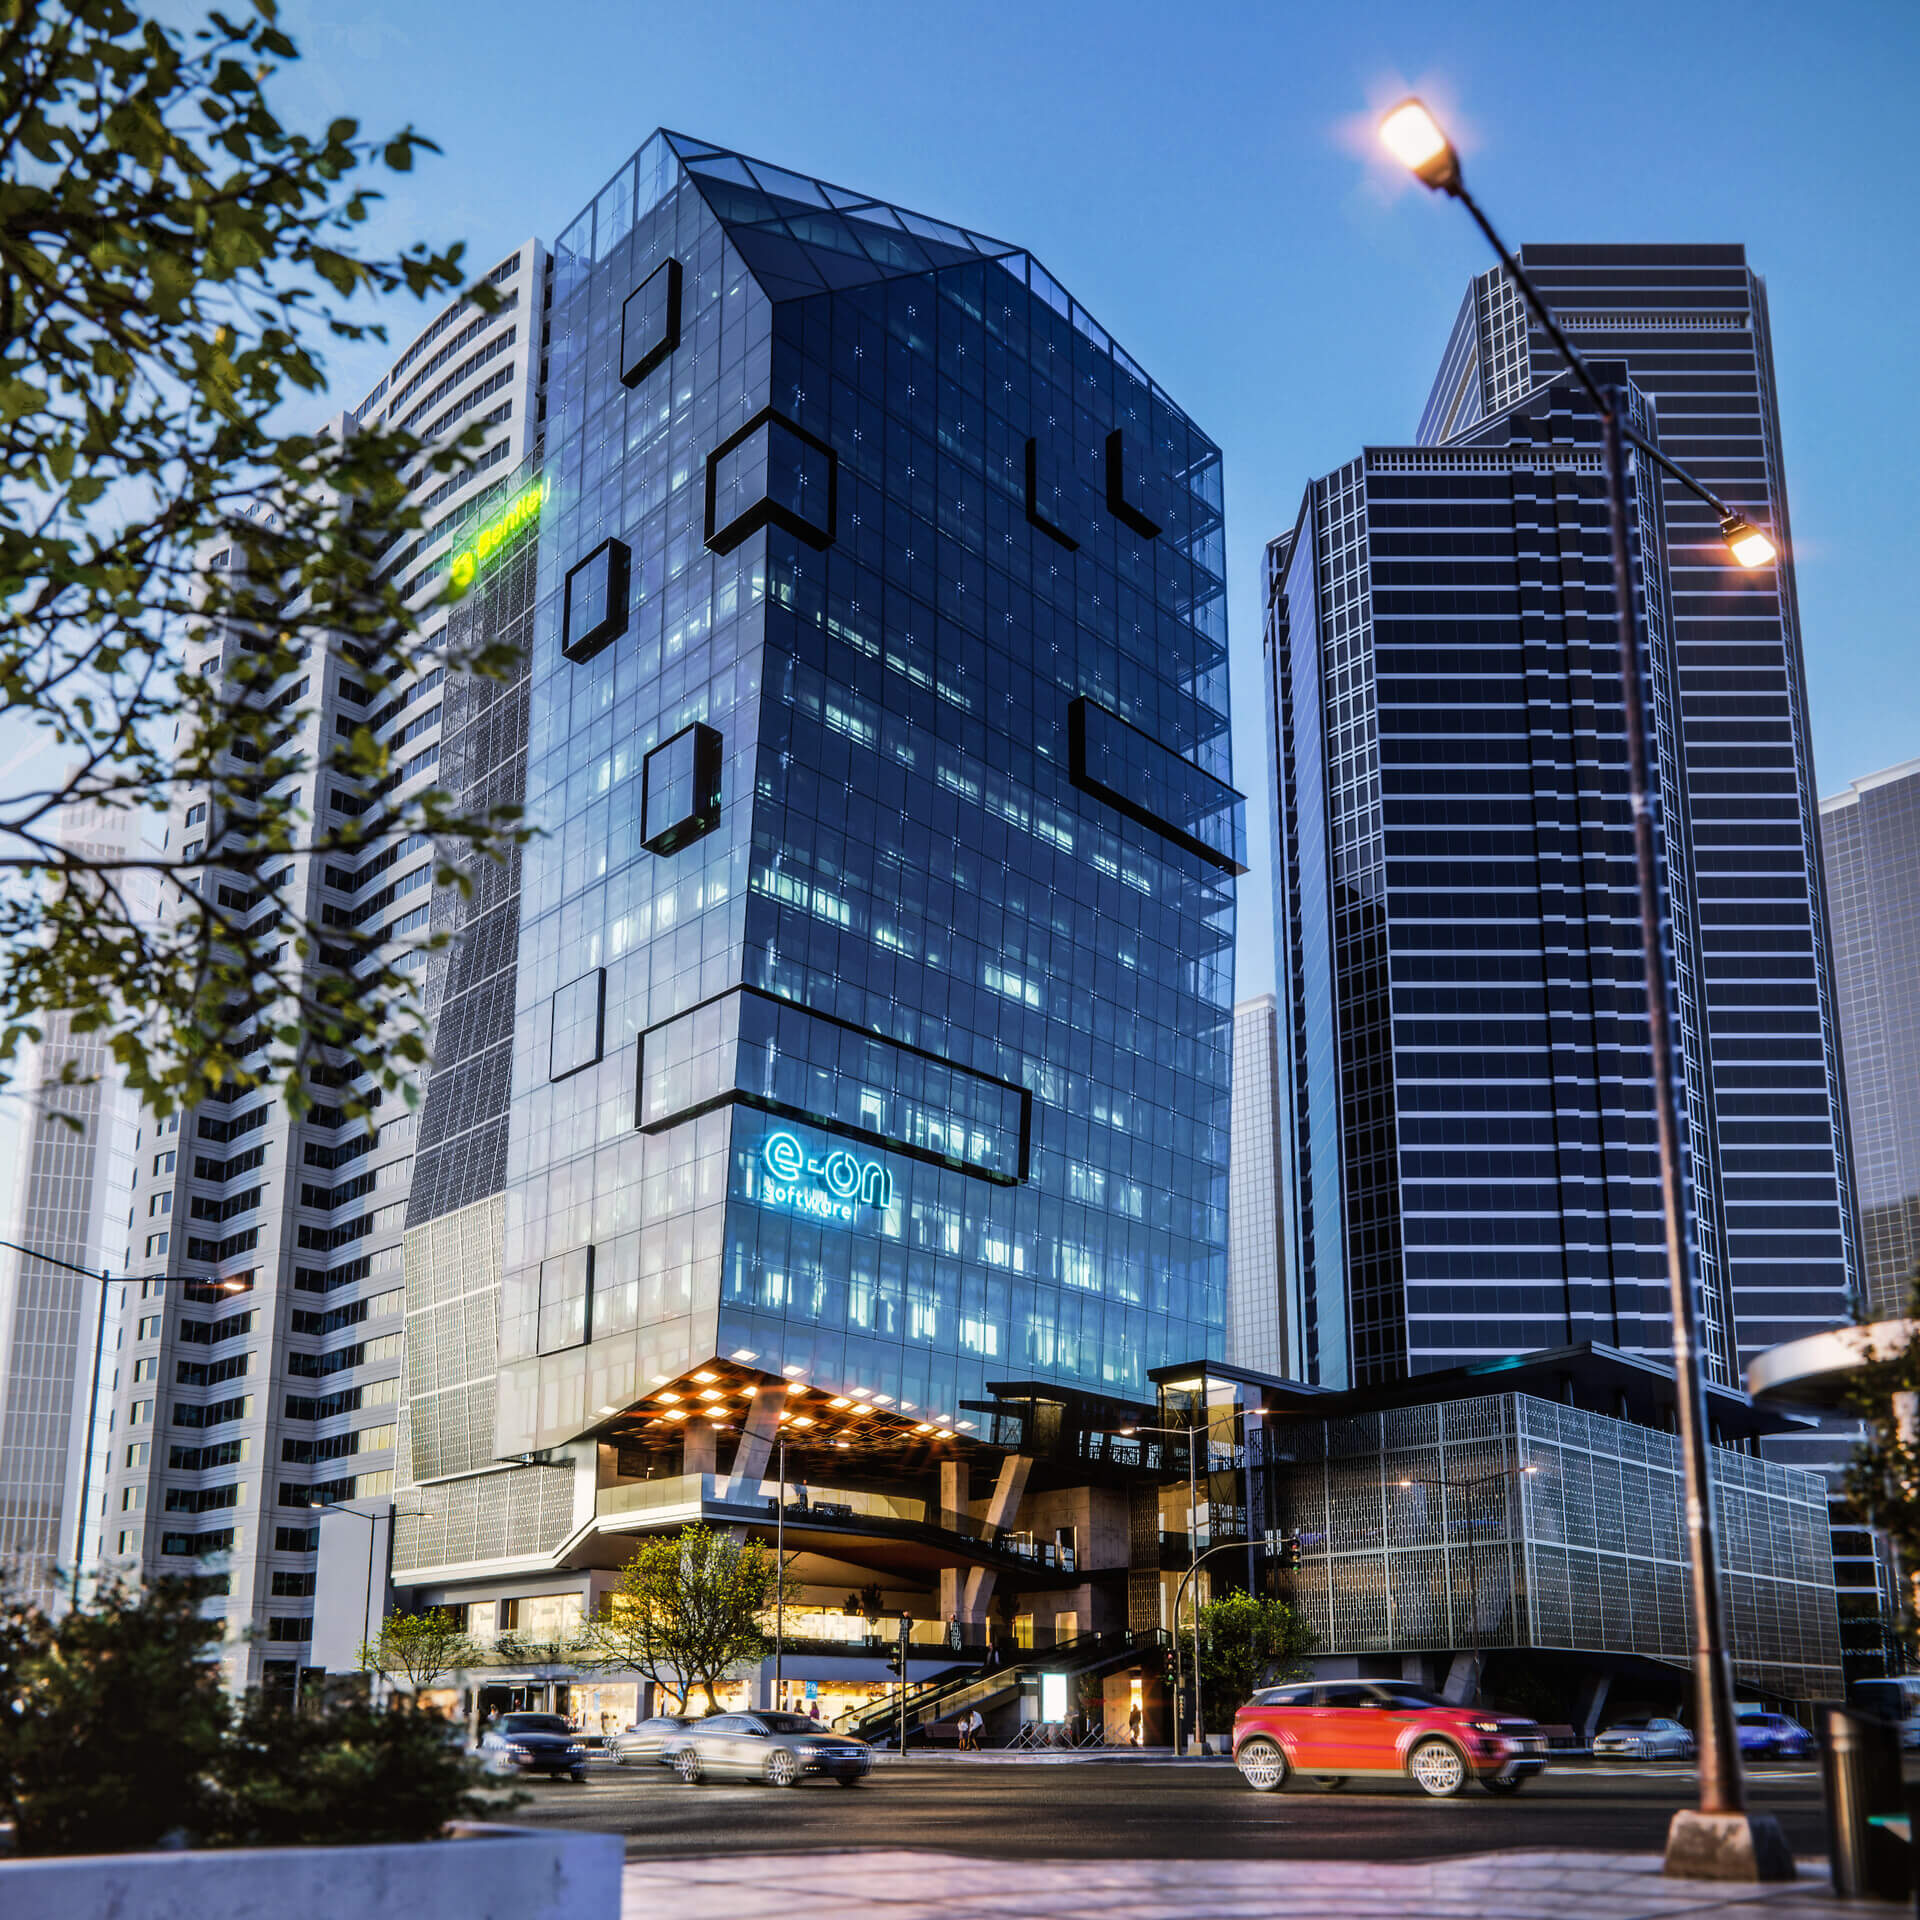
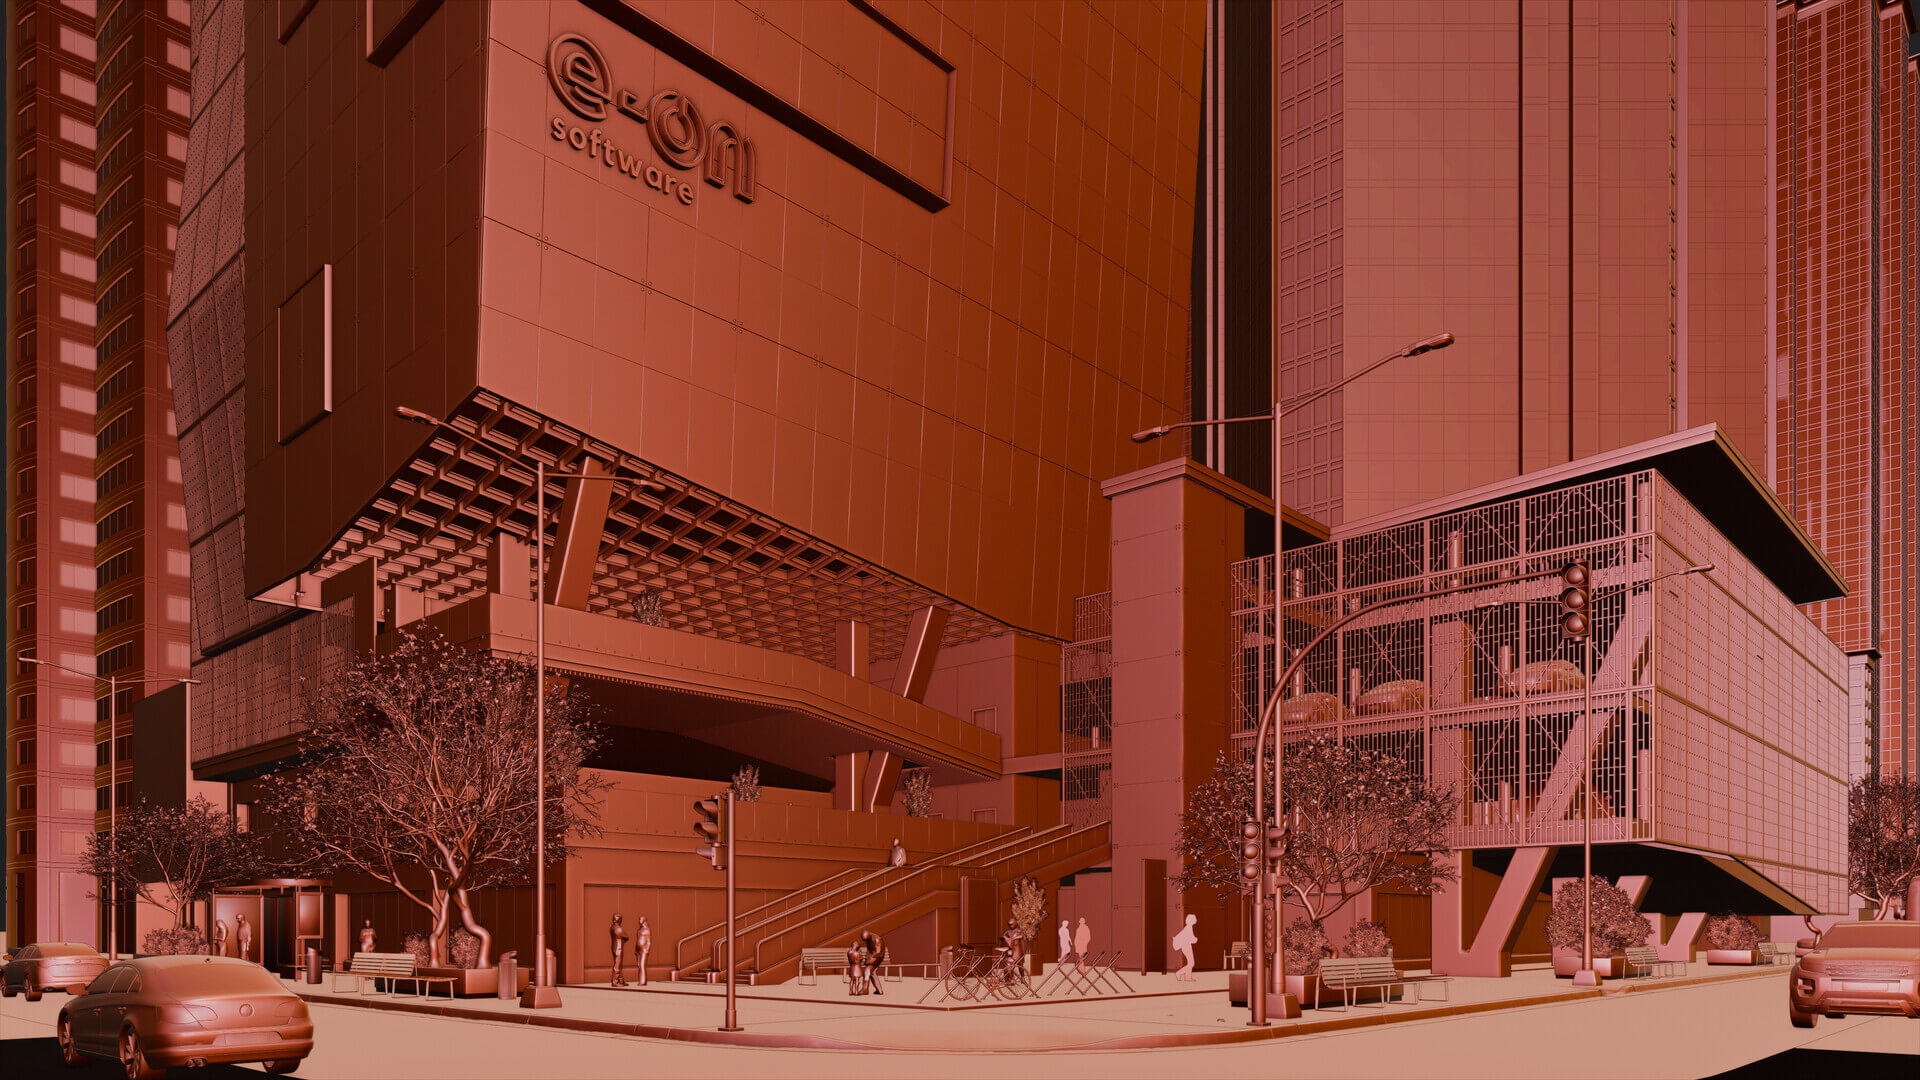
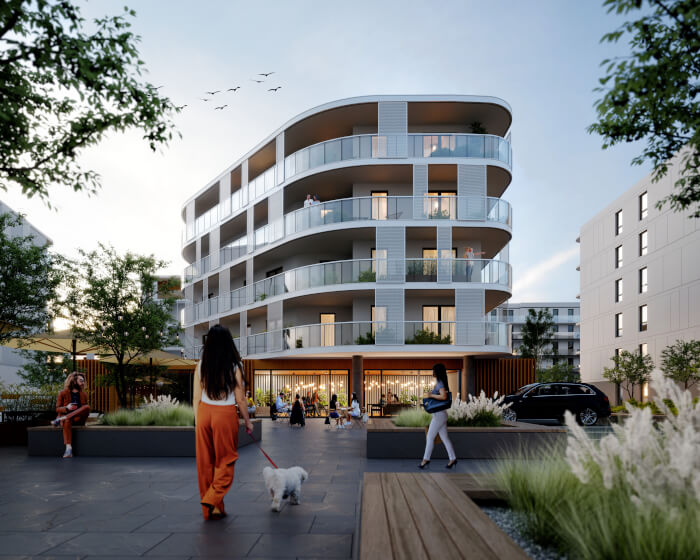
Today we have a project named Bentley Street Building from artist Noel Villalobos, which used Blender Cycles to create some impressive visuals for an urban scenario.
(Click to enlarge)
What is unique about this project? You find here something quite common in architecture, which is a project that is part of a contest. A conceptual design that competes with multiple ideas. If you are starting with architectural visualization, it is almost certain that at some point, you will have to make renders for a contest. Besides being part of a contest, you have here an impressive set of renders with an external urban space.
Since the project was a bit old, you will notice that it uses Blender 2.80 beta.
Let me thank Noel Villalobos for sharing the details about the project with Blender 3D Architect readers.
Was it a commercial project?
It is not a commercial project, it was a fictitious project for a render contest, in which I participated in the office where I worked, the award was for a software called “E-on Vue” from the company Bentley Systems that are dedicated to BIM software, for this reason, the building has the company logos.
(Click to enlarge)
What can you tell us about the motivation for this project?
The project was designed by me and modeled originally in SketchUp, but at that time I was learning Blender and transitioning between 3D modeling softwares and that is why I decided to use this model for renders in Blender, in the end, I had to do a lot of modeling directly in Blender with which I learned a lot.
(Click to enlarge)
Did you use any references for modeling, like technical drawings?
It was a complete conceptual design based on the architectural design logic of this type of commercial buildings, I saw many references on Pinterest, I liked the typical New York scene of the “corner building with glass walls” and tried to play with interesting shapes such as biases and angle.
(Click to enlarge)
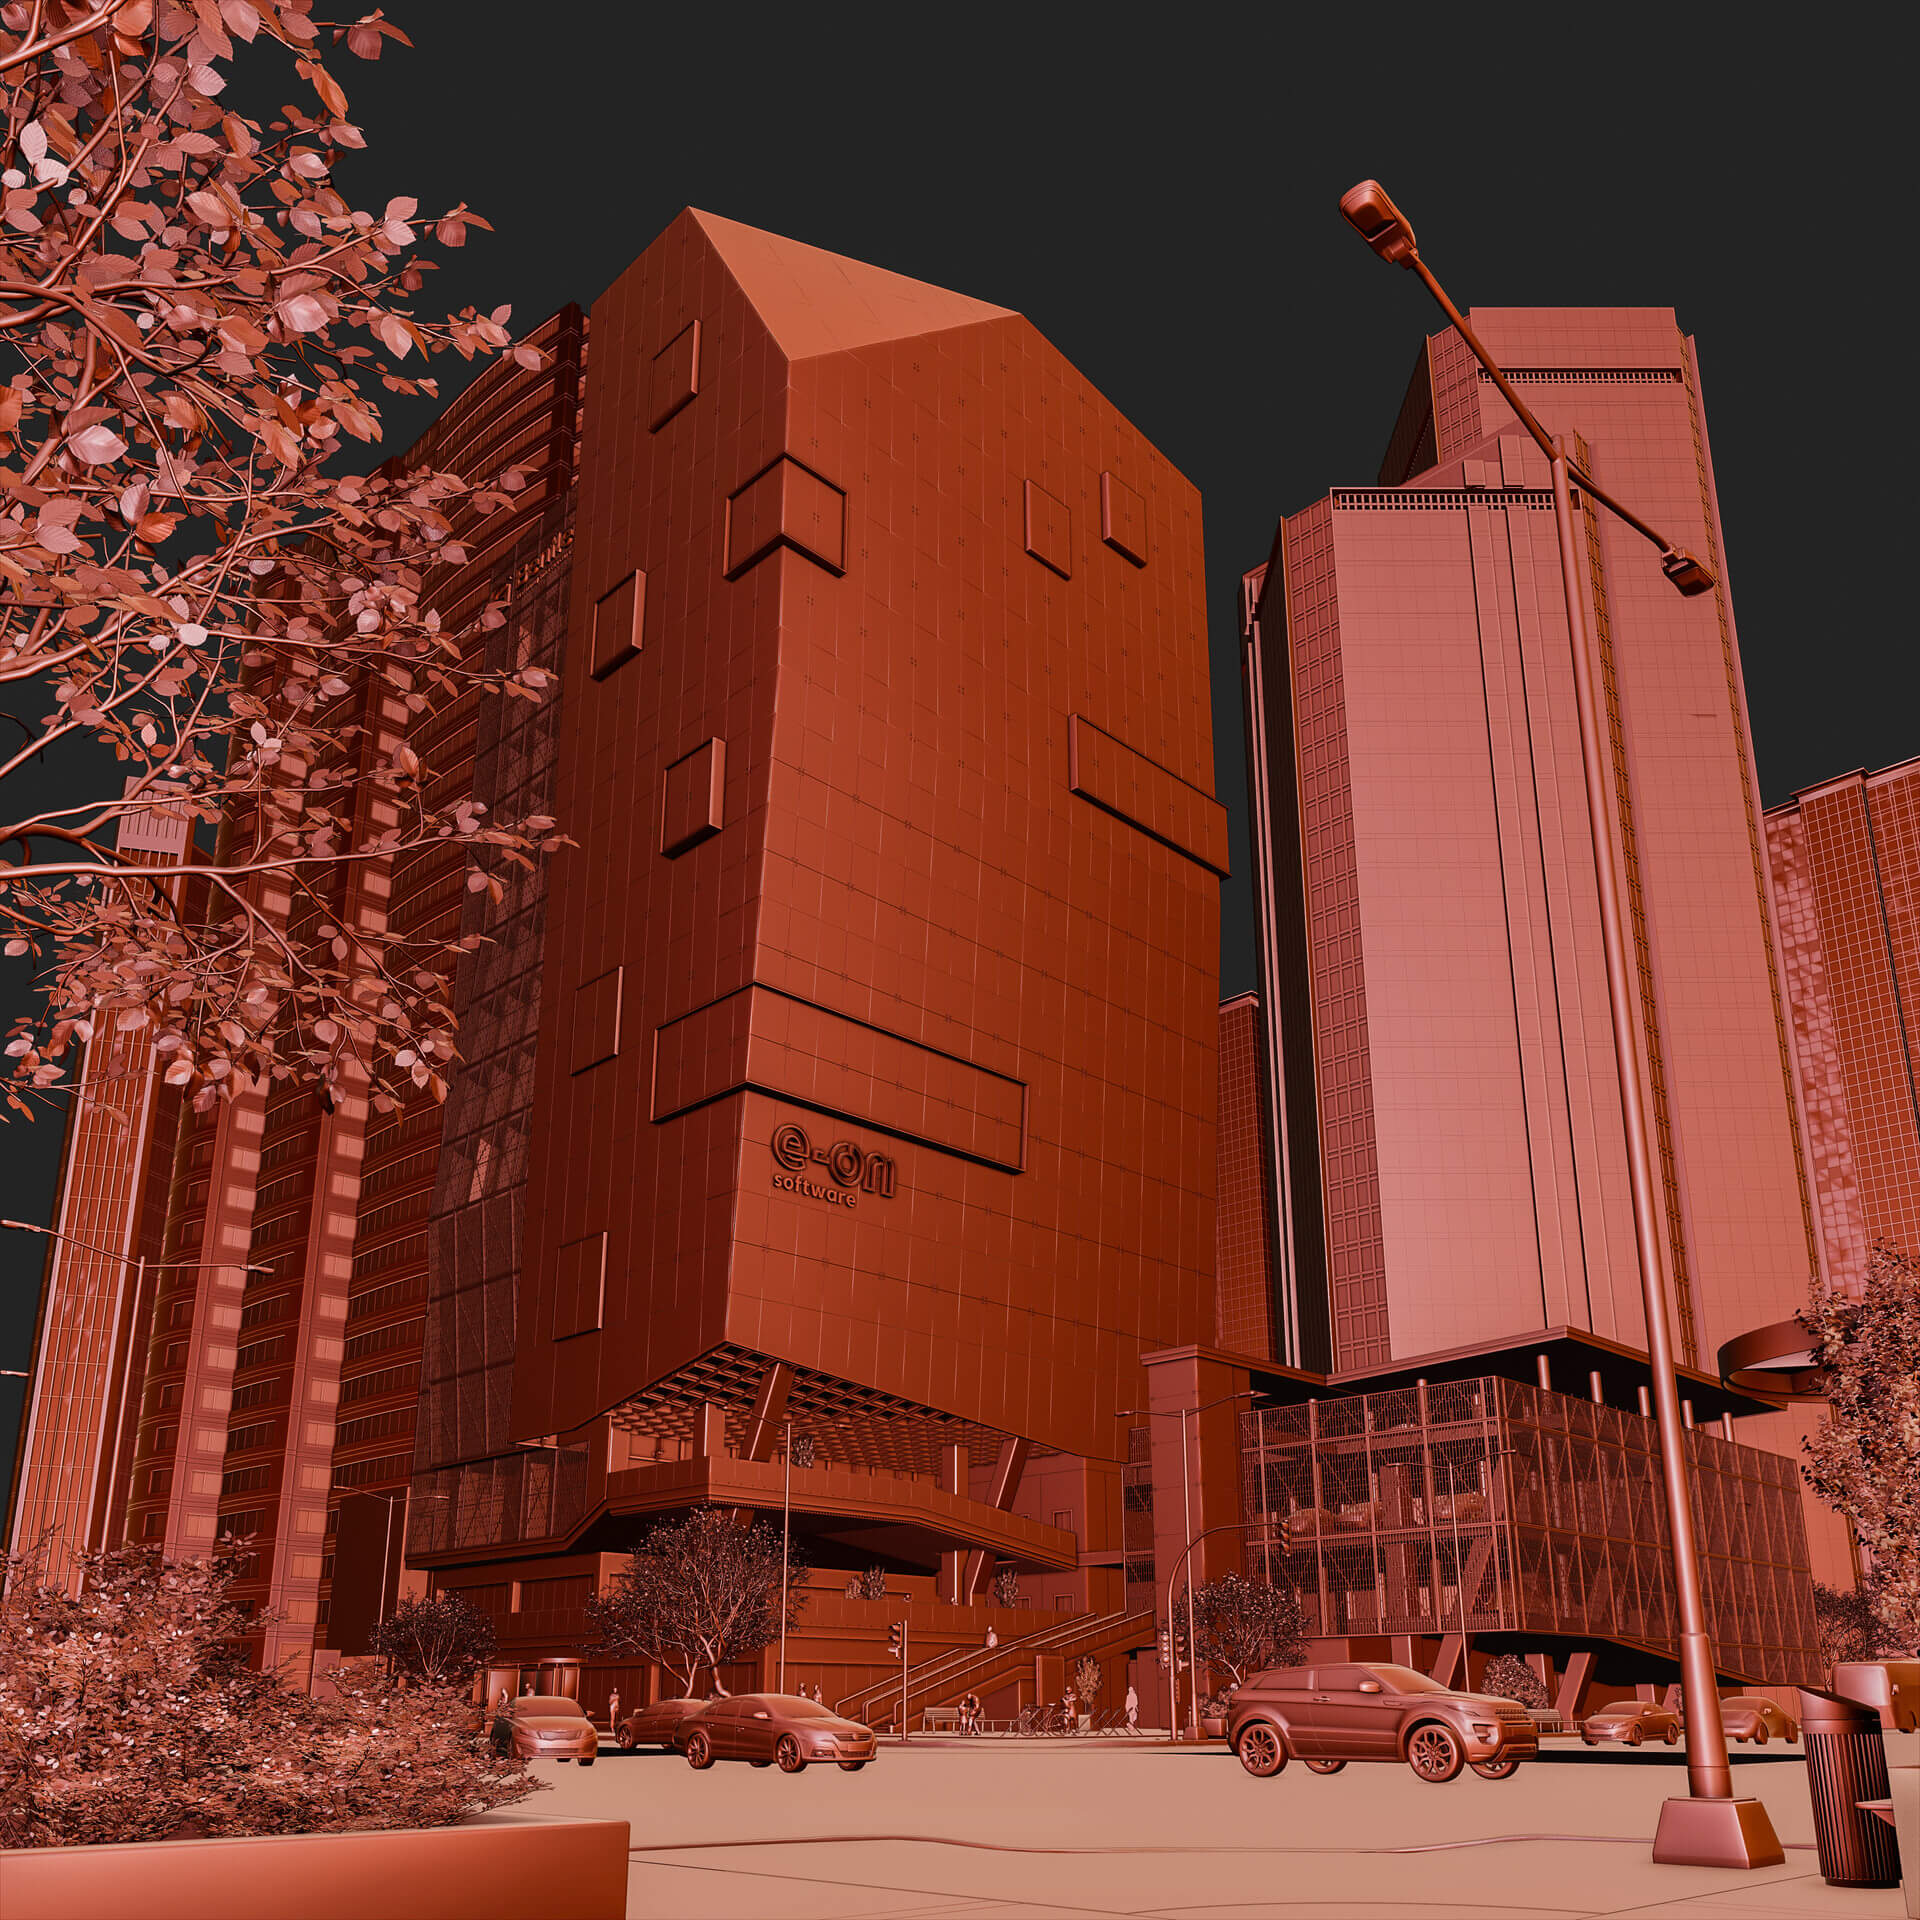
Did you model everything in the project, including furniture and props?
I modeled the entire main building, sidewalks, and the street, including light poles.
For the other elements use the different commercial collections:
- The neighboring buildings: Evermotion-Archmodels Vol.71
- Cars: Vizpeople Cars Vol. 1
- People found them at: 3dwarehouse.sketchup.com
- Urban furniture: Vizpeople 3D Streets vol.1
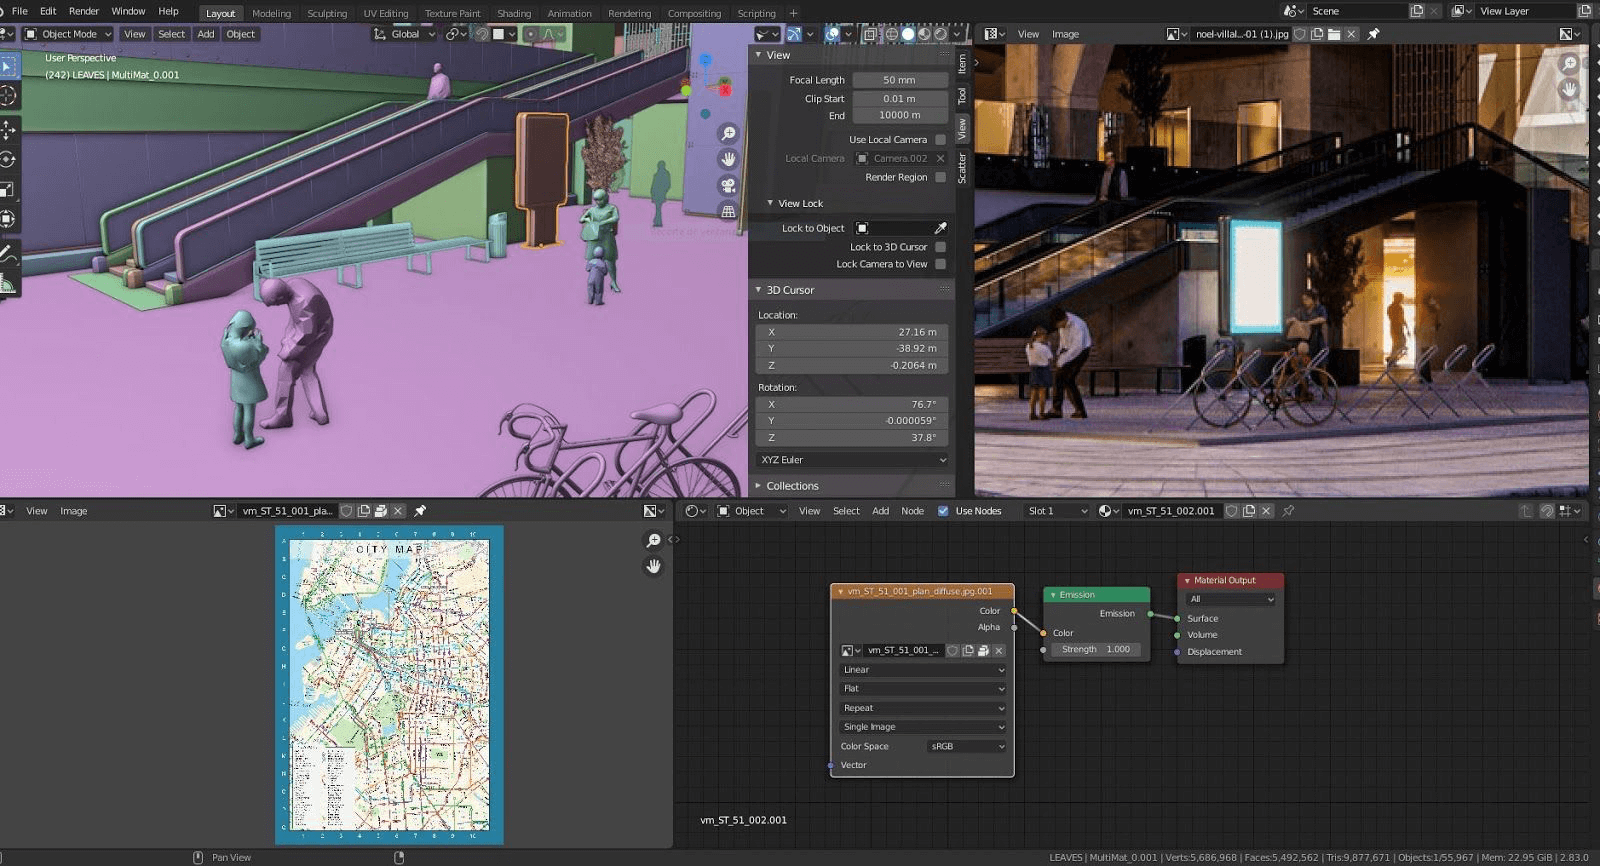
What can you tell us about the interior design (Layouts, materials, and props)?
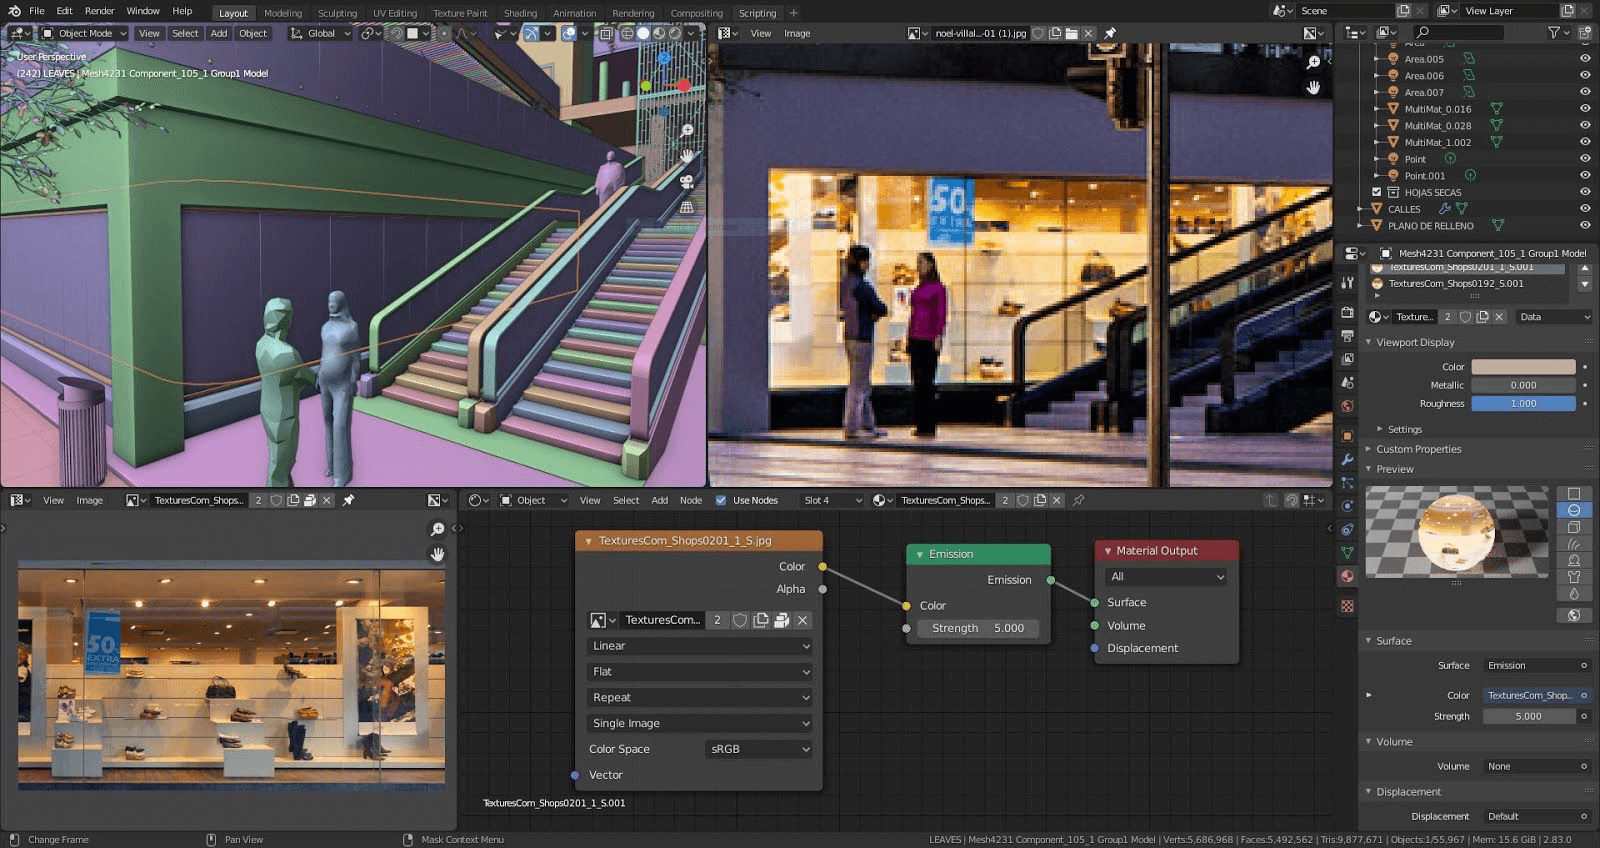
The interiors of the building are just textures of sideboards and offices with an emissive material applied on planes with bevels.
Most of the materials are from these sources: textures.com, poliigon.com, texturehaven.com, Textures.one, Hdrihaven.com, and others…
(Click to enlarge)
Did you have to create it yourself?
I only had the idea of presenting a building with these characteristics, I made the design and 3d model of it, create the materials and render the image.
Before, I had the idea of modeling everything at all, but I learned that it is only a waste of time and that if you already model something, using a model of others is not an artist’s sin.
(Click to enlarge)
How long did it take from start to finish?
About a week to model the building, and it took me a few days to render to test to adapt to Blender, etc., it was a learning process.
(Click to enlarge)
What hardware did you use to render?
It was a PC with Windows 10 system with these specs:
→ CPU: Intel i7 7700 GPU: GTX 1070 RAM: 32 GB DDR4
Can you share some render times?
About 40 min per image with CPU only, 256 samples, and 64px bucket tile size.
(Click to enlarge)
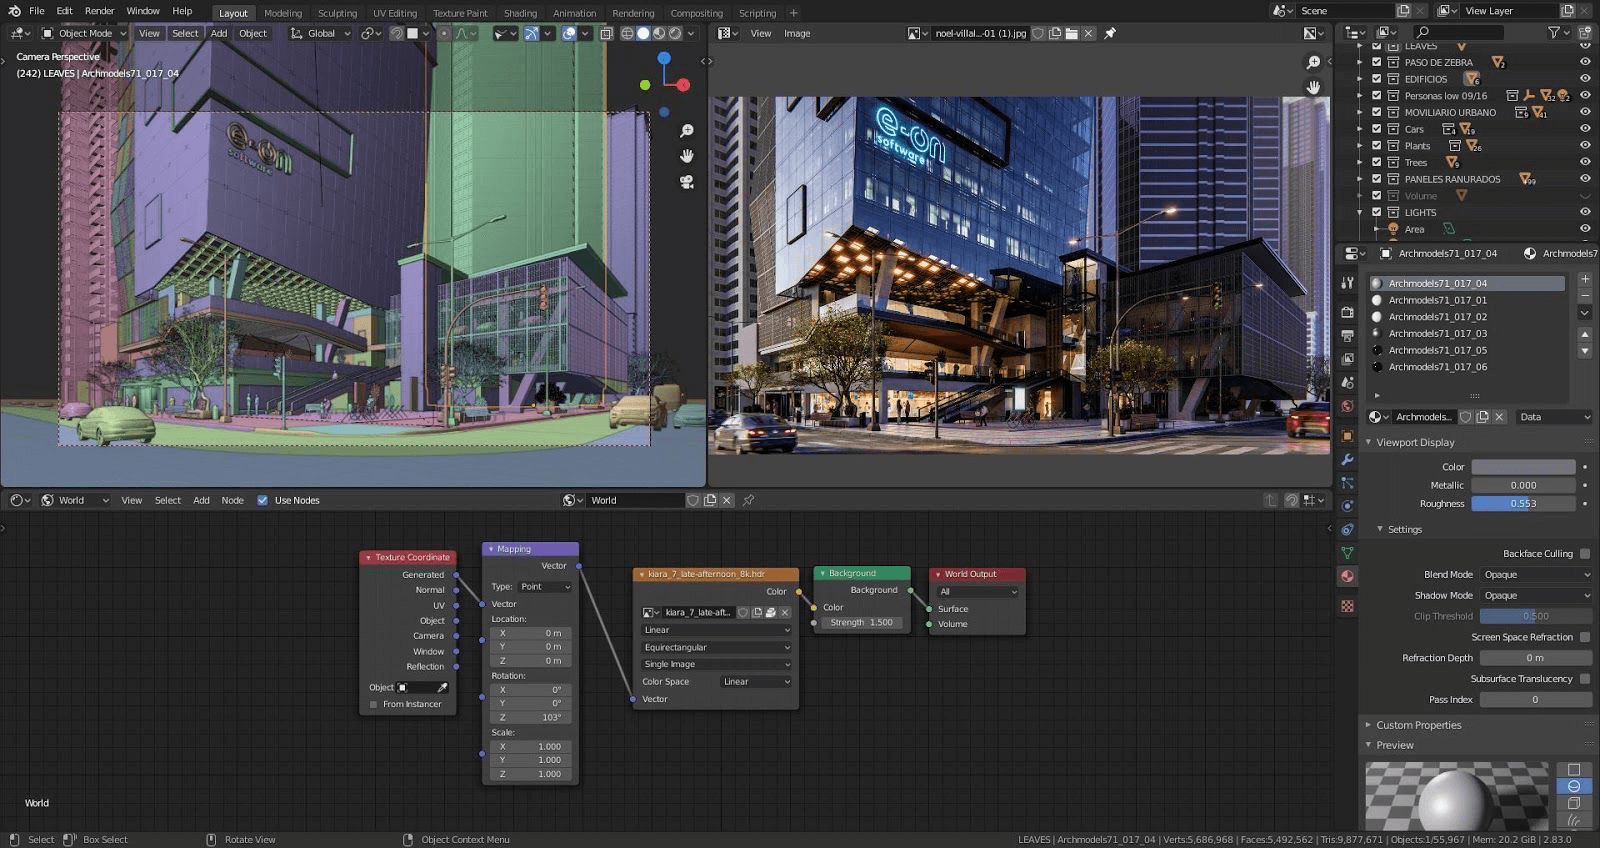
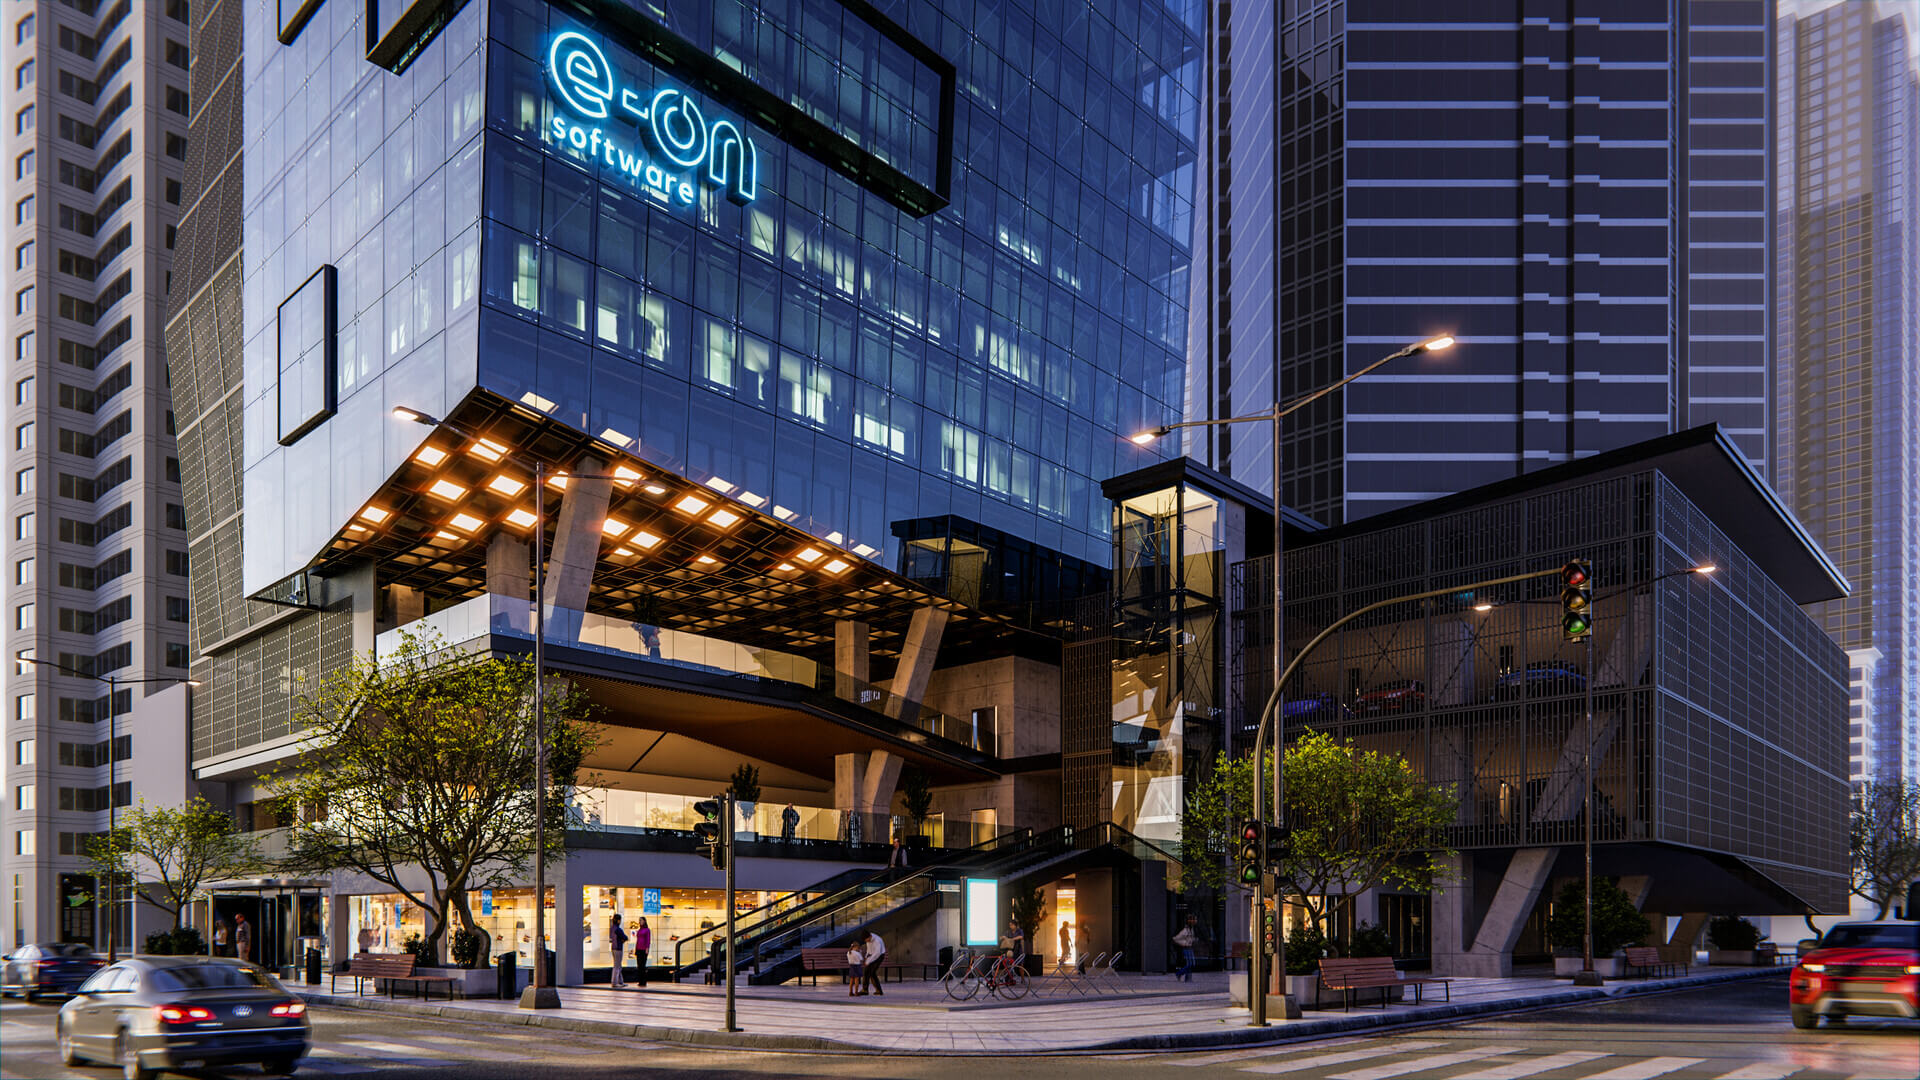
Can you share any details about the lighting process?
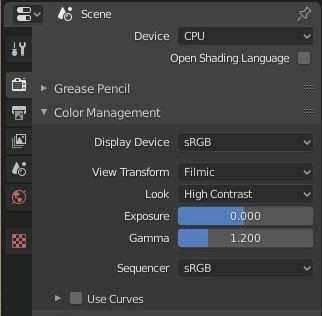
For exterior images I always use HDRI lighting, I almost never use the sun lamp, in this case, I used this. Adjust the rotation to an angle that I liked with these settings: I always use “Filmic” in color management perhaps with “high contrast” or “very high contrast” depending on the scene.
After the natural lighting of the scene, I add emissive materials such as the sideboards, screens, and lamps.
- Sideboard Emission shader
- Screen Emission shader
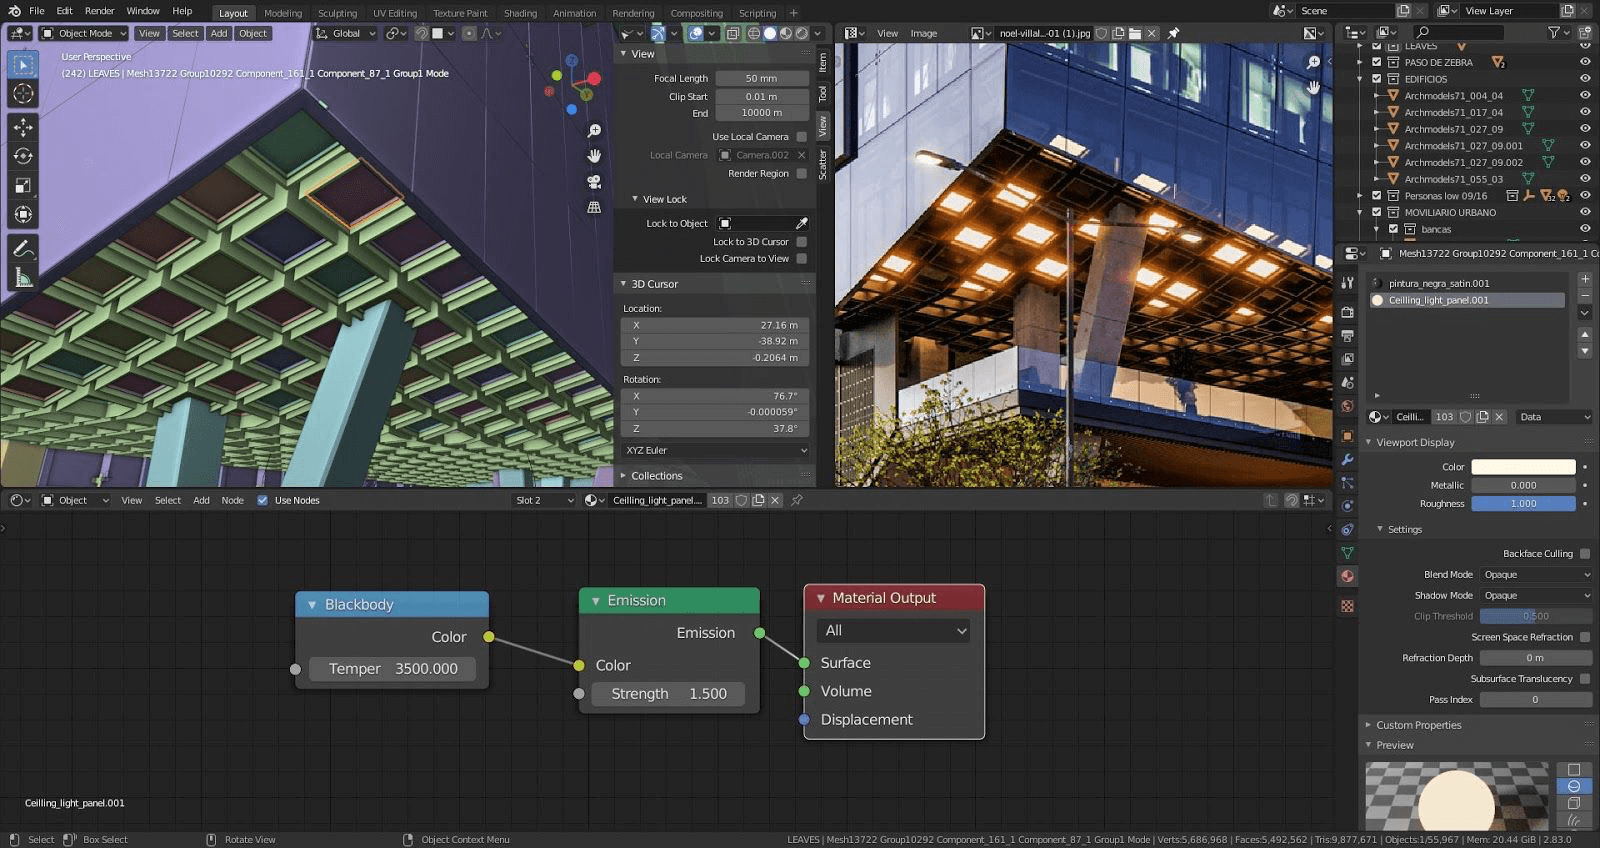
- Ceiling lamp emission shader
Finally, I add point lamps in dark areas where the emissive does not have the power to illuminate correctly. I like to use the blackbody node to give it the right shade of light temperatures.
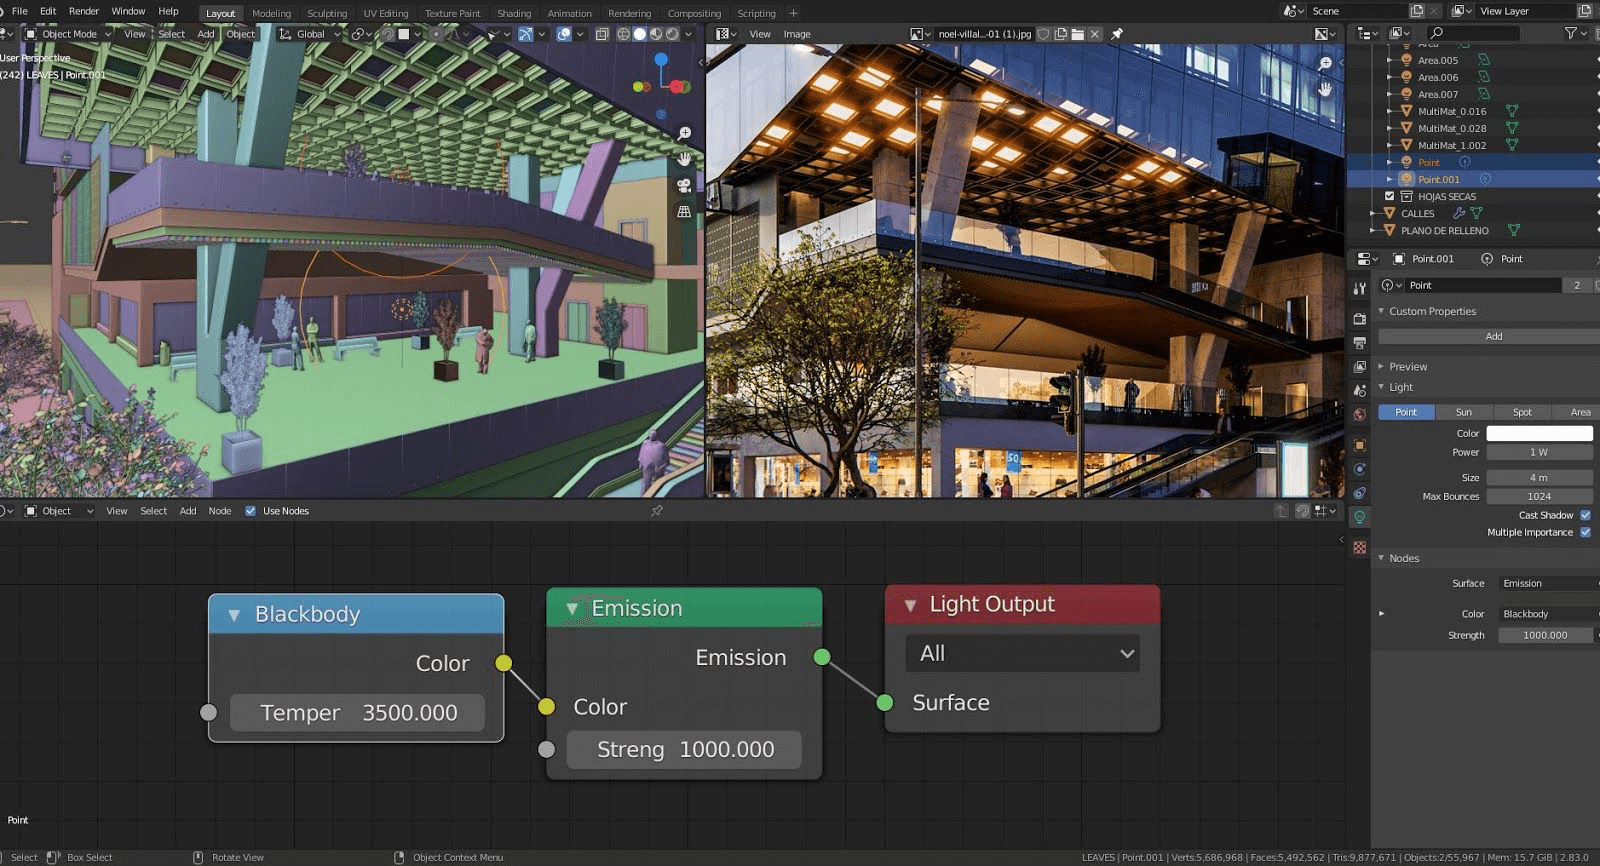
(Click to enlarge)
How important was post-production in your workflow?
Post-production is “the cherry on the cake,” it is possible to spend hours creating a scene and other hours more rendering, but it would be wasted work without the subsequent touches.
For me, post-production depends solely on the color correction and tweaks of contrast, levels, and perhaps adding photography defects such as vignette.
I am not very supportive of adding elements such as 2D people or plants after having rendered the image, it is a very artistic work, but that consumes a lot of time, and it is very difficult for it to be well integrated into the image, of course, there are those who make it perfect, but not in most cases.
I usually use Photoshop to touch up my renders, but precisely with this project, I met the blender composer, which I loved!
The version was 2.80 beta, and they had just added the cryptomatte node, which is a very powerful tool to isolate elements of the image and edit them separately at ease, I used it to blur motion to cars and people, which gives dynamism to the picture. Also, add the “Glare” filter to the emissive materials, which simulates the effect of how the camera perceives the lights in a photograph, finally use the mist pass by superimposing it on the image slightly to add a sense of depth in the environment.
I would never deliver a render without post-production.
(Click to enlarge)
Did you use any Add-ons or external tools to create the project?
Yes, use The groove addon to create trees; it is very intuitive to create vegetation.
If you want to share any additional details about the project, feel free to send it!
I had approximately six years working with archviz, moving from software to software, and they did not give me the results that I wanted or did not adapt correctly to conventional workflows, which greatly limited the variety of resources that I could implement in my work.
I remember very Well this project because it was my transition to using 100% blender, and it was the first time that I felt entirely comfortable with 3D modeling software, and I would like to thank everyone involved in the development of Blender who is doing an amazing job!
It’s one of those things “too good to be free.”
Thanks again to Noel Villalobos for sharing details about their work. You can check more projects from him by visiting his portfolio.

I think the tree add-on is “The Grove,” but if I am wrong, could you please include a link to the “Groove” add-on?