

How to improve Bézier Curve editing in Blender? (Free Add-on)
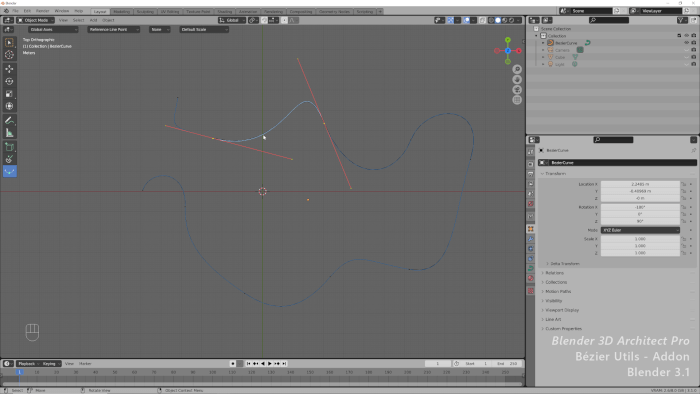
Bézier Curves in Blender can be used in many types of projects, from animation tasks to modeling. It is a versatile tool and can give you better results than mesh objects if you know how to use them. One of the problems related to Bézier Curves in Blender is that it is not easy to create and edit those lines. After you make the primary curve, you need to go into Edit Mode to extrude them to make all the rest.
For artists who used tools like Inkscape, Affinity Designer, and others, it becomes clear that curves in Blender require patience to get the correct shape.
What if I told you that we have an Add-on that can completely change how we work with Bézier Curves in Blender? Meet the Bézier Utility Operations from developer Shrii Nivas.
You can download the Add-on for free by following this link.
After installing this Add-on, you will be able to create and edit Bézier Curves in Blender as if you were in a tool like Inkscape. Once installed, it becomes pretty easy to set up and get the best shape for your modeling project.
Can we use Bézier Curves for architectural modeling? Sure, you can do a lot with those types of objects. For instance, here are a few common types of architectural elements that we can create with curves:
- Curtain walls
- Plaster mounding
- Furniture
Since the Add-on is free to use and download, you can include that in your modeling workflow and try to see if working with curves in Blender becomes easier.
The subscribers of Blender 3D Architect Pro received a tutorial with an overview of the Add-on.
