

There are several ways to create grass in Blender for architectural visualization, from using simple textures to complex Add-ons. Using an Add-on will bring you a lot of advantages over textures like being a lot more realistic. That is hard to beat.
Have you ever tried one of those Add-ons? In a past article, we did mention an Add-on called Grass Free. Judging by the name you can assume with confidence that it is a free Add-on for Blender, and you are right.
From that article, a few of our readers sent us messages asking about how to use the Add-on. Once installed in Blender, how to get that a realistic grass surfaces?
In the following article, we will try to explain all steps necessary to create and setup grass using that Add-on. We will assume that you have downloaded and installed the Grass Free Add-on in Blender.
Note: By the time we were writing this article the original website to get the Grass Free Add-on went offline. Not sure if that is temporary. If you want to download the Add-on, here is an alternative link.
Get the zip file and add it to your Add-ons, using the “Install from file…†option. You should not extract the zip contents, just point to the file.
Step 1 – Adding the grass to the scene
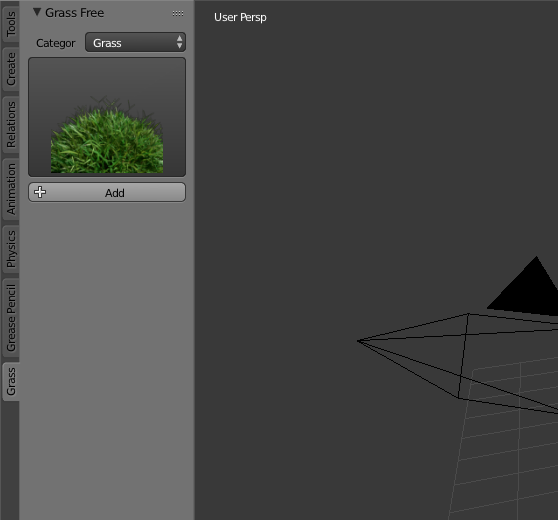
Once you install the Add-on, you will see something new in the Blender UI. At the Tool Shelf, a new tab called Grass.
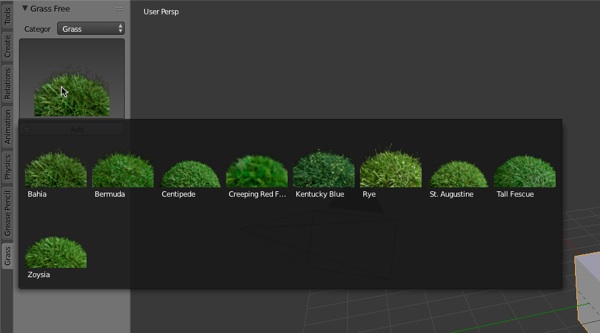
When you click on the grass selector, you will be able to choose between several types of grass for the scene.
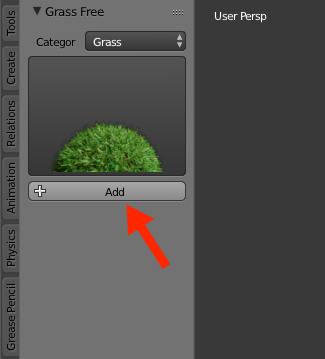
Choose one and click the “+Add†button.
Step 2 – Assigning the grass to a surface
Here is the part where a few users get confused. By clicking on the “+Add†button, only three small shrubs will appear in the scene.
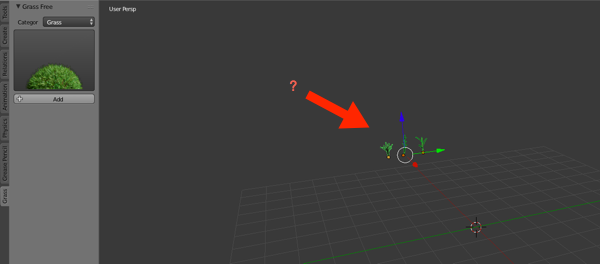
Should I add more grass objects? No.
The objects you have in the scene are part of a particle system. To assign them to an object you must go to the particles tab and assign a particle system to the object.
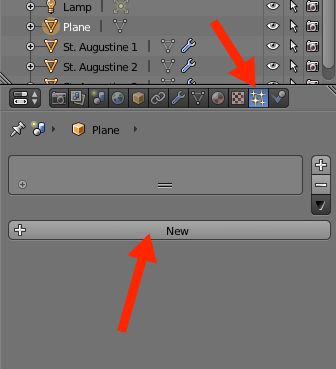
In our case, I will add a plane to the scene. Keep the plane selected and assign a particle system to the object.
After adding the particle system, you can select the data-block corresponding to the grass we added at step 1. If you click there, you will see the grass name.
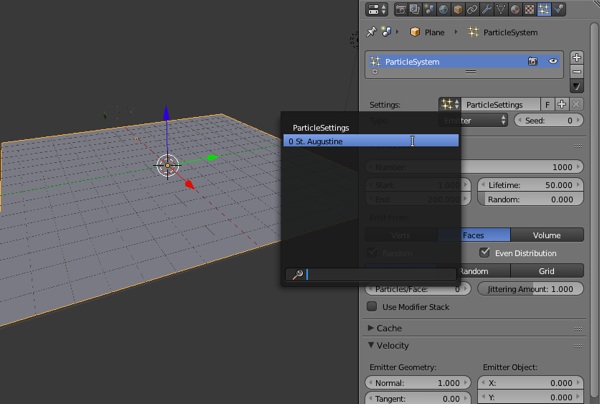
And the grass will appear on top of the surface.
Step 3 – Changing the grass parameters
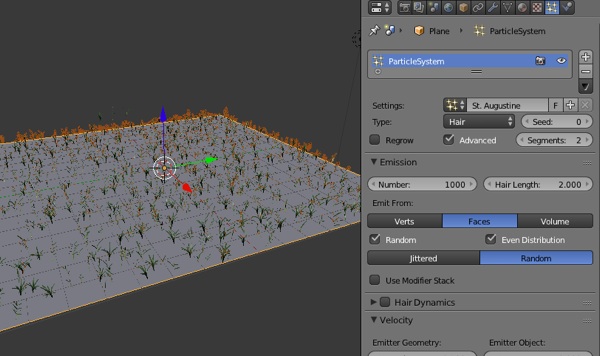
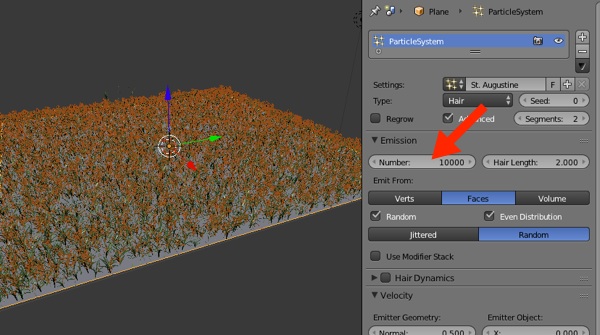
How to increase the grass distribution over a surface? You have to change the particle parameters. By default, the particle system will start with 1000 instances in the emitter settings. Let's add a zero and change it to 10000.
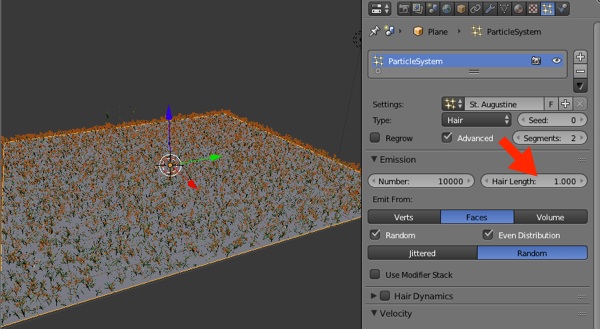
My grass is too tall! Can I cut it? The grass uses hair parameters of Blenders particle system. To shrink the grass leaves, you can reduce the size of your hair.
The default value for hair length is 2; we can cut it in half setting the number to 1.
Step 4 – Rendering the grass
To render the grass, we can push the settings a little higher to get a more realistic look.
Setting the number to 500000 half a million particles and the length of 0.5 will make the scene size skyrocket.
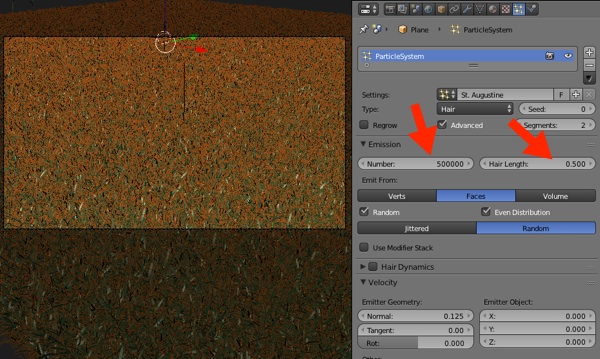
Notice in the image above that we also did set a camera to render the scene.
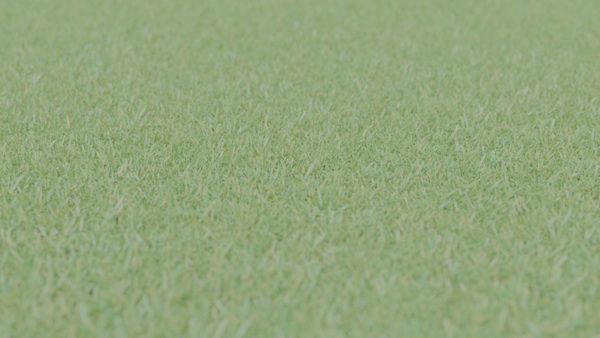
If you render the scene in Cycles using some basic settings, you will get a reasonable, realistic render of grass.
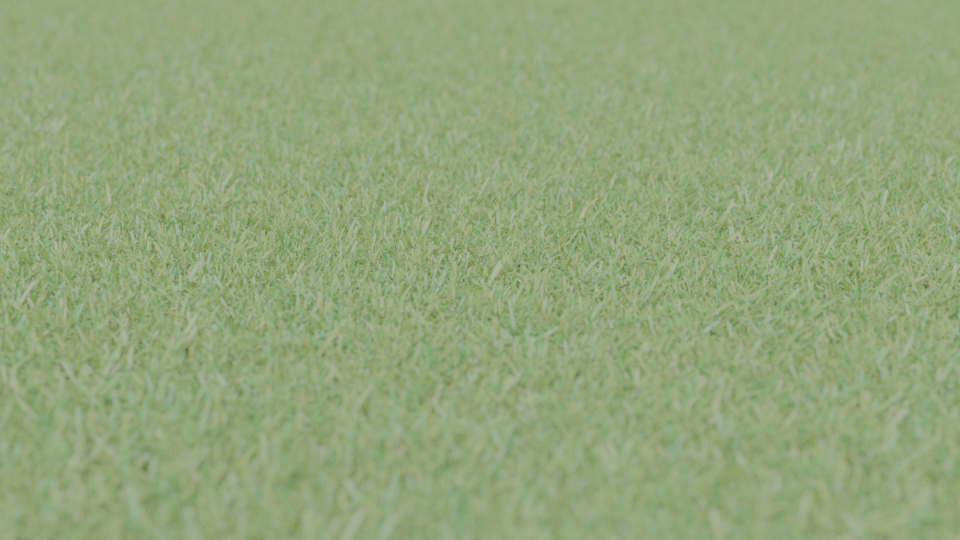
(Click to enlarge)
Now you know how to setup the Add-on Grass Free in Blender. That will give you a boost in your external visualization projects.
Be aware that using such high values for particles will also add a high computational load to the scene. Just the grass in our example has 159MB in size.

You post the most useful tips when I don’t need it anymore hahaha. Thanks, great article.
I have to work on my timing 😉
Great job Allan. Just cant get access to ur tutorials
Hi Zami,
Can I help you? Did you try to create an account?
Actually the original creator deleted those links and made their material paid only.
THamk you so much, really usefull!
Cannot download..there is no link