The settings used to light a scene for interiors in Cycles will most likely feature an HDRI map as environment texture. That map will help you both compose a background and add light energy to the scene.
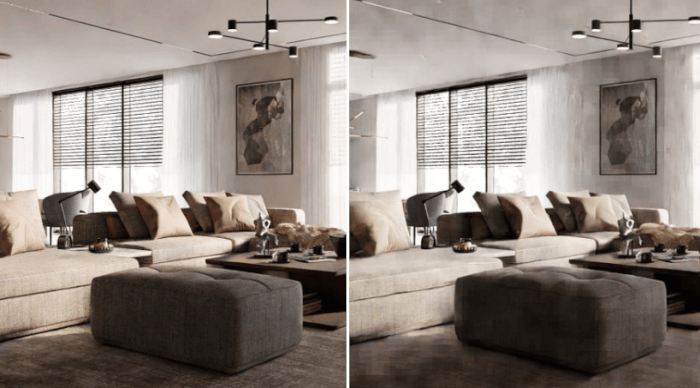
But, a few artists are choosing a bright white light as background to light their scenes with some excellent results. Like the compact residence created by an artist called Ghaell and posted at the BlenderArtists forums.
There is not much information about the overall settings used for this project, besides the use of 2000 samples for each image and average render time of 1 hour for each render.
But, the artist shares valuable information for anyone starting to use Cycles for interior rendering and willing to not use HDRI maps for lighting.
You will find that he doesn't use an HDRI map as a light source to the scene. Instead, only a white background with the HDRI there to compose with the render.
How to do that? Use an HDR map and a white background at the same time.
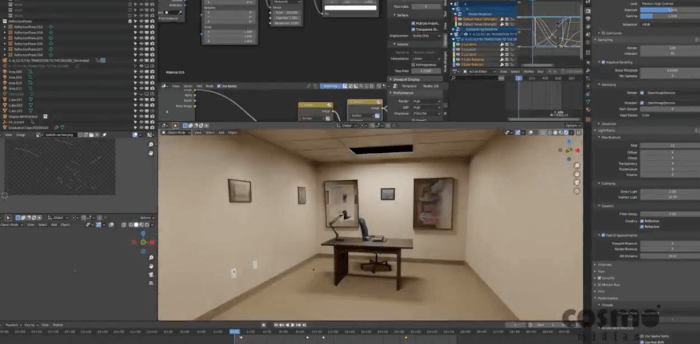
You will find the node setup required to use both a white background and HDRI maps at the same time.
The nodes are quite simple, and you only have to mix them using the Light Path Node as a factor for the blend, connecting the “Is Camera Ray†output.
Environment textures are essential for interior rendering in Cycles because they not only help to add light to the scene but will speed up your render. The path tracing algorithm doesn't like small light sources.
Why is that? To calculate the contribution of light in your render the algorithm will shot rays from the camera until they reach a light source. Using small light sources will make the rays bounce on surfaces a lot until they hit a light source.
Using the background to emit light will create a massive surface for Cycles to quickly calculate light contribution!
For that reason, you won't see much people using Point and Spot Lamps for interiors. You have to use a combination of Sun and Area Lamps with the background.
If you want to see another project using only a white background for lights, visit this article that shows a noiseless interior render with only 250 samples!