
This is the second part of a modeling tutorial started last month, which we will learn a simple and easy way to model a balcony in Blender 3D. In the previous tutorial, we learned how to create the platform of the balcony, and now we move forward to create the handrail for the balcony. The tools required to create this model are quite simple, like the ones we have used in the previous tutorial.
If you already have use some curve tools in Blender 3D, then maybe you already know how to finish up the tutorial. The trick here is to create a curve, following the border of the platform, and use some of the Dupli options of Blender, to create the necessary duplicates to support the handrail.
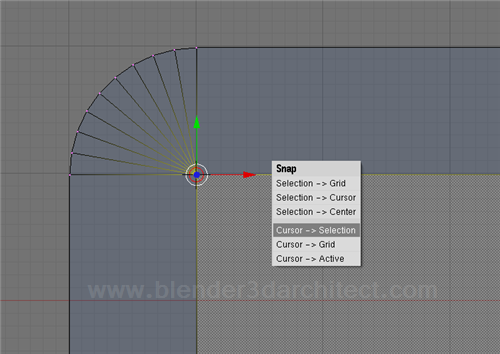
The first task is create a curve aligned to the rounded corner of the platform, for this we have to enter in edit mode and place the 3d cursor right at the center of the arc. Select the vertex pointed in the image below, and press SHIFT+S to align the cursor to the point.
Now, create a Bezier Circle and scale it (S Key) until it looks like the circle in the next image.
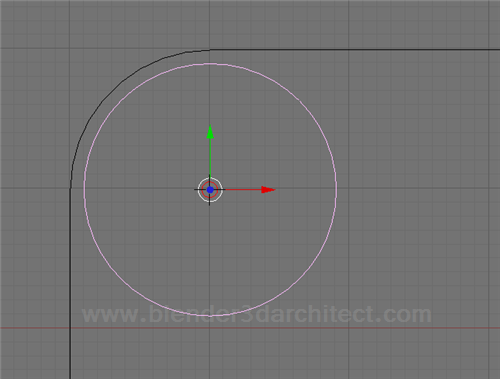
A lot of people don't like to use curves in Blender, because they have some troubles with the tools and shortcuts to edit and adjust the curves. But, with a bit of patience and some tricks, we can make the curves fit in almost any shape.
With the curve still selected, enter in Edit mode and press the H key once. This will turn all control points of the curve to Free. You will notice the difference, when only the control points of the curve become yellow.
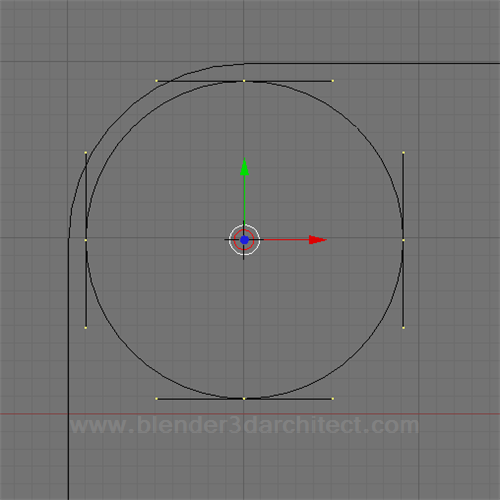
Deselect all control points and with the B key or the right mouse button, select only the two control points showed in the image below. When the points are selected, press the X or Del keys and choose Segment to erase the Arc between those two points.
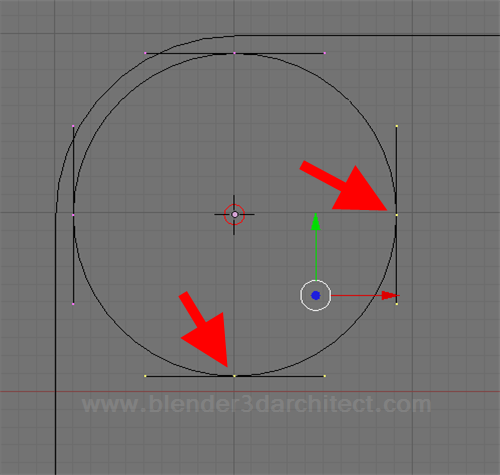
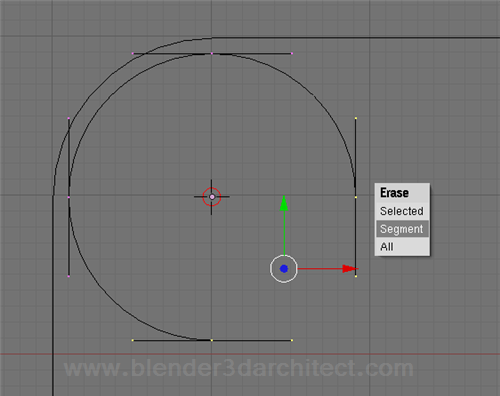
Repeat the same process, erasing the segments until we get only this arc.
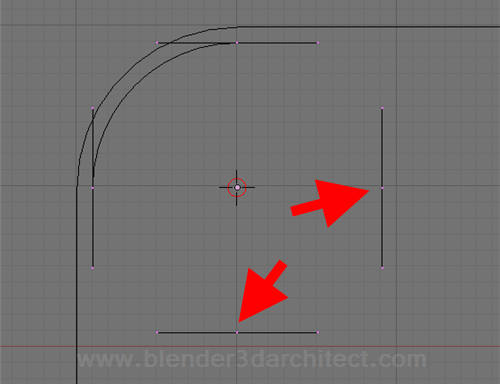
Select the two isolated control points and erase them. Choose selected when you press the X or Del keys.
The next step is select one of the control points of the arc, and presses the E key to extrude them. Hold the CTRL key while you moving the extruded curves to keep them orthogonal.
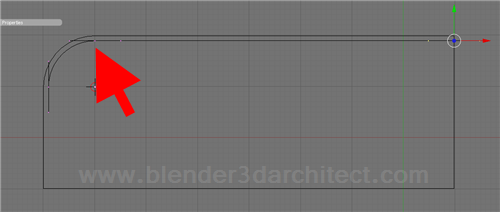
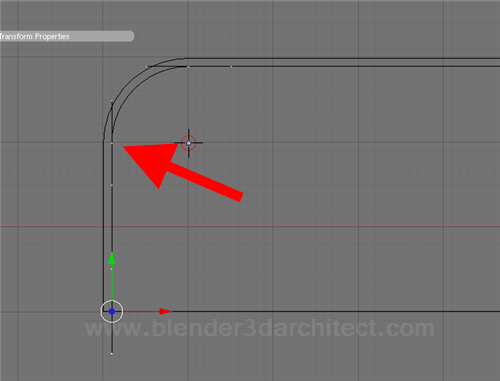
The hardest part of the handrail modeling is done, because all the rest will be only a matter of applying the right modifiers and tools, which won't require much editing work.
Now, create a mesh circle with only 4 vertices, which end up in a square. While you still are in edit mode, select all four vertices and press the F key to fill the square with a face. Adjust the size of the square, to make it looks like the one showed in the image below.
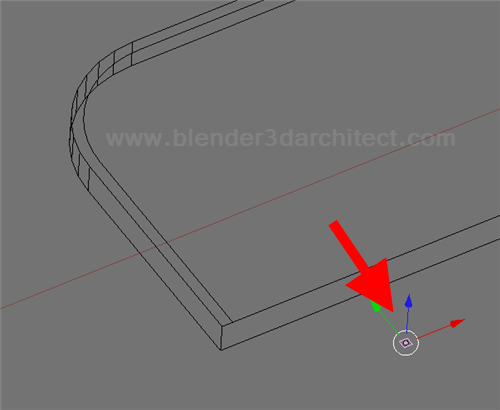
With the square selected, hold the SHIFT key and select the curve. With both of them selected, press the CTRL+P key and choose normal parent. Select only the curve created in the beginning of this tutorial, and access the Curve and Surface menu for this curve. Turn on the CurvePath and CurveFollow for this curve.
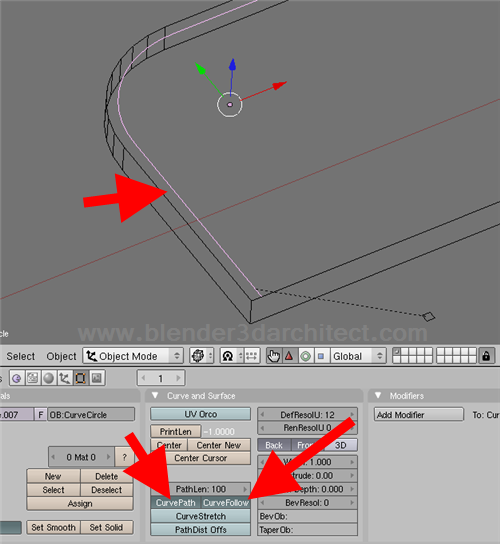
It will create an animation, with our small square moving along the curve path. But, we can also use this feature to duplicate objects. Select the square and access the Object panel.
There we will find the DupliFrames button. Press this button and we will see the small square be copied for each frame of the animation. If the square is not in the right track of the curve, press the ALT+O keys to clear the origin of the object. You can control the number of copies, with the DupOff option.
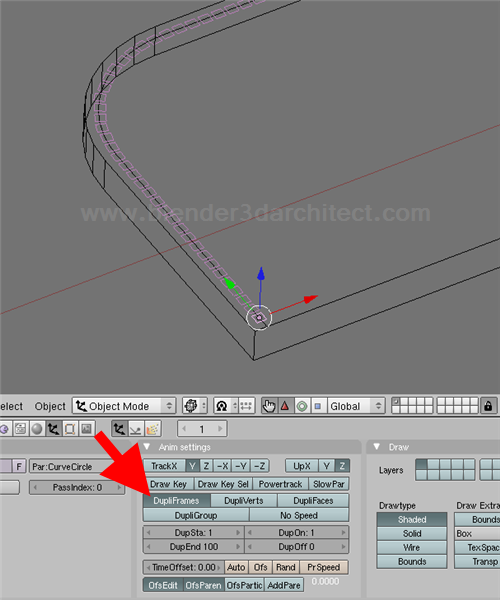
Enter in edit mode for the square, and extrude it until you reach a desired height for your handrail.
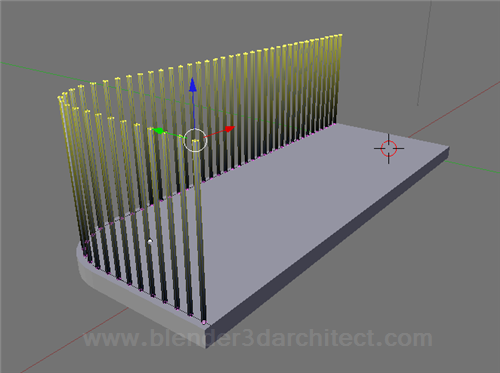
Now, select only the base curve and create a copy with the SHIFT+D keys. Place this copy right above the copied squares. Next, create a curve circle, and turn all the vertices of the circle to Vector with the V Key.
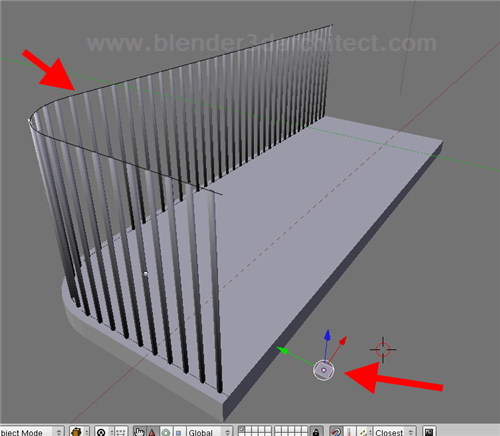
Select the curve and in the Editing panel of the curve, use the BevOb option to make the circle created in the previous step, to be extruded along the curve. All we have to do is to put the name of the curve in the text filed. In my case, the name is “CurveCircle.004”.
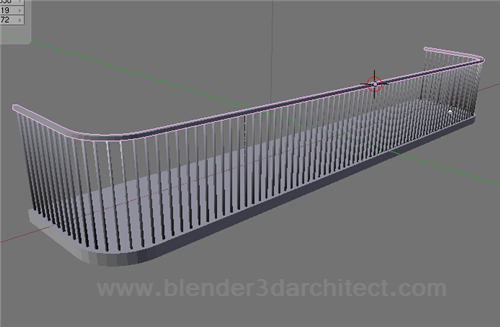
And that it, we will have our balcony finished. If you want to use the Mirror modifier, convert the curve to a mesh object, select it and press the ALT+C keys and use the Make Duplicates Real with the support for the handrail, press the CTRL+SHIFT+A key.
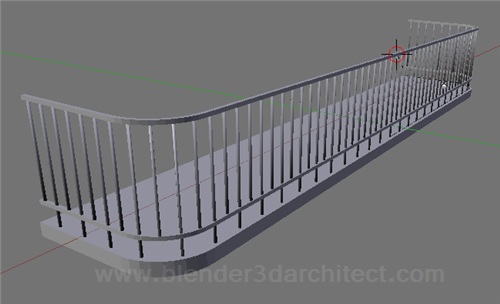
If you want, with the same technique we can make all kinds of variations and end up with different types of handrails.


very handy part with balcony fence! thanx a lot!
Thanks for a great tutorial!
You start out with the sahpe of the full balcony and all of a sudden you are working with only half it, this is very confusing (for new users like me). I gave up.
Hi Ward,
Well, I looked at the images and I start this part with only half balcony. Only in image 14 I apply the mirror and create the duplicate.
Let me know if you need any help.