

Trick to minimize the noise in rendered images from Unbiased renderers
If you have been using an unbiased render engine like LuxRender in the last couple weeks, you may have noticed that this type of render engine requires a long time to produce noise free images. By the time we hit the render button, the full image already appears to us, but with a lot of noise. To accelerate the render process of render engines like LuxRender, we have basically two options to bust up the render.
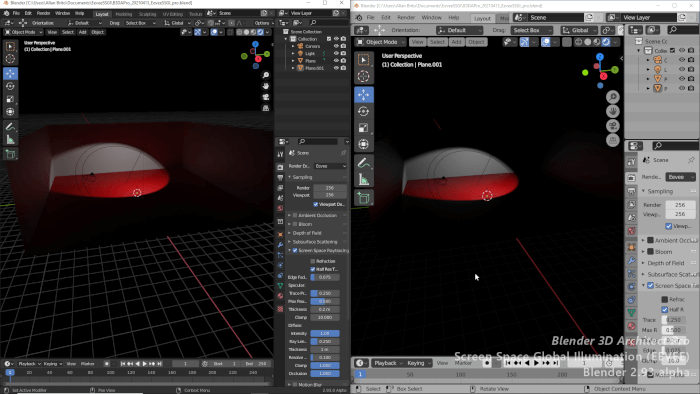
The first option is use a network renders and distributes the render along several computers. For the second option, we can try to minimize or remove the noise in post-production. Yesterday, I published an article that shows an example of a rendering created in LuxRender, with the modeling of a Panton Chair in Blender 3D. That image was left rendering for about two hours. To remove the noise of the original image, which is showed below, we can use a quick trick on any image editing software.
![]()
The post-production of this image was created in Pixelmator, but you can apply it on any software you prefer, like Photoshop or GIMP.
It’s incredible simple! Here is what you have to do:
- Open the original image rendered in LuxRender
- Go to the layers menu of your software, and duplicate the layer where the image is placed
- At the top layer, set the opacity to something close to 40 percent
- Still at the top layer, apply a Gaussian Blur filter of about 20 or 30 percent
The final result of the image is showed bellow:
![]()
![]()
As we can see by the image, a lot of the noise left by LuxRender in the original image was removed by the Gaussian Blur. This is a quick solution, and there are no guaranties that the image will be noise free. As a side effect to the Gaussian Blur filter, the image will gain some sort of glow around the objects. If you don’t like the glow, reduce the amount of blur.
When there is not enough time to leave the image rendering, this trick can really help a lot.
A quick and easy way to get rid of that annoying halo is to use the magic wand (or manual techniques for a more accurate result) to select just the chair, apply the blur, then invert the selection and apply the blur to just the background. It’s still not perfect, but for two more minute’s work you can improve the result 100%.
Why not using Greycstoration?
It’s included in Luxrender, or you can use it as a plugin for Gimp (to try the new G’Mic Toolbox).
It also gives better results