Modeling for architecture: How to build a balcony in Blender 3D (Part 1)
Today I will start a series of articles, dealing with the modeling of a few elements and parts of a build, which may require more than just hard work to build. The selected parts have a great importance over the full modeling of a project like roofs, stairs and balconies. To help other artists working on architectural visualization projects in Blender, I will show a few tips on how to model some of those parts in Blender. And to get started we will work on the modeling of a balcony.
The type of balcony is simple, without more complex details, like balusters. Our balcony will have only a handrail, to make the modeling process easier. In the future I promise to publish a tutorial, on a balcony with a balustrade.
Since it will take quite some time to build the model, the tutorial in separated into two parts. So, let`s get started!
This tutorial will build the platform of the balcony, with rounded corners. We will be using the Spin tool, Mirror Modifier and the default transformation tools.
I know it`s simple, but we have to start somewhere. Don't worry; things will get better with the build of a handrail.
The first thing to do is add a cube in the top view of Blender, or use the default cube. Scale the cube until it reaches the dimensions showed in the image below. Use the X and Z keys, to constraint the scale to the x and z axis. (remember to hold the CTRL key to snap the transformation to the grid)
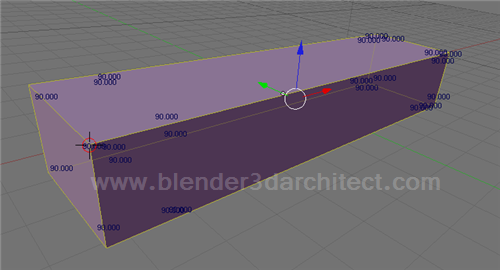
Now we can select the faces pointed in the image below and extrude them. For this type of extrude I use the Individual Faces option. The extrude must be of exact 1 blender unit. This is very important to make the rounded corners of the platform.
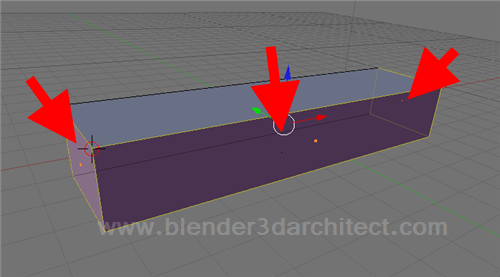
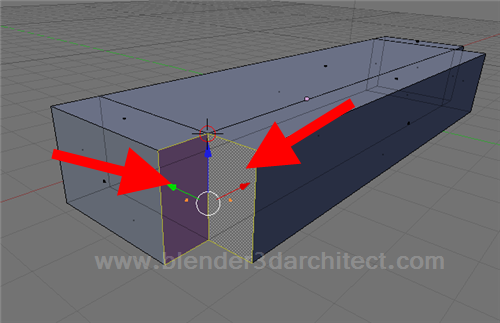
The next step is to erase the pointed faces.
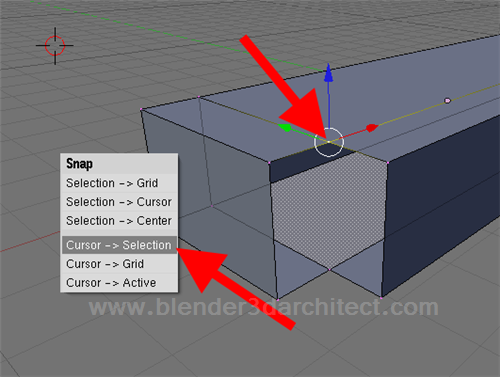
Now the trick part, we have to place the 3D Cursor in the pivot point, where we want to make the edges rotate with the Spin. This is the tool used to create rounded corners, with a clean and organized topology. The procedure to do that is to enter Edit Mode, and select only the pointed vertex at the image below.
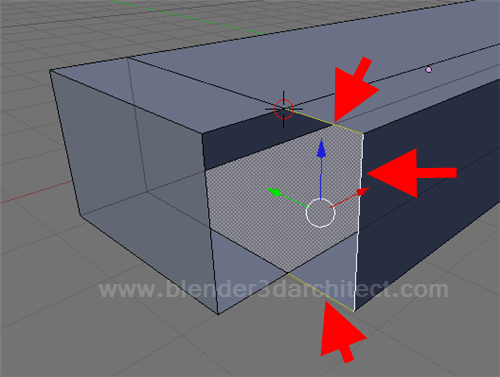
Make sure no other vertex is selected! Now, press the SHIFT+S key and choose “Cursor -> Selection” to make the 3D Cursor to jump right to the position of the vertex. To create a rounded corner, we have to select a few edges to copy. Select the edges pointed at the image below to use with the spin tool.
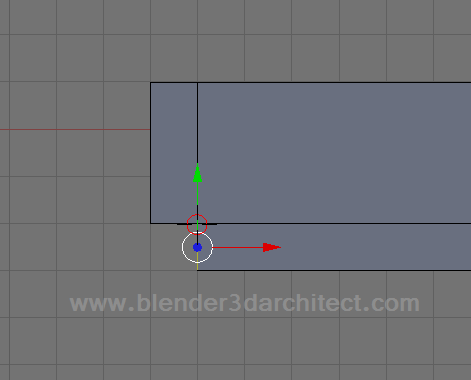
Then, press the 7 key in your numeric keyboard to set the view to Top. It will look like that:
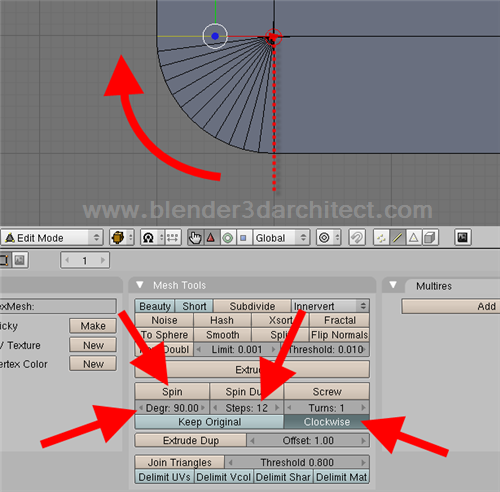
With the Spin tool, at the Mesh tools menu opened, make sure the Clockwise button is pressed to make or copied edges to rotate clockwise. Setup the Spin with 12 steps and a 90 degree range. Press the Spin button to make the copies! If anything wen't wrong, press CTRL+Z to try it again.
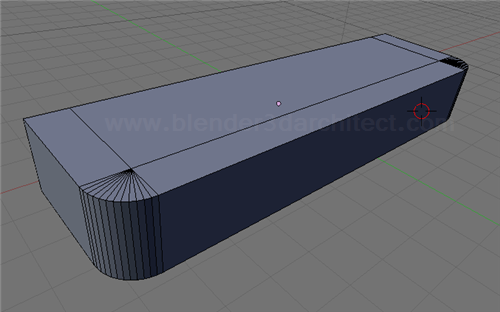
We already have your first rounded corner! This same technique with the Spin tool can be used for walls and other architectural elements as well, it`s an incredible and easy way to build rounded edges on objects. Now, select all objects with the A key and press W to open the specials menu, and choose Remove Doubles to erase and merge overlapping vertices ans faces.
All we have to do now is to add a mirror modifier to create a copy of your model, and finish the platform for the balcony. Or if you like, just repeat the same process in the other side of the model. So far, the process was easy and doesn't require much tools or knowledge in Blender. But, in the next part of the tutorial, we will have to use a few extra tools to create the handtrail and finish up the balcony.
Stay tuned for the second part of the tutorial.



Comments
Alain
I hope you will show us a good methode to create and modify railings 😉
Keep on going, I like the work you do for architecture vizualisations with blender ! 🙂
Alain
Szabesz
Thanx! Waiting for the next parts 🙂
Irenka
Very clear and useful.
Thanks!
Timo Heino
Hah! didn’t never think like that 😀 thanks mate
Zlatko
Very practical, thanks