
Modeling for architecture: Blender 3D BevOb and 3ds Max Loft tools to create cornices

Just by the time I was giving a course on architectural visualization with 3ds Max, a lot of users asked me about the issues and learning curve of Blender 3D. Some architects and 3d artists still think that by learning 3ds Max or other 3d package, will make the learning of Blender 3d impossible, because of the differences on interface and workflow. But, there are more resemblances between the tools of Blender 3D and 3ds Max than most people can image. When I’m explaining how to create architectural models in Blender and 3ds Max, one of the first tools that come to my mind is the Loft in 3ds max.
How this tool works?
A short description of the loft tool would be that it creates a 3d model based on two curves. It works like an extrude guided by a path, where a profile can be created to give shape to the extrude. This is great option to create cornices for walls and ceilings.
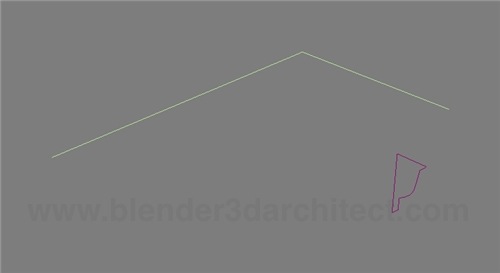
We have to create two different curves, one to be used as path and other for the 2d profile.
Select either the path or 2d profile curve and go to the creation panel and choose compound objects, where the loft tool will be available.
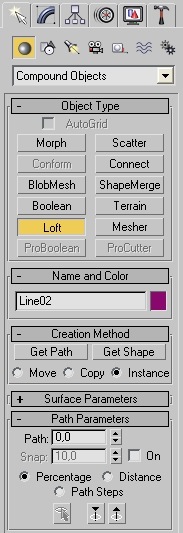
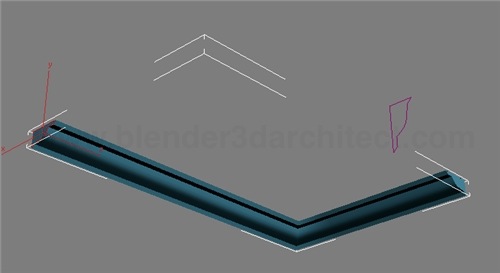
Then, if you have the path curve selected press the Get Shape button and click on the 2d profile. If you choose the profile before access the loft tool, click on Get Path and click over the path curve. It will create a nice cornice model.
In Blender 3D we have a tool that creates the same kind of object, and can be used to add cornices to walls and ceilings as well. If we have two curve objects in Blender 3D, one for the path and other as the 2d profile, there will be an option from the editing panel for the curves called BevOb that will work just like the Loft.
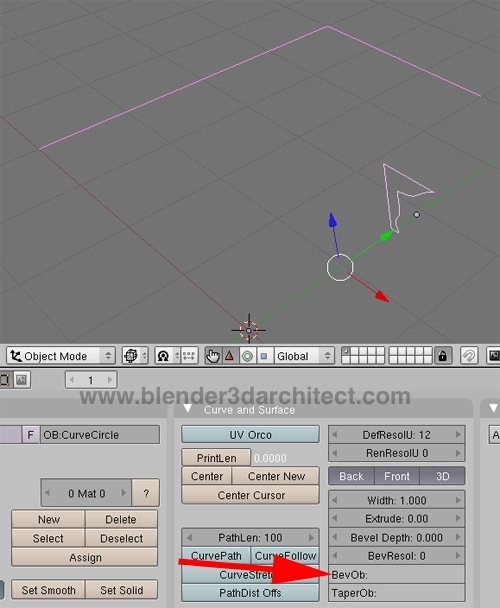
All we have to do to create a cornice in Blender, is to select the path curve and type the name of the curve object that represents the 2d profile.

And then we will have a nice cornice in Blender 3D as well.
As you can see, there are only a few differences between interface and workflow, but the final result we get in the modeling stage of the project is very similar. I will post a few extra articles about the resemblances between Blender 3D and other 3d packages. I know that a lot of artists still fear to miss a tool or another in Blender, but with time it’s possible to find exactly what you need. And if it’s not there, we can always find a nice python script to help on the modeling, or even create one yourselves!
Comments
Alain
Thanks for that comparison.
What I miss in Blender is the “Cutt (it’s called “Schnitt” in german)”- Modifier of 3d Max. It is very useful when you have a set of detailed 3d windows models an you wanna attache dem together on a 90° angle by cutting 2 of them on a 45° angle.
I know there is python script that cuts objects by a plane, but this is not a flexble modifier which you can modify every time.
Kind regards
Alin
accessoire
Thanks for this post! I’ll use this technique in my new project.
van
You can also accomplish mitred corners in blender by applying a lattice modifier to a 3D mesh object, though it’s a bit more work.
Luz_y_sombra
looks nice but ¿what the hell works the bend modifier?