
Modeling a terrain with level curves for Architectural Visualization

This week I posted an article about terrain modeling with SketchUp in my other blog, and since that day I was wondering if I had posted anything similar about that, but using Blender 3D for the modeling. And the answer is no, so far I didn’t. Today I’m going to show a simple and effective way to model terrains using level curves for architectural visualization. If you notice, most tutorials about architectural visualization use a flat plane as the ground for the models, but this is an exception for architectural visualization projects. The terrains usually have a messed topography and requires a bit of imagination from both architects and 3d artists to create a good rendering.
The technique will be familiar to old Blender users, because it uses NURBS surfaces to create the level curves that are connected to create the terrain. I’m saying that it will be familiar, because an old tutorial in the Blender documentation shows the same technique to create railings.
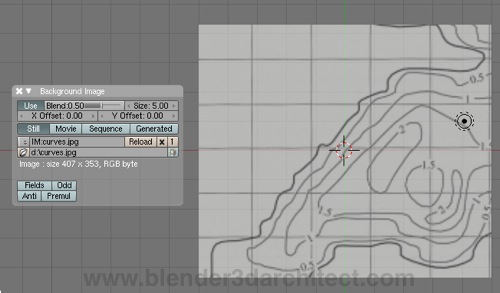
Here is how it works, before anything try to find an image that helps you to draw some level curves. It will work only as a guide, and can be added to the background of the 3D View.
Add a NURBS Curve Surface NURBS Curve and deform the control points to adjust the curve to the level curves.
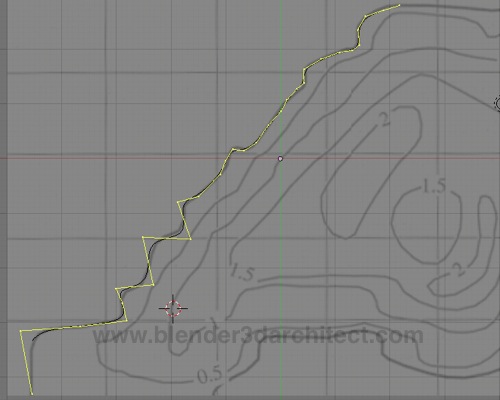
If you don’t know how to add new curves, select a control point at the beginning or end of the curve, and click somewhere while holding down the CTRL key.
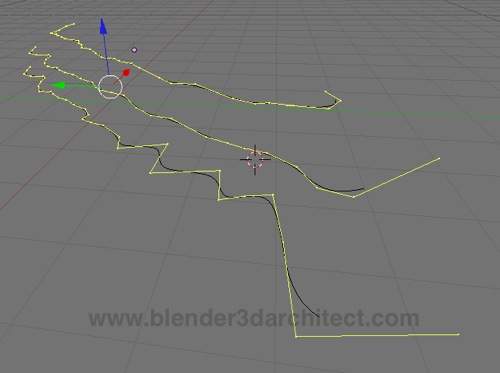
Duplicate the same curve to add more level curves to the scene and adjust them until we have a good number of curves, to model our terrain. The best option here is to duplicate the curves, because all curves must have the same number of points.
Move the curves in the Z axis to have a representation of the topography on the surface.
When everything is created, we can select all curves and press CTRL+J to convert everything into a single object. While in edit mode, select all vertices of the object and press F. if everything was created correctly, we will see a surface connecting all curves and a terrain will appear.
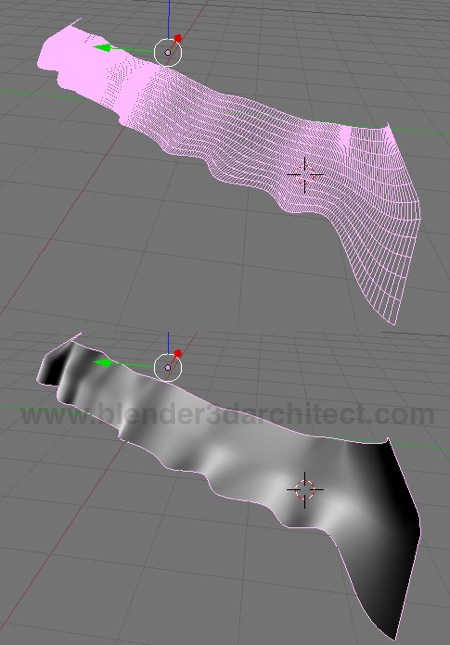
As you can see it’s not hard to create a terrain with level curves in Blender 3D for architectural visualization, and if you need mesh tools to edit or enhance the model, press ALT+C to convert it into a Mesh.
Comments
reezjer
Thanks for this great explanation of detailing terrain. As usual, well done.
Grtz
Fabio
Add a NURBS Curve (add-surface-NURBS curve) and deform the control points to adjust the curve to the level curves.
add-curve-NURBS curve doesn’t work in this case
Allan Brito
Ops!
Thanks Fabio, it`s updated!
D. Waschow
Using this method, what’s the best way to ‘close’ the surface at the inner-most contour? In other words, if you start with a closed curve and work your way inwards, how do you finish without having a hole in the center?
Thanks!
Zack
I’ve tried this method out a few times on a site topo map. Heights that curve back on themselves totally break the face creation for me. Is there a different method to accomplish this?
Astroman Pete
@ Zack
I’ve had some marginal success in making height maps in Inkscape and using them with the Displacement modifier in Blender. It is less precise than Mr. Brito describes, but not subject to the curve-interpolation weirdness that you describe, and is less time consuming for large sites. (Having very long and very short curves in a surfacing operation can be a pain.)
The (very) basic steps are:
1. Export the topography from CADD (if available) into Inkscape via DXF or PDF. Your will want to make these continuous closed polylines/splines before you do.
2. In Inkscape, each contour should be a closed path. Shade them in equal steps with your lowest being black and your highest white. And set their draw order so that they all show.
3. Blur the shapes in Inkscape. Your trying to achieve a smooth gradient. Other tools may be better for this, I haven’t done this since the newer 2.47 builds have come out. The “Interpolate Sub-Paths” path filter looks promising for refining coarse shape transitions.
4. In Blender, apply the rasterized height map from Inkscape as a displacement modifier to a flat mesh. A good starting point for the magnitude of displacement is height difference between your lowest and highest contour. You can spot check the heights and change your multiplier accordingly.
domlysz
now you can easily triangulate contour lines with this addon : http://blenderartists.org/forum/showthread.php?255237-Addon-Points-cloud-Delaunay-triangulation-amp-Voronoi-diagram