
Using architectural glass in Blender 3D

If you have visited the blog in the last couple days, you may have noticed that LuxRender has a lot of interesting tools and features to help us in the process of creating great renderings for architectural visualization. Besides all the features like the Light Groups, this allows us to control almost each aspect of the lights at the scene. We have some other features that help to solve specific problems of architectural rendering. One of those other features is the ability to set a material as glass and make it behave like architectural glass.
But, what is the difference between regular glass materials and architectural glass? For those of you who have manage to create interior renderings using old versions of YafRay, the objects that had materials set to transparent in order to simulate a glass surface, didn’t let all the light pass by the plane.
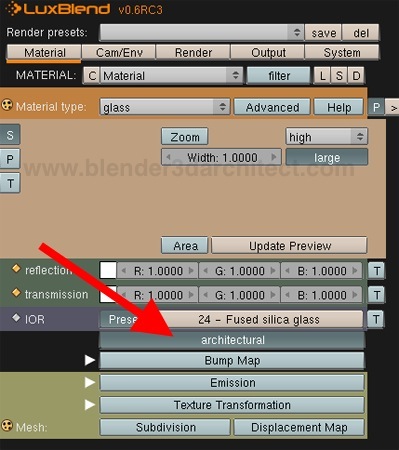
To show the difference between both types of glass, nothing better than a practical example! Here is the place at the Material tab of LuxBlend where the architectural button can turn a glass material into architectural glass.
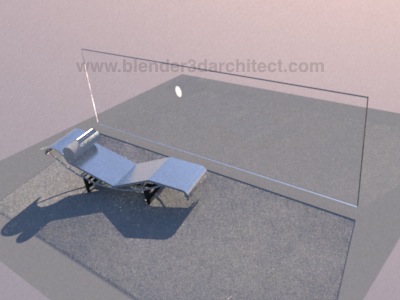
Before we render a scene with this type of glass, here is a simple scene with a big panel set as a regular glass material of LuxRender. The light energy that passes through the glass suffers the normal deflection from the material, and the final illumination of the objects behind the glass is affected by the transparency level of the material.
If the same scene has the plane set as an architectural glass, we will see a big difference in the light that pass through the material.
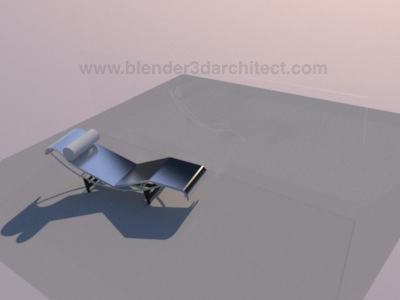
As we can see, there is a lot more light passing through the glass and the plane almost can`t be seen. One of the things that let us sees the glass plane is the reflection of the chaise. With a plane set as a architectural glass we will have windows and doors that let a lot of light energy to pass by, and create really good lighting for interior rendering.
So, now you know! For projects that use a daylight solution and need to show the sun light coming into the scenes through the glass of windows or doors, always use the architectural glass in LuxRender!
Comments
iceangel89
i actually find the normal glass nicer, for architectural glass, i cant really see that a glass is there. i am not an architect but i think i may mistake a window that it has no window pane … but just my non-architectural opinion
but the articles here are great! video tutorials are a big plus, but best in english 🙂 or maybe have closed captions or subs 🙂